How to Set Up WooCommerce Royal Mail Shipping Plugin?
In this article, we will show you how you can set up WooCommerce Royal Mail Shipping plugin to get real-time Royal mail shipping rates on your website and to track your shipments directly from your store. This tutorial will give you an excellent launch pad to kick-start the usage of this plugin on your WooCommerce site.
Real-time Rate Settings
After a successful installation, you will find the following setting section in the top part of the plugin settings page.
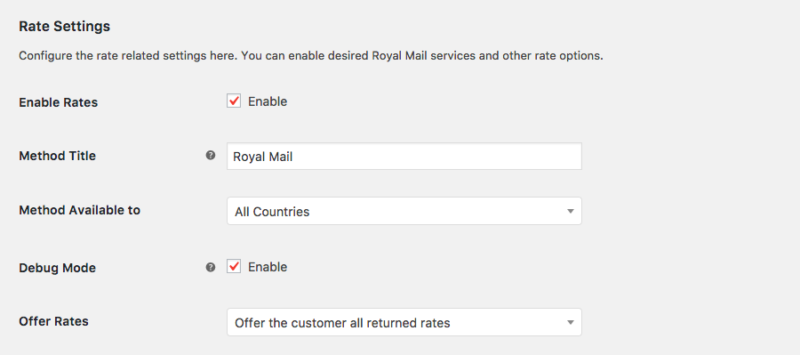
- Enable Rates: Select the Enable check box to enable rates using the Royal Mail Shipping Plugin. This is the most important part of the setup and you have to enable this option to show the shipping rates on the Cart/Checkout page.
Note: Unchecking this feature only disables rates on the Cart/Checkout page. Shipment Tracking functionality will still be available to you. - Method Title: The method Title is visible on the Cart/Checkout page under Shipping options. Specify the Method Title as required (defined by you).
- Method Available to: This field allows you to select countries for shipping. The available options are as given below:
- All Countries: This option provides the availability of the Royal Mail Shipping plugin to the customer in all countries. It is set as a default option.
- Specific Countries: This option allows you to add the list of countries. Royal Mail Shipping Method is available only in the listed countries.
- Debug Mode: If you are not getting proper rates (lesser or higher than expected), not getting all the available shipping options, or not getting rates at all, then you need to enable the Debug option to find the error(s). You can also see the warning(s) given by the Royal Mail Shipping plugin. By enabling debug mode, you can trace issues using the log. You can see information about debugging at the top of the Cart and Checkout page. After enabling the debug mode, add a product to the cart. Go to the Cart or Checkout page to see the debugging information.
Packaging Settings
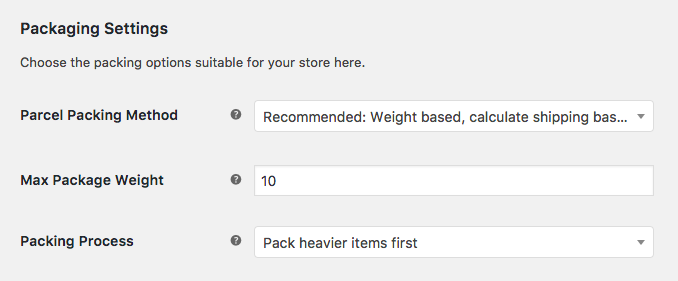
The plugin provides you with three options to pack a parcel(s) and they are listed below:
- Pack items individually: By choosing this option, each item in the cart is packed separately. The total Shipping cost is calculated by adding the shipping cost of each item.
For example, the shipping cost of item A is $10. If the customer adds two quantities of Item A to the cart, the total shipping cost will be calculated as $10×2, which is $20. - Pack into boxes with weight and dimensions: If packing items individually does not suit your business, then you can define the required box sizes under Box Sizes. All the cart items are packed into custom boxes defined in Box Sizes settings. The best-fit box is auto-chosen from the defined boxes. By selecting this option, the Box Size settings appear as shown below:
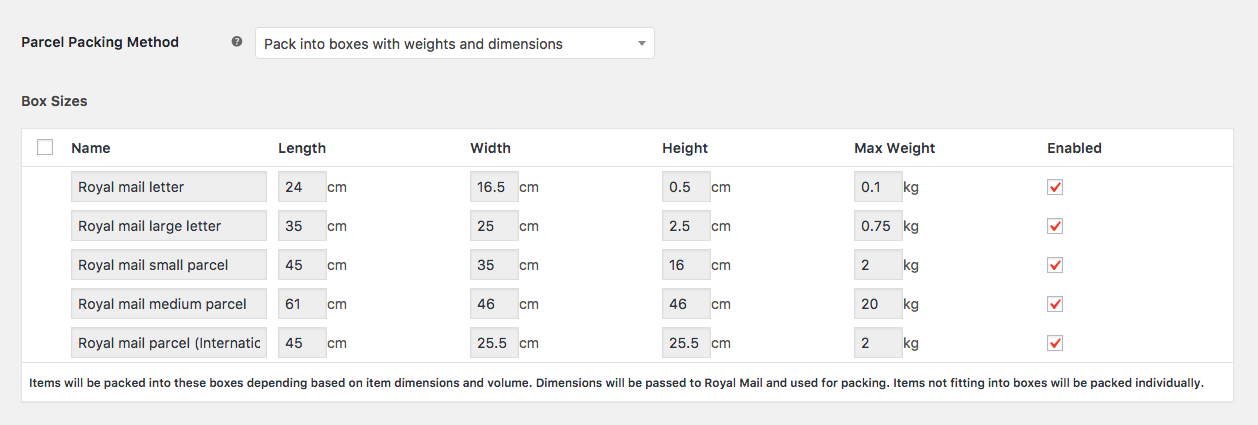
This box dimension and weight settings are applicable only when packed into boxes with weight and dimension is selected. Here, you can define the dimensions of the boxes.
- Recommended: Weight based, calculate shipping based on weight: In some business cases, you may wish to pack items according to their weight. If you are using this option, make sure that you have set accurate weights for your products. If you need to do this now, go to your Products page and click on each product in turn to set the weight.
If you select weight based option, then the settings appear as shown below:
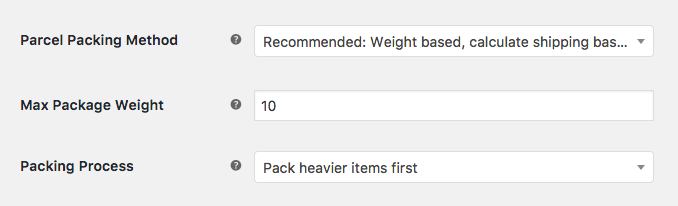
Max Package Weight: Enter the highest limit of the weight for a single box.
Packing Process: You can pack the items based on weight in three ways as given below:
- Pack heavier items first
- Pack Lighter items first
- Pack purely divided by the weight
Services
The WooCommerce Royal Mail Shipping Plugin comes with all the shipping services available. You can find the list of services in this section of the plugin settings page. The section looks like the following screenshot:
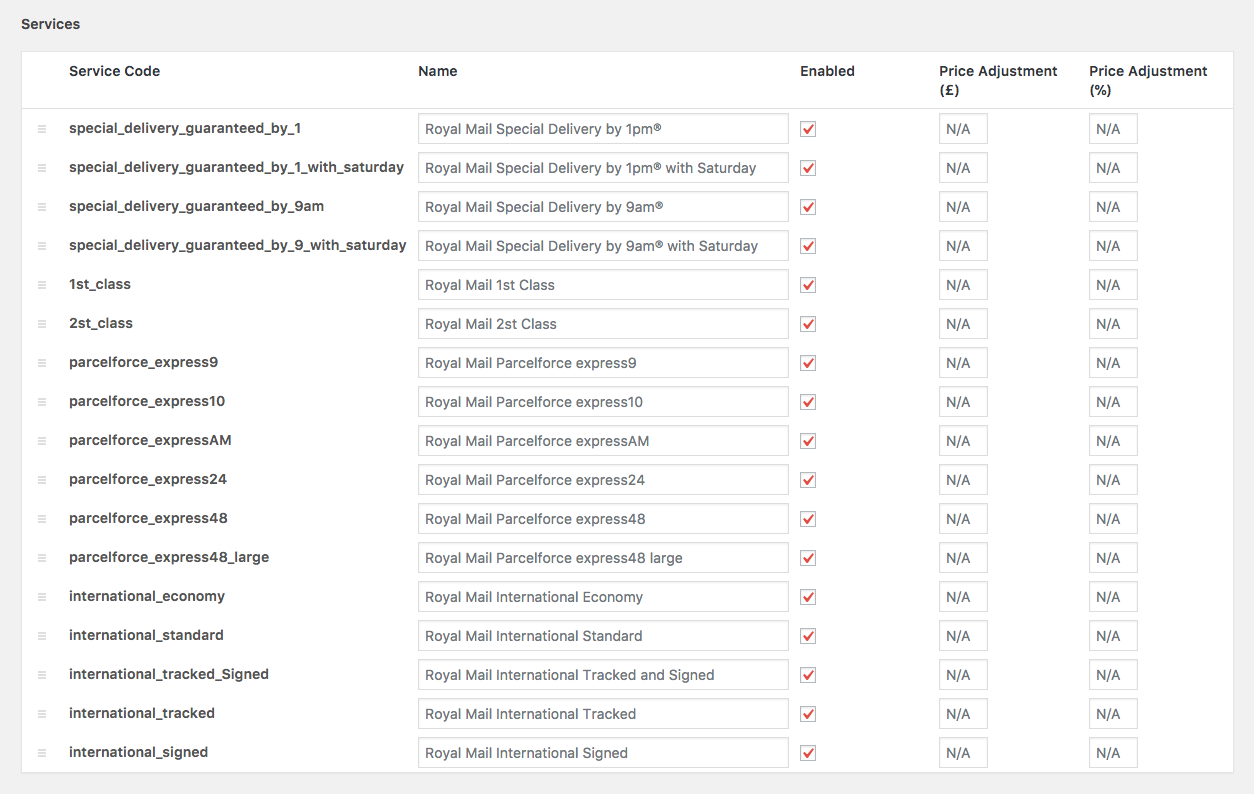
In the above figure, all the services are displayed. You can select the required services by enabling each service. The non-selected services, however, will not be shown to the customers even if the services are valid in their region. You can adjust the shipping price by adding/subtracting the required amount to/from the actual shipping cost. Use the minus sign(–) for subtracting the amount. You can mention the amount in % and £ for each service.
For example, consider that the shipping cost of Royal Mail 1st Class is £5.
The Price Adjustment(£) for this service can be seen below:

Then the total shipping cost displayed on the Cart/Checkout page would be £10 (5+5).
The Price Adjustment(%) for this service can be seen below:
Then the total shipping cost displayed on the Cart/Checkout page would be £5.5 (The 10% of 5 is added to 5 to get the actual shipping cost).
When you choose both Price Adjustment(£) and Price Adjustment(%) for this service, then it will look something like the following:

Then the total shipping cost displayed on the Cart/Checkout page would be £10.5 (The 10% of 5 is added to 5+5 to get the actual amount).
Other Options
After the services section, you would find the following settings on the plugin settings page. This section would look something like the below:
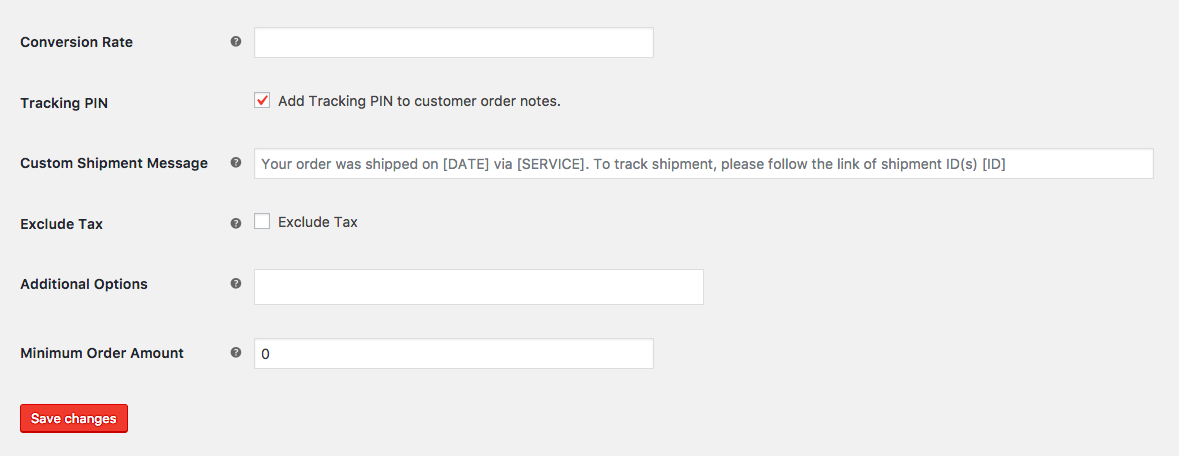
- Conversion Rate: Enter the conversion amount if you are using a currency different from the one that you set up in the WooCommerce base location. This amount gets multiplied with the shipping rates.
- Tracking Pin: Enable this option to attach the tracking information in the order completion email.
- Custom Shipment Message: This plugin provides flexibility to customize shipment tracking messages according to need. The message appears in the email, Admin Order Page, and Order page of Customer(under My Account) after completing the order. Here, Admin can use placeholders to fill details of shipment automatically. You can frame a message by including tags like [DATE], [SERVICE], and [ID]. Details about these Tags are given below:
| Tag | Description |
|---|---|
| [DATE] | It gets replaced with the shipment date in the order page tracking section. |
| [SERVICE] | It gets replaced with the selected shipping service in the order page tracking section. |
| [ID] | It gets replaced with the tracking code in the order page tracking section. |

- Exclude Tax: Tick this check box to exclude tax from the product price.
- Additional Options: This option will affect the shipping rates. Under this option, you can choose to provide Insurance for the orders. Refer to the following image:

- Minimum Order Amount: With this field, you can set a minimum order amount for your customers to avail of the Royal Mail shipping method. If the order is below the amount specified here, Royal Mail shipping options will not be visible to your customers.
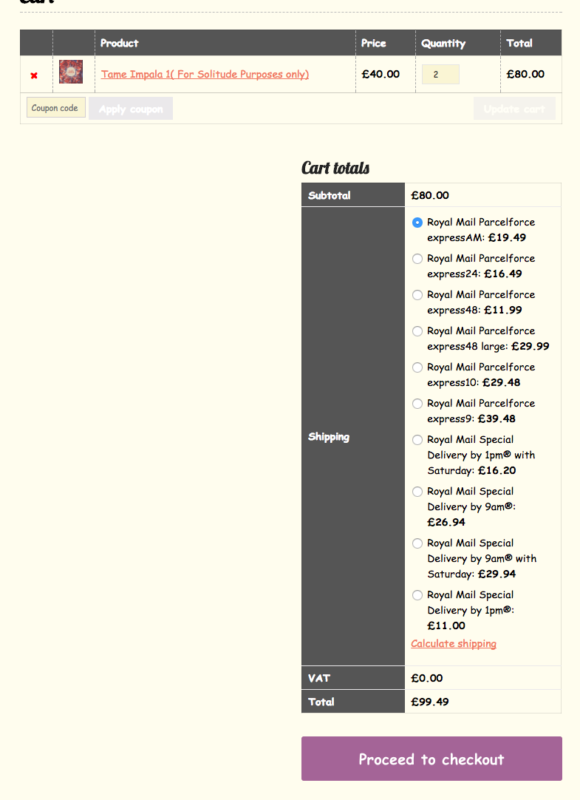
Cart/Checkout Page
If the product enters the Cart then the shipping rates will appear when the correct address is mentioned in the Calculate Shipping option. Only then the Royal Mail Shipping services will be displayed on the Cart and Checkout page. The shipping rates will be mentioned next to their respective shipping service. You can have a look at a sample image below:
Royal Mail Shipment Tracking
You will find the Royal Mail Shipment Tracking section on the Edit Order page. You can go to the order page and then find the following section:
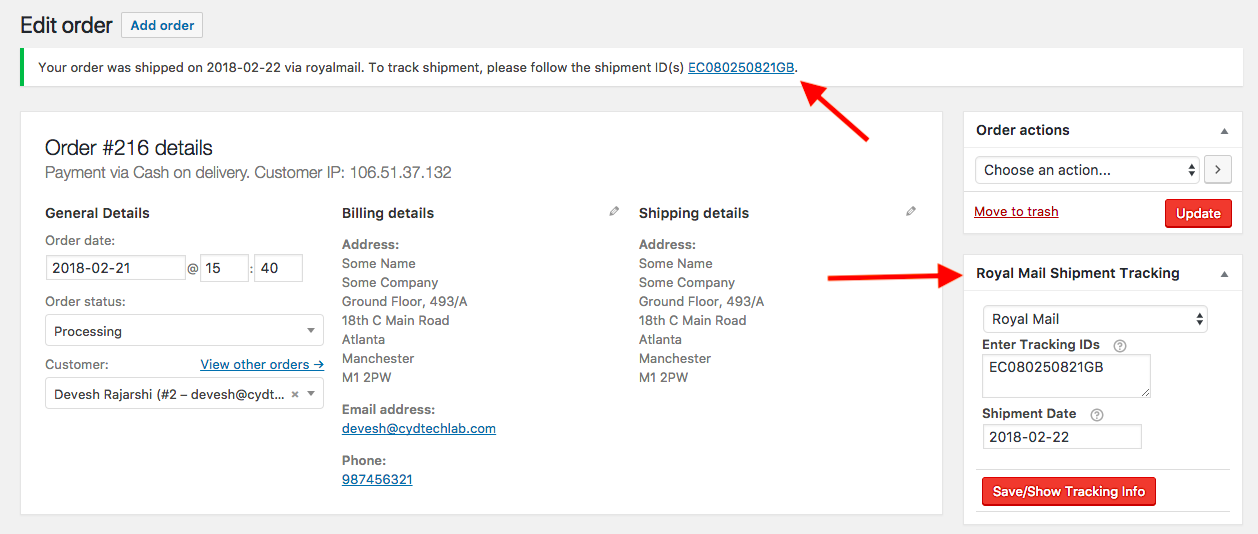
You can add the shipment or order tracking ID in the Royal Mail Shipment Tracking box. You can further choose the shipment date. After doing that, you will get the message as pointed out by the top red arrow.
Now, if you go ahead and mark the order as completed then the plugin will attach the shipment tracking info along with the order completion email. The email will contain the following part:
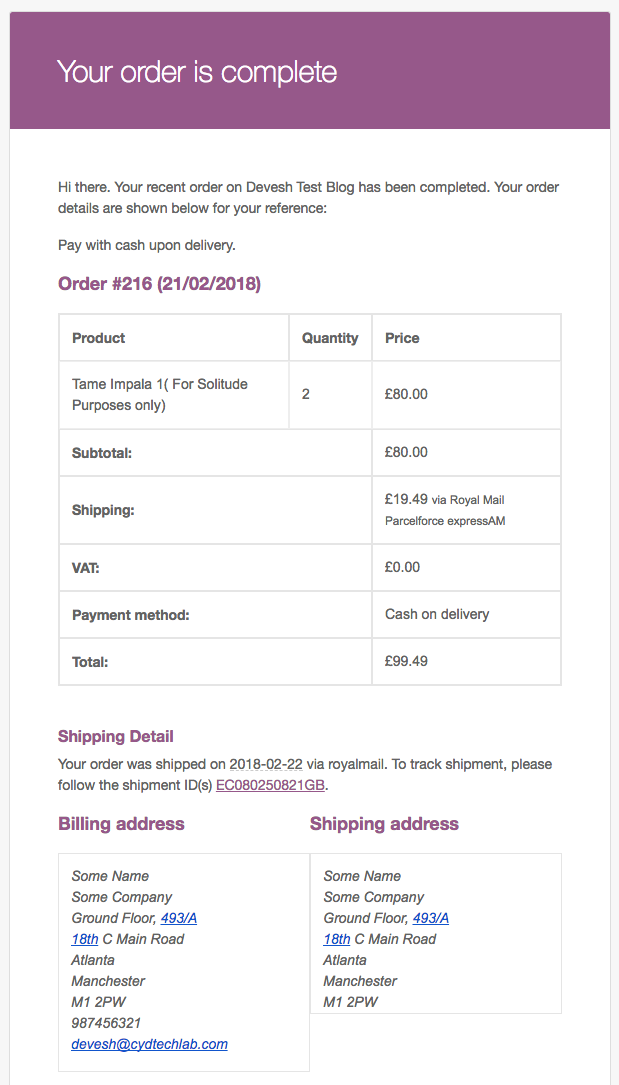
This way the customers can directly click on the link(highlighted as underlined-purple) and directly go to the Royal Mail website where they can see the live tracking data.
If you have any queries regarding the setting up of this plugin then kindly comment down below.If you need any further help then kindly contact our customer support. We would be more than happy to help you with anything.