



By default, a WooCommerce product page only shows a title, description, price, and an Add to Cart button. There’s no built-in way to collect anything extra from a customer – no text box for a name, no dropdown for a size that isn’t a variation, no file upload for a logo. If your products need any kind of personalization, you’re stuck.
Adding a form to your product page fixes this. It lets customers fill in details, pick options, or upload files right there on the page, before the item ever reaches the cart. This guide covers why it helps, what you can add, and exactly how to set it up using PH Product Add-ons for WooCommerce.
On This Page
- Why Add a Form to WooCommerce Product Pages?
- What Can You Add to a WooCommerce Product Form?
- How to Add a Form to WooCommerce Product Pages
- Examples of WooCommerce Product Forms
- Best Practices for WooCommerce Product Forms
- Conclusion
- FAQs
Why Add a Form to WooCommerce Product Pages?
A form matters whenever your product can’t be sold correctly without first getting something from the customer, whether that’s information, a choice, or a paid upgrade.
- Collects information you can’t fulfil the order without: Details like a name for engraving, a pet’s photo for a custom portrait, or attendee names for an event ticket need to reach you before fulfillment, not be chased down over email afterwards.
- Let customers personalize the product without new variations: Order-specific choices like an inscription or a gift message don’t need their own SKU, so one product page can handle them instead of creating a new listing for every option.
- Sells add-ons and upgrades at the point of decision: A priced form field, such as gift wrapping or rush delivery, captures the upsell while the customer is already deciding what to buy.

The right form fields depend on what information or options you need from customers. Once you identify those requirements, you can choose the appropriate fields and add them to your WooCommerce product pages.
What Can You Add to a WooCommerce Product Form?
With PH Product Add-ons for WooCommerce, a “form” can include a mix of field types, not just one or two:
- Text and Textarea – for names, initials, or special instructions
- Dropdown and Multi-Select Box – for choosing from a fixed list of options
- Checkbox and Radio Button – for optional add-ons or either/or choices
- File Upload – for logos, reference images, or design files
- Date Picker and Time Picker – for delivery dates or appointment slots
- Color Picker and Image Options – for visually picking a shade or design
- Number, Email, Telephone Number – for structured contact details
The right combination of fields lets you create a WooCommerce product form that collects the information customers need to provide without unnecessarily complicating the product page.
How to Add a Form to WooCommerce Product Pages
Setting up a form on your WooCommerce store takes just a few minutes with PH Product Add-ons for WooCommerce; no coding needed.
Create an addon group: Install the plugin, then go to PH Product Add-ons and click Add New. Give the group a clear name so it’s easy to identify later. This group holds your form fields and can be reused across multiple products.

Choose where it appears: Under Applies To, pick the product, products, or category that should show this form. Skip this, and it applies to your entire store by default.

Add the fields you need: Inside the group, click Add Field and choose from types like Text, Dropdown, File Upload, or Date Picker, based on what the order actually requires.
Set up each field: Add a clear label for what you’re asking, turn on Required if the order can’t proceed without it, add a price if it should work as a paid upgrade, and use Conditional Logic if a field should only appear after a specific selection.

Test it on your store: Fill in the form as a customer would, add the product to cart, and place a test order to confirm the details and any add-on pricing show up correctly in the order summary.
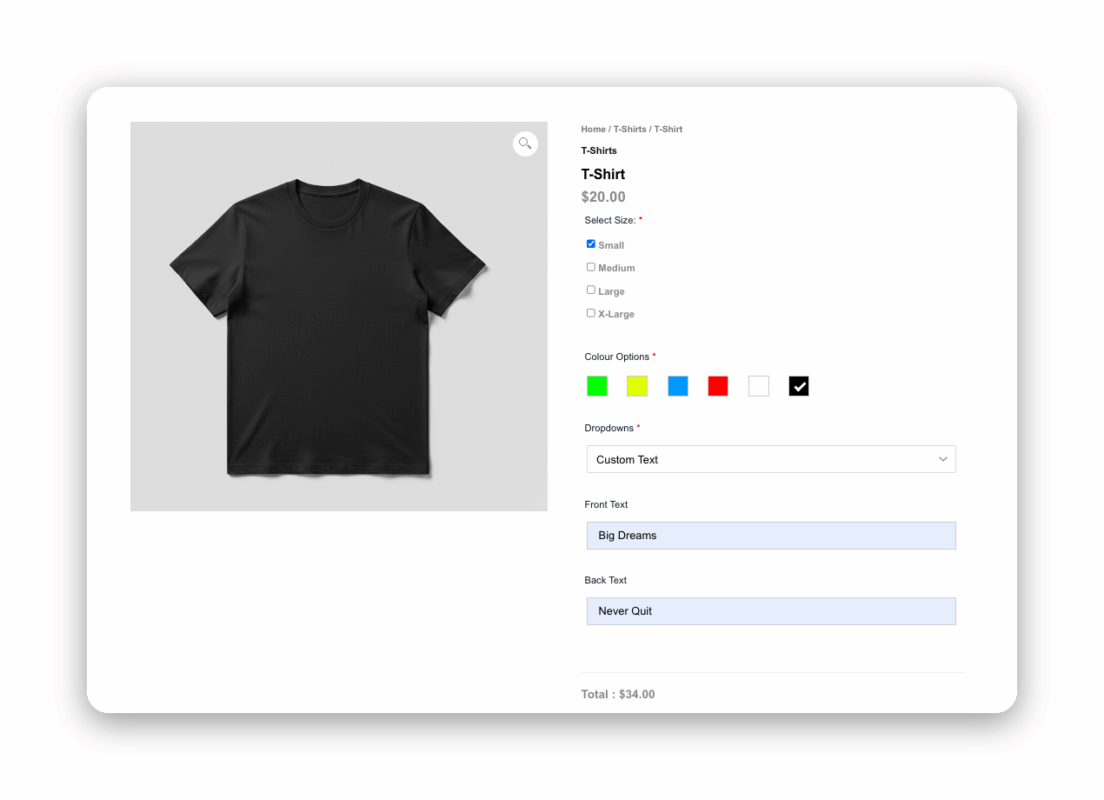
Once it’s set up, the same form works across every product you assign it to.
Refer to the setup guide for PH Product Add-ons for more on each field option.
Examples of WooCommerce Product Forms
Different businesses need different fields on their product pages. Here’s a quick breakdown:
| Product Type | Form Fields | What You Can Collect |
|---|---|---|
| Personalized T-shirt | Text field, dropdown | Customer name, text to print, or print style |
| Custom Mug | Text area, file upload | Personalized message and customer-provided image |
| Engraved Jewelry | Text field, dropdown | Engraving text and font or design preference |
| Gift Box | Checkbox, text area | Gift wrapping, additional items, and gift message |
| Custom Cake | Dropdown, date picker, text area | Cake flavor, delivery date, and special instructions |
| Printed Banner | File upload, dropdown | Artwork file and banner size |
| Custom Furniture | Dropdown, radio buttons, text field | Material, finish, size, or other customization details |
Whatever your product is, the same principle applies – figure out what detail you genuinely need from the customer, then pick the field type that captures it with the least effort on their end.
Best Practices for WooCommerce Product Forms
A form works best when it asks for exactly what the order needs, nothing more. Keep these in mind once your fields are set up:
- Keep the form short: Add only the fields the order genuinely can’t be fulfilled without. Every extra field is one more reason for a customer to abandon the page.
- Use specific labels, not generic ones: “Enter the name for engraving” tells the customer exactly what to type. “Customization” doesn’t.
- Avoid asking for the same thing twice: If one field already captures a choice, don’t add a second field that collects overlapping information. A focused form is easier to fill in and easier for you to process.
- Mark required fields clearly: If a piece of information is necessary to fulfill the order, make the field required so customers don’t miss it.
A short, clearly labelled form gets you the details you need without slowing customers down at checkout.
Conclusion
A form on your WooCommerce product page lets you collect the exact information, choices, and upgrades your product needs before the order goes through. With PH Product Add-ons for WooCommerce, adding a form to your WooCommerce product pages takes just a few minutes and works across as many products as you need. If you need help setting this up, PluginHive Support is happy to assist.
FAQs
Q: How do I insert a form into a WooCommerce page?
Install a plugin like PH Product Add-ons for WooCommerce, create an addon group with the form fields you need, and assign it to the product page.
Q: How can I customize my WooCommerce product pages?
You can customize a WooCommerce product page by adding extra fields for personalization, changing the layout, or adding elements like a delivery date or trust badges. See our guide on 7 ways to customize a WooCommerce product page for more options.
Q: How do I add a custom field to a WooCommerce product?
Install PH Product Add-ons for WooCommerce, create an addon group, add the field type you need (text, dropdown, file upload, and so on), and assign the group to your product. Full steps are in the setup guide.
