



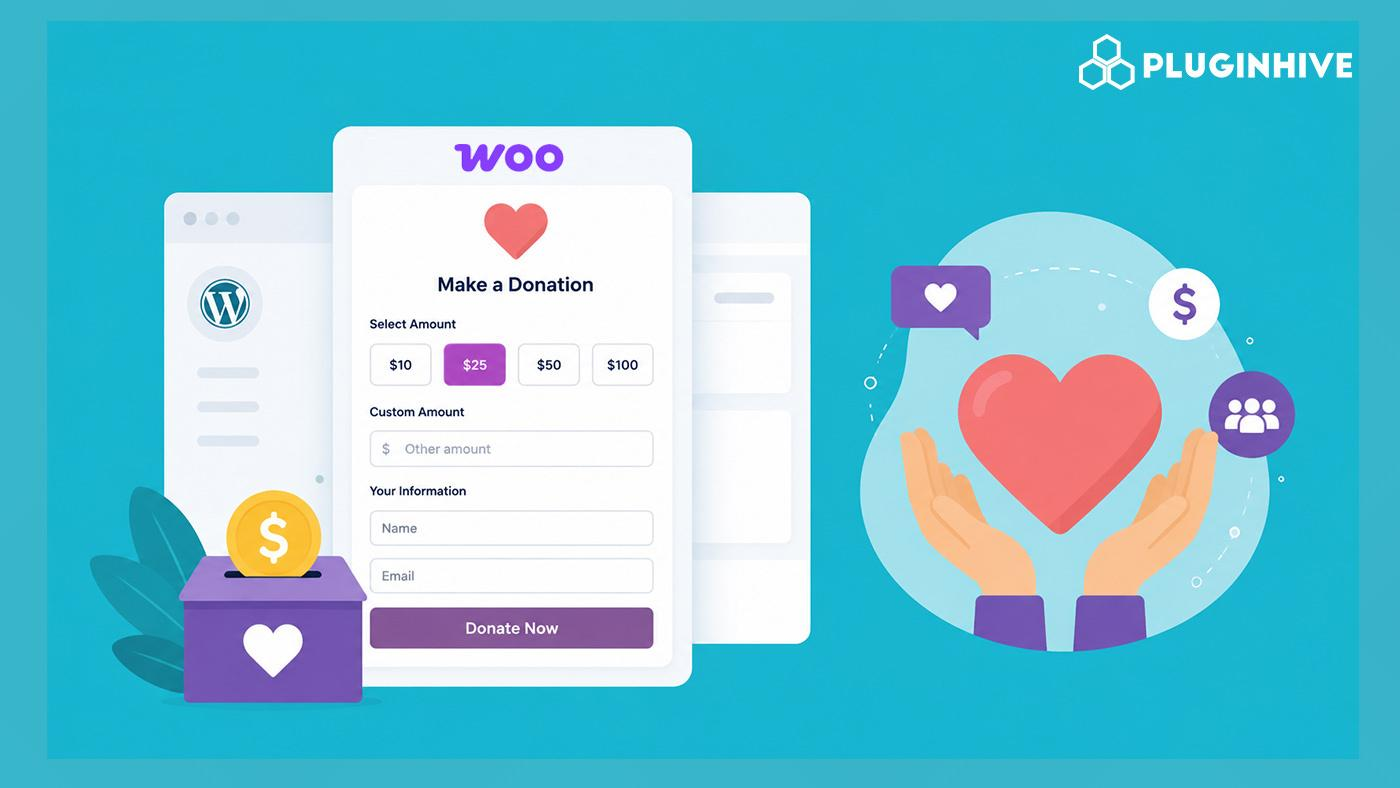
Accepting donations directly through your online store is a powerful way to support charitable causes, fund community projects, or give customers the option to contribute to a meaningful mission at checkout. Whether you run a non-profit organization, an online store supporting social initiatives, or a business hosting special fundraising campaigns, adding a flexible donation option to your WooCommerce store builds deeper connections with your audience and expands your brand’s positive impact.
While many store owners think they need a complex, dedicated fundraising plugin to collect contributions, you can set up a streamlined donation system using tools you might already have. This guide covers how to create a WooCommerce donation form using the PH Product Add-ons for WooCommerce plugin, built for a smooth donor experience that helps your fundraising campaign succeed from day one.
On This Page
- Why Create a Donation Form in WooCommerce?
- What You Need to Create a WooCommerce Donation Form
- How to Create a WooCommerce Donation Form
- How to Customize Your Donation Form
- Best Practices for a WooCommerce Donation Form
- Final Thoughts
- FAQs
Why Create a Donation Form in WooCommerce?
Integrating a donation form directly into your existing store gives you a few clear advantages over sending donors off to a separate fundraising platform.
- Keep Donors on Your Site: Instead of redirecting supporters to a third-party payment page, you keep them on your own domain, which reinforces trust and keeps your branding consistent.
- Use the Payment Gateways You Already Have: Donors can pay through your store’s existing, trusted methods, such as credit cards, PayPal, or Apple Pay, without creating a new account elsewhere.
- Combine Purchases and Contributions: Customers can buy a product and add a tip, round-up, or donation to the same order, all in a single checkout.
- Reduce Overhead: You avoid setting up a separate merchant account or paying subscription fees for a standalone donation tool.
Bringing your donations into the same checkout as the rest of your store simplifies your admin work and gives donors a smoother, more trustworthy experience, which tends to encourage more contributions.
What You Need to Create a WooCommerce Donation Form
Before you start, make sure you have the following in place:
- An active WooCommerce store with a payment gateway already configured
- A WooCommerce product set up to represent your donation (this acts as the base “Donate Now” product)
- The PH Product Add-ons for WooCommerce plugin, installed and activated on your site
- A clear idea of your donation structure, such as fixed suggested amounts, an open custom amount field, or both
Once these are ready, you can start creating your WooCommerce donation form and adding the donation options and fields your customers need.
How to Create a WooCommerce Donation Form
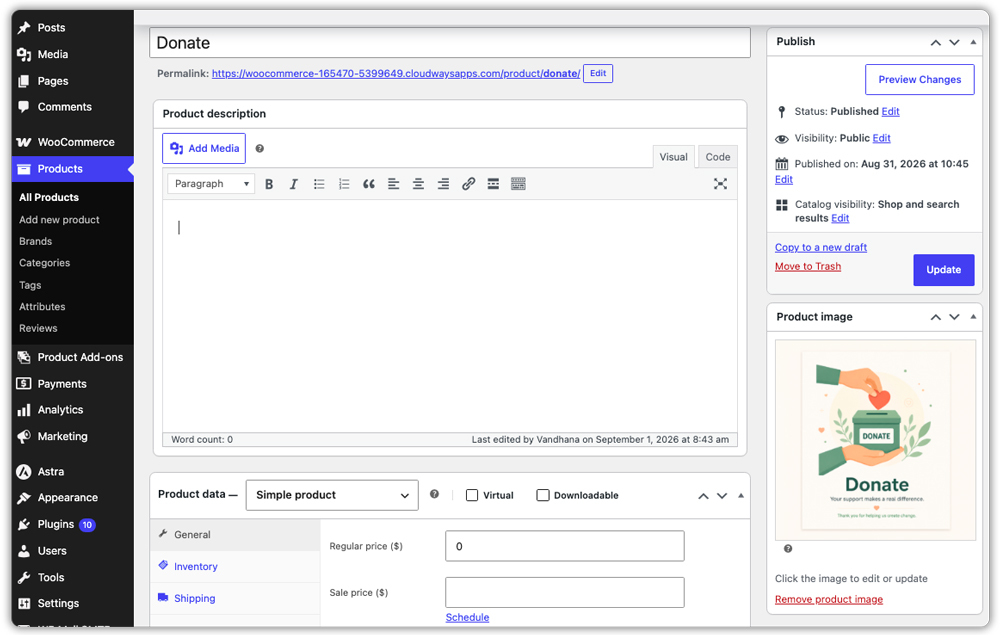
Setting up a donation page in WooCommerce takes just a few simple steps using the PH Product Add-ons for WooCommerce plugin. Start by creating a new WooCommerce product named something welcoming, like “Donate” or “Support Our Cause,” and set its base price to zero, since donors will choose their own amount.
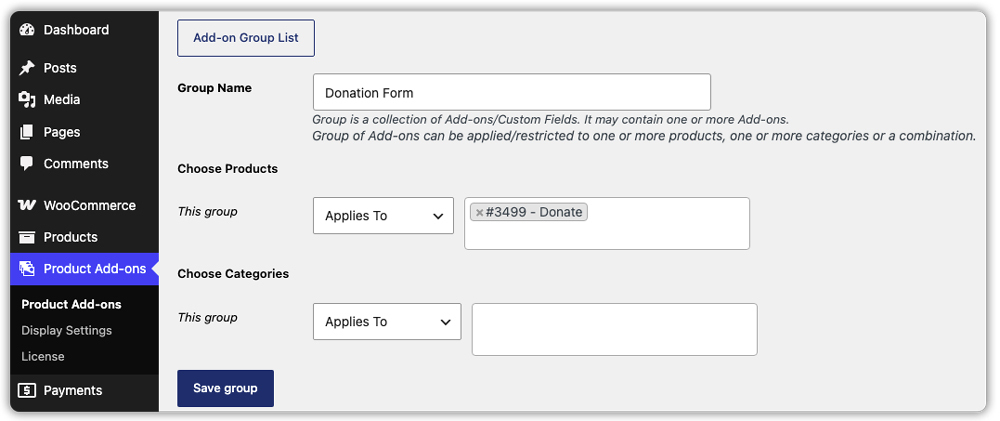
Next, create a new Product Add-on Group in the plugin’s settings and name it “Donation Form.” Link this group to your donation product only, so the options stay exclusive to that page.
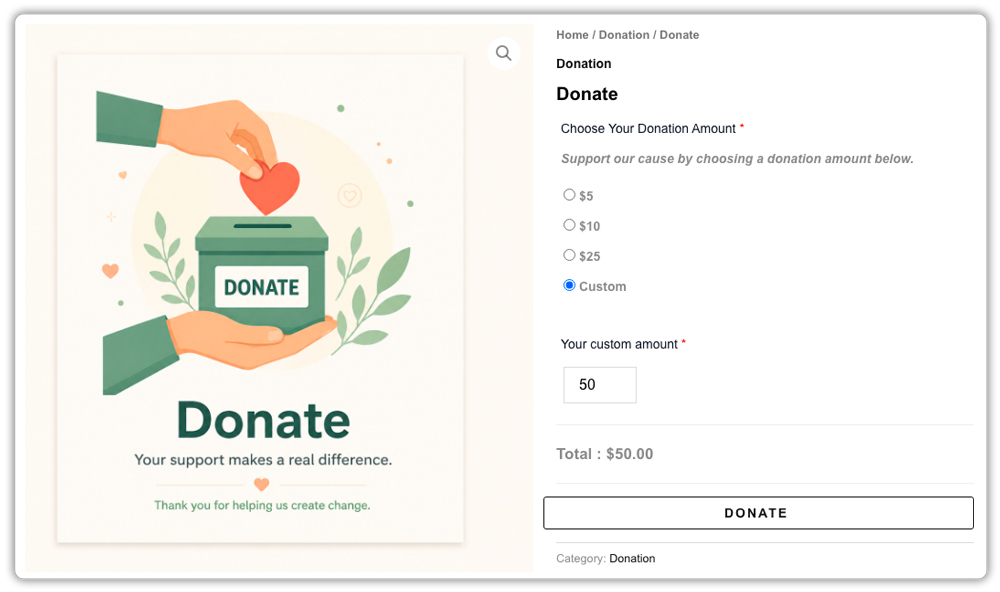
Add a few preset amounts, like $10, $25, $50, or $100, using radio buttons or a dropdown, and set each as a flat fee so the total updates instantly when a donor picks one.
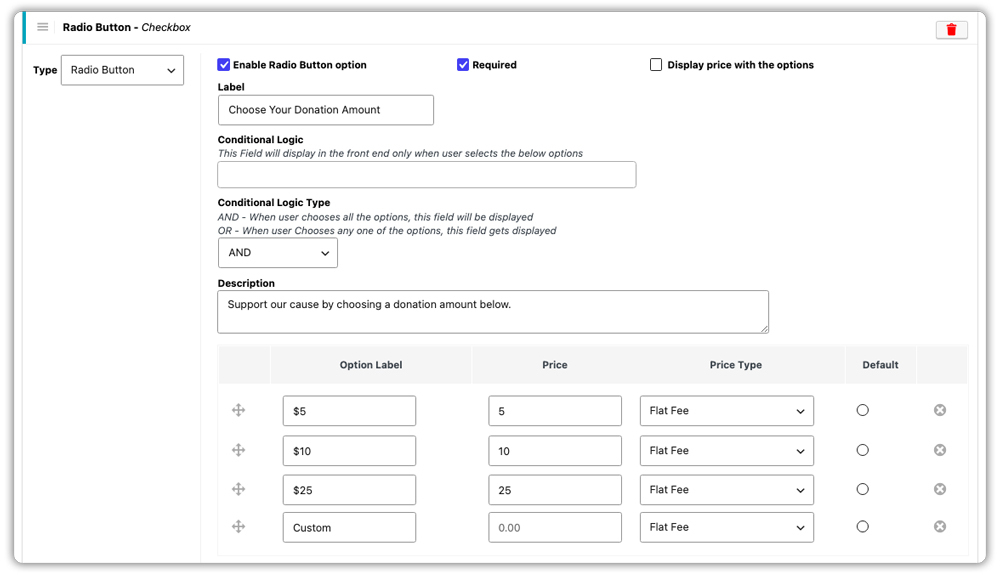
Include a “Custom Amount” option in the same list, then add a separate number field for donors to enter their own amount, with its pricing multiplier set to 1 so whatever they enter becomes their exact donation. You can set this number field to appear only when a donor selects “Custom Amount” using conditional logic, keeping the form clean instead of showing every option at once. You can also add an optional text box for a short note or dedication.
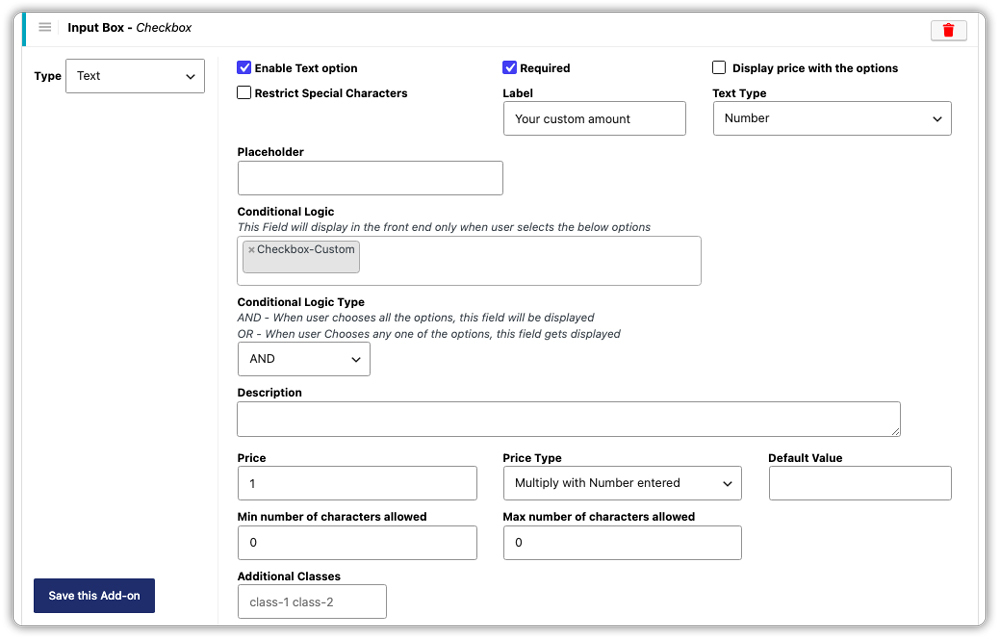
Once everything is in place, save your changes and preview the live page. Test a few amounts to confirm the totals are calculated correctly, and the form feels welcoming to your supporters.
For a more detailed walkthrough of every setting involved, see PluginHive’s complete setup guide for Product Add-ons.
How to Customize Your Donation Form
A great donation form balances simplicity with personal touches. Optimize your form fields using these strategies:
- Offer Preset Giving Tiers: Human psychology loves options. Providing quick-select buttons ($10, $25, $50) reduces decision fatigue while letting users type in a custom amount if they wish.
- Use Clear Labels: Instead of technical backend terms, use friendly labels like “Choose Your Contribution Amount” or “Add a Custom Donation” so visitors immediately understand the form.
- Streamline the Path to Checkout: Using custom code, you can rename the “Add to Cart” button to “Donate” and let donors skip straight to checkout, keeping the page focused entirely on the cause.
- Keep Checkout Fields Minimal: Don’t ask for information you don’t need. If someone is only making a donation, keep billing fields short or enable guest checkout to avoid losing donors partway through.
Thoughtful customization transforms a standard product page into an engaging fundraising asset, directly reducing drop-off rates and maximizing total funds raised.
Best Practices for a WooCommerce Donation Form
A well-designed donation form should make it easy for visitors to understand the cause, choose an amount, and complete their donation. Keep these best practices in mind:
- Keep the form short: Too many fields can discourage a quick donation. Stick to amount selection and, at most, one optional message field.
- Set a sensible minimum: If your custom amount field allows any number, consider guidance in the label so donors do not accidentally enter $0 or an unrealistic figure.
- Test the checkout flow yourself: Walk through selecting a preset amount, then a custom one, to confirm both calculate correctly at checkout.
- Label amounts clearly: Instead of just numbers, consider brief context like “$25 – Covers one meal kit” to help donors connect their gift to an outcome.
- Automate thank-you email: Customize your WooCommerce order confirmation emails to express genuine gratitude, outline tax deduction details if applicable, and share updates on how the campaign is progressing.
These small adjustments can make a noticeable difference in how smoothly your store handles donations.
Final Thoughts
Creating a WooCommerce donation form doesn’t have to be complicated. With a WooCommerce donation product and PH Product Add-ons for WooCommerce, you can give donors flexible options to choose or enter their donation amount and provide additional information. By keeping the form simple and easy to use, you can create a smooth donation experience and make it easier for customers to support your cause directly through your WooCommerce store.
FAQs
Q: Which platform is best for donations?
If you already run a WooCommerce store, keeping donations on the same platform is usually your best option. It saves you from setting up a separate tool, keeps donors on your own site, and lets you use the payment gateways you already trust.
Q: How to create a donation page in WordPress?
The simplest way is through WooCommerce. Create a donation product, then use a plugin like PH Product Add-ons for WooCommerce to add preset amounts, a custom amount field, and an optional note box, all on one page.
Q: Can I put a donate button on my website?
Yes. You can add a Donate button to your website that directs visitors to your donation page. In WooCommerce, you can link the button to your donation product so visitors can select an amount and proceed with their contribution.
