
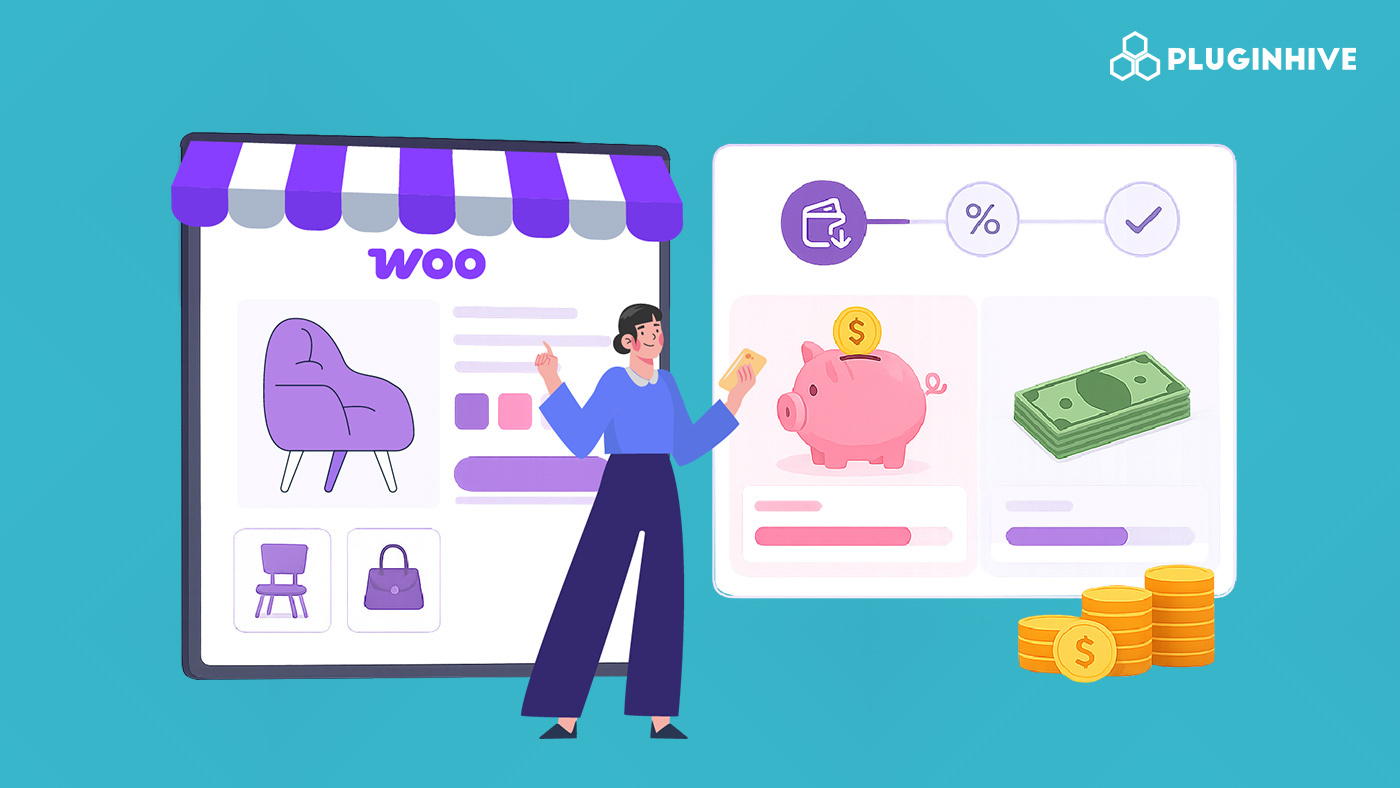
If you sell high-value products or services on your WooCommerce store, you’ve likely seen customers browse, add to cart, and then leave without completing the purchase. A high upfront price is often what stops them. Offering a WooCommerce down payment option lets customers pay a portion now and the rest later, making it easier for them to commit without the pressure of paying the full amount at checkout.
WooCommerce doesn’t include a built-in deposit feature, which means you’ll need a dedicated plugin to get this working. In this guide, we’ll show you how to add a WooCommerce deposit option to your store, step by step – no coding needed.
Table of Contents
- Why Should You Offer a Down Payment in WooCommerce?
- Use Cases for WooCommerce Down Payments
- How to Add a Down Payment Option in WooCommerce
- Tips for Using WooCommerce Down Payments Effectively
- Conclusion
- FAQs
Why Should You Offer a Down Payment in WooCommerce?
Offering a down payment option isn’t just about making things easier for your customers; it’s a smart move for your business too. When customers don’t have to pay the full amount upfront, they’re more likely to complete the purchase, especially for high-ticket items.
Here’s why adding WooCommerce deposits and down payments to your store makes sense:
- Reduce cart abandonment: High prices are one of the top reasons customers leave without buying. A partial payment option lowers that barrier and keeps them moving toward checkout.
- Improve cash flow: You collect revenue early, even before the product is shipped or the service is delivered, helping you manage inventory and operations smoothly. Learn more about boosting cash flow with partial payments
- Increase conversions on expensive products: Customers are more willing to commit to premium or bulk orders when they’re not paying everything at once. Learn how WooCommerce deposits help boost sales of expensive products.
- Reduce cancellations and refund requests: When a customer has already paid a deposit, they’re more invested in following through with the order.
- Build customer trust and loyalty: Flexible payment options show customers that you value their experience, making them more likely to return and buy again.
Simply put, a WooCommerce down payment option makes your store more accessible without reducing your product’s value.
Use Cases for WooCommerce Down Payments
WooCommerce down payments aren’t just for one type of store. Here are the most common use cases where offering a deposit makes a real difference:
- Bookings and Appointments: If you run a photography studio, event planning service, or consultation business, a deposit secures the booking upfront and reduces no-shows. Learn more about accepting deposits for WooCommerce bookings.
- Rental Services: Whether you’re renting out equipment, vehicles, or event supplies, collecting a deposit confirms the reservation and protects you against last-minute cancellations. See how to set up deposits for WooCommerce rentals.
- Custom or Made-to-Order Products: When you’re producing something specifically for a customer, personalized gifts, custom furniture, or bespoke clothing, a deposit before production reduces the risk of cancellations after you’ve already put in the work. See how WooCommerce deposits work for custom-made products.
- High-Ticket Items: Expensive products naturally come with more checkout hesitation. A WooCommerce down payment on premium items like electronics or luxury goods lowers the barrier to purchase without affecting your price.
- Pre-Orders: If you’re selling products not yet in stock, a deposit lets customers reserve their order early without paying in full. This helps you gauge demand and secure revenue before the product is ready to ship. Here’s how WooCommerce partial payments for pre-orders work.
If any of these match your store, you’re in the right place. Let’s look at how to actually set it up.
How to Add a Down Payment Option in WooCommerce
1. Deposit Settings
Open the Deposit Settings tab. This is where all the core configuration happens.
- Set Enable Deposits to Yes to activate the feature on your store.
- Under Deposit Option, choose whether the deposit is mandatory (customers must pay a deposit to place an order) or optional (customers can choose between a deposit and full payment at checkout).
- Under Deposit Type, decide how the deposit amount is calculated – Fixed Amount (e.g., a flat $50), Percentage (e.g., 25% of the product price), or Scheduled Payment Plan (the total split into multiple installments over time).
- You can also customise the Pay Deposit and Pay in Full button text and add a message above the Add to Cart button to set clear expectations for your customers.

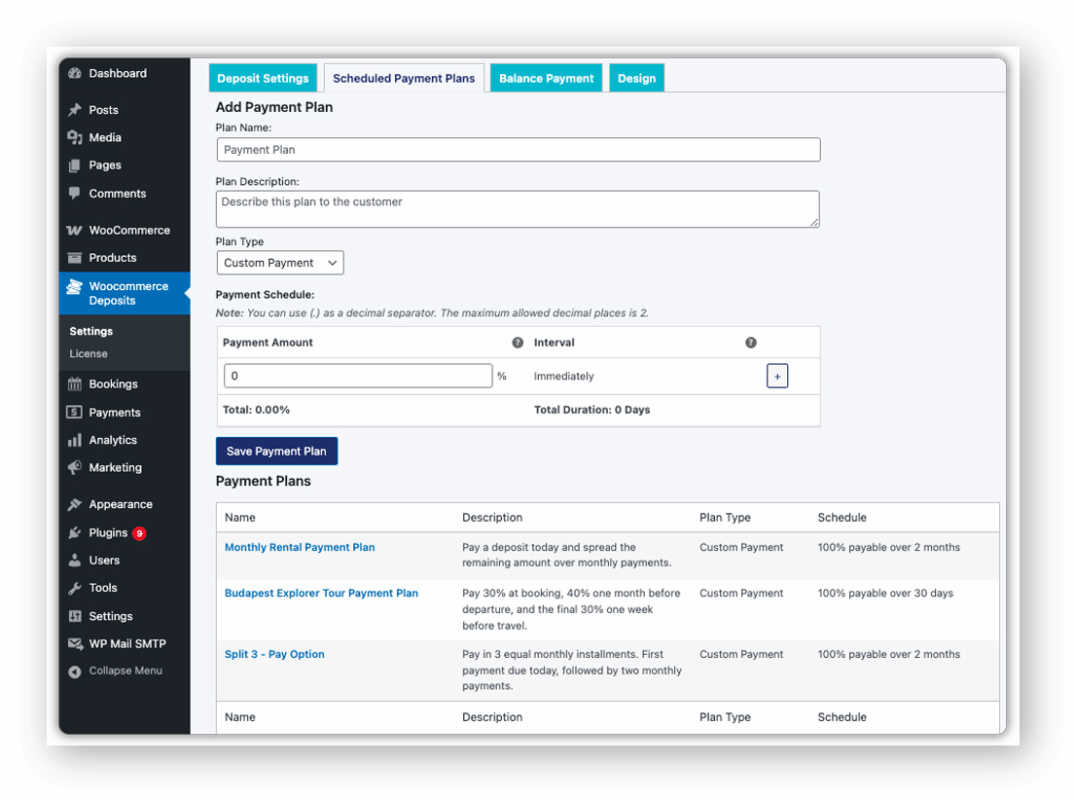
2. Scheduled Payment Plans
If you selected the Scheduled Payment Plan option, open the Scheduled Payment Plans tab. Enter the plan name, description, payment amount, and the interval: daily, weekly, monthly, or yearly. This is a great way to offer payment plans without needing a subscription model. Once saved, go back to Deposit Settings and assign this plan under Deposit Type. Once saved, go back to Deposit Settings and assign this plan under Deposit Type.
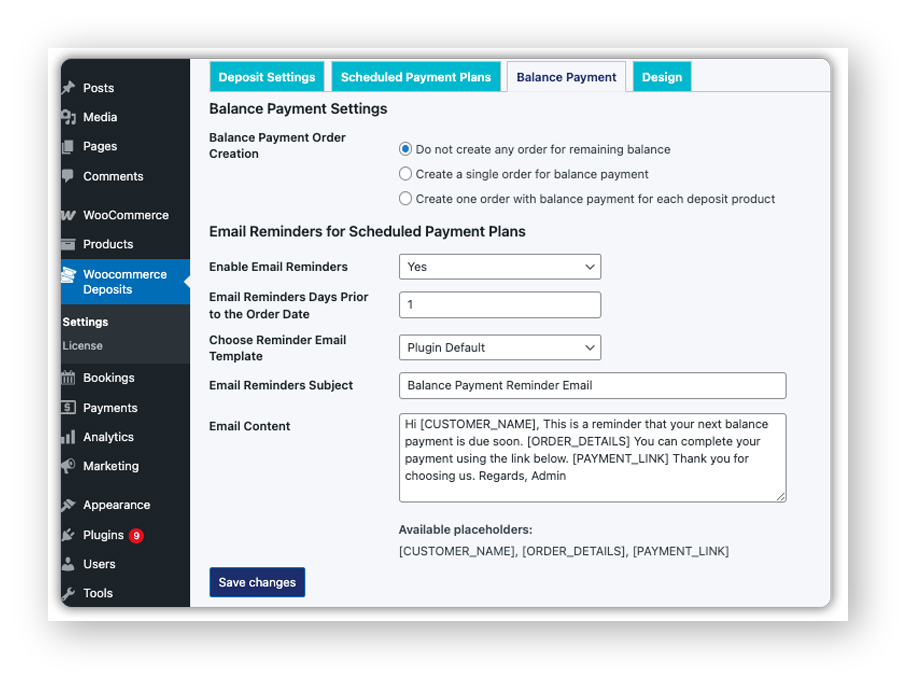
3. Balance Payment
The Balance Payment tab controls how the remaining payment is collected after the deposit is made. You can choose to keep the balance within the same order or create a separate order for it. This is also where you set up automated reminder emails, enable them, set how many days before the due date the reminder goes out, and customise the email template using placeholders. Every reminder email includes a direct payment link, so customers can complete their balance in one click.
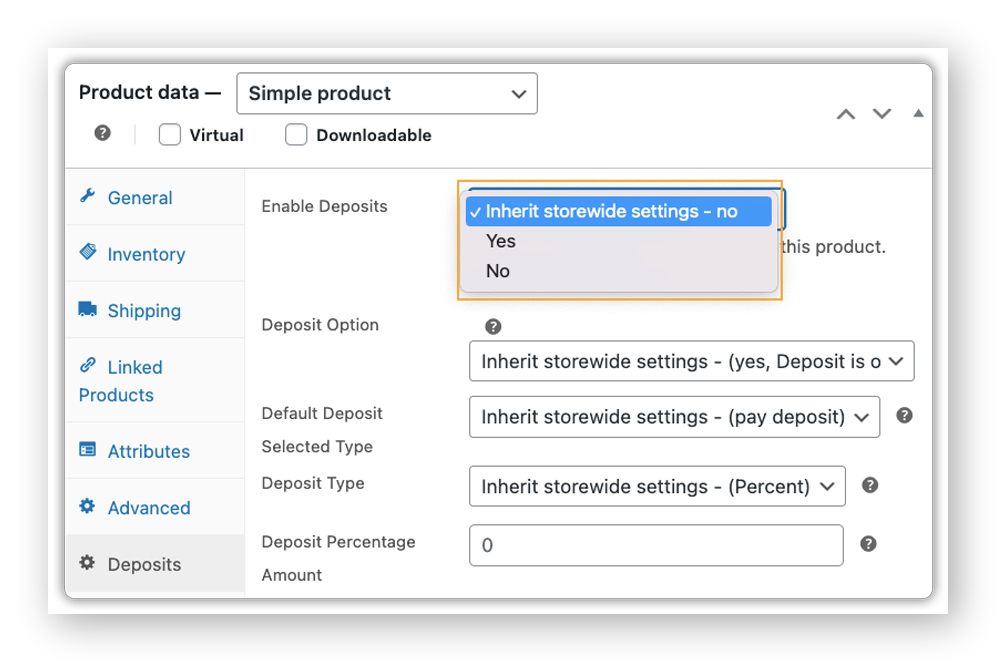
4. Apply Deposits to Specific Products (Optional)
If you don’t want deposits applied across all products, you can configure them at the product level. Go to the product edit page, open the Deposits tab, and either inherit the storewide settings or set custom deposit rules for that product only. This gives you full control over which products offer a down payment and which don’t.
Once all four settings are configured, visit a product page on your store to confirm the deposit option is displaying correctly. That’s all it takes; your store is now ready to accept WooCommerce down payments.
Tips for Using WooCommerce Down Payments Effectively
Once your deposit option is set up, how you configure and present it makes a big difference. Here are a few tips to help you get the most out of WooCommerce down payments:
- Start with your highest-ticket products: Don’t roll out deposits across your entire catalogue at once. Apply them first to products with the highest price points or the longest production lead times; that’s where they’ll have the most impact.
- Match the deposit type to your business model: Percentage-based deposits scale naturally with price and feel fair to customers. Fixed amounts work better when your fulfillment cost is consistent regardless of order size. Think about which fits before setting it globally.
- Make deposits optional where possible: Giving customers the choice between a deposit and full payment typically converts better than forcing one. Customers appreciate flexibility, and those who can pay in full will.
- Use payment plans for higher commitment purchases. If your products are expensive and take time to deliver, a scheduled payment plan gives customers a structured way to pay, making it easier for them to commit without hesitation. To understand which payment structure works best for your store, see WooCommerce Deposits vs Payment Plans.
When used thoughtfully, WooCommerce deposits and down payments do more than split a payment; they reduce friction, build trust, and make it easier for customers to say yes to purchases they would have otherwise walked away from.
Conclusion
Adding a WooCommerce down payment option to your store is one of the simplest ways to make high-value products more accessible to your customers. By letting them pay a portion upfront and the rest later, you remove the biggest barrier at checkout without changing your pricing or reducing the value of what you sell.
The PH Deposits for WooCommerce plugin makes the entire process straightforward, from setting up deposit amounts and payment plans to automating balance payment reminders. If you need any help getting started, the PluginHive support team is always available to assist you.
FAQs
Q. What is meant by down payment?
A down payment is a partial amount paid up front when purchasing a product or service, with the remaining balance paid at a later date. In WooCommerce, it allows customers to secure an order without paying the full amount at checkout.
Q. What is an example of a down payment?
If a customer is buying a custom dining table priced at $1,000, they pay a 30% deposit of $300 at checkout and the remaining $700 before delivery. With the PH Deposits for WooCommerce plugin, this entire process is handled automatically.
Q. Does WooCommerce support down payments by default?
No. You’ll need a dedicated plugin like PH Deposits for WooCommerce to offer partial payment options on your store.
Q. What is the difference between a WooCommerce down payment and a payment plan?
A down payment is a two-step arrangement: pay a portion now, balance later. A payment plan splits the total into multiple scheduled installments. The PH Deposits plugin supports both. See WooCommerce Deposits vs Payment Plans for a full breakdown.