Setting up a WooCommerce store for the first time can feel overwhelming. The moment you activate the plugin, you are looking at a dashboard full of settings with no clear idea of where to begin or what needs to be done first.
This tutorial covers everything in the right order. From configuring your store settings and adding products to connecting payments, setting up shipping, and managing orders, each step is explained clearly so you can get your store live without second-guessing yourself.
Table of Contents
- What Is WooCommerce?
- Why Store Owners Choose WooCommerce Over Other Platforms
- Prerequisites Before Installing WooCommerce
- How to Install WooCommerce on WordPress
- WooCommerce Setup Wizard: What to Configure First
- WooCommerce Store Settings Overview
- Adding and Managing Products in WooCommerce
- Setting Up Payment Gateways in WooCommerce
- Setting Up Shipping in WooCommerce
- Managing Your WooCommerce Store
- WooCommerce Plugins to Extend Your Store
- Conclusion
- FAQs
What Is WooCommerce?
WooCommerce is a free, open-source eCommerce plugin built for WordPress. It converts any WordPress website into a fully functional online store, giving you complete control over your products, payments, shipping, and customer data without any monthly platform fees.
Since it’s built on WordPress, you can easily customize your store using themes and plugins while keeping full control over your data and how your store runs.
Why Store Owners Choose WooCommerce Over Other Platforms
WooCommerce powers over 36% of all online stores worldwide and runs on more than 6.6 million live websites. Shopify sits at around 20% market share, and no other e-commerce platform comes close. The reasons for this are straightforward:
- It is completely free: The core plugin costs nothing, and WooCommerce charges no transaction fees on top of what your payment gateway charges.
- It supports every product type: Physical goods, digital downloads, services, bookings, and subscriptions, all manageable from one store.
- It scales without rebuilding: Features like High-Performance Order Storage (HPOS) keep your store fast, whether you have 100 orders or 100,000.
- The plugin ecosystem is unmatched: With over 55,000 WordPress plugins available, you can extend your store in almost any direction without custom development.
Prerequisites Before Installing WooCommerce
Before installing WooCommerce, confirm that your hosting environment meets these requirements:
- PHP: 8.0 or higher (8.2+ recommended for better speed and security)
- WordPress: 6.7 or later
- MySQL: 8.0+ or MariaDB 10.6+
- SSL Certificate: Required for any store processing live payments
- Hosting: A managed WordPress host such as Cloudways, Kinsta, or WP Engine gives you reliable performance from day one
Shared hosting works well for new stores with low traffic. As your order volume grows, a managed WordPress host becomes the more practical choice to maintain consistent performance and uptime.
How to Install WooCommerce on WordPress
Installing WooCommerce is as simple as installing any other WordPress plugin. From your WordPress dashboard, go to Plugins → Add New Plugin, search for WooCommerce, click Install Now, and then click Activate.

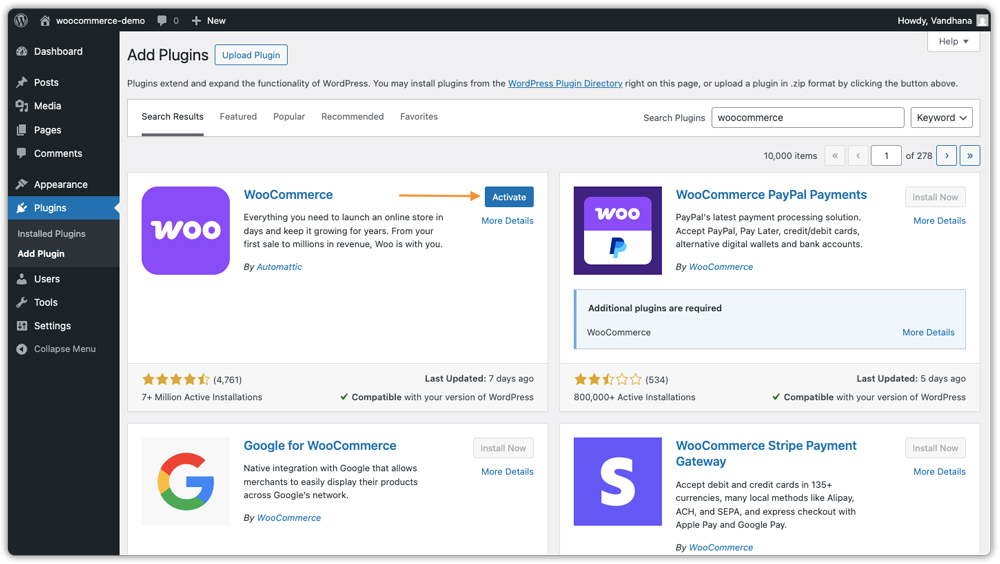
Once activated, WooCommerce guides you through a quick setup process to configure the essential details of your store.
WooCommerce Setup Wizard: What to Configure First
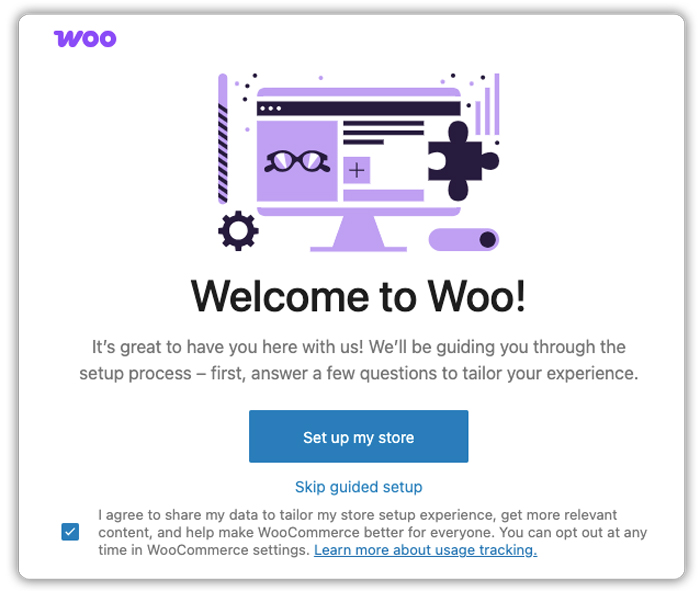
The setup wizard walks you through a short onboarding flow to personalise your store experience. Here’s what each screen asks for:
- Welcome Screen: Click “Set up my store” to begin the guided setup. You can skip it entirely if you prefer to configure everything manually, but going through it saves time.
- Business Stage: Choose whether you are just starting, already selling, or setting up a store for a client. This helps WooCommerce tailor recommendations.

- Store Details: Enter your store name, select the type of products or services you plan to sell, specify your store location, and provide your email address.

- Recommended Features: WooCommerce suggests additional tools like Jetpack, Mailchimp, Google integrations and others. These are optional and can be skipped or installed later.
After completing the setup, you’ll land on the WooCommerce Home dashboard. This screen shows a checklist of the next steps, like adding products, setting up payments, and customizing your store.
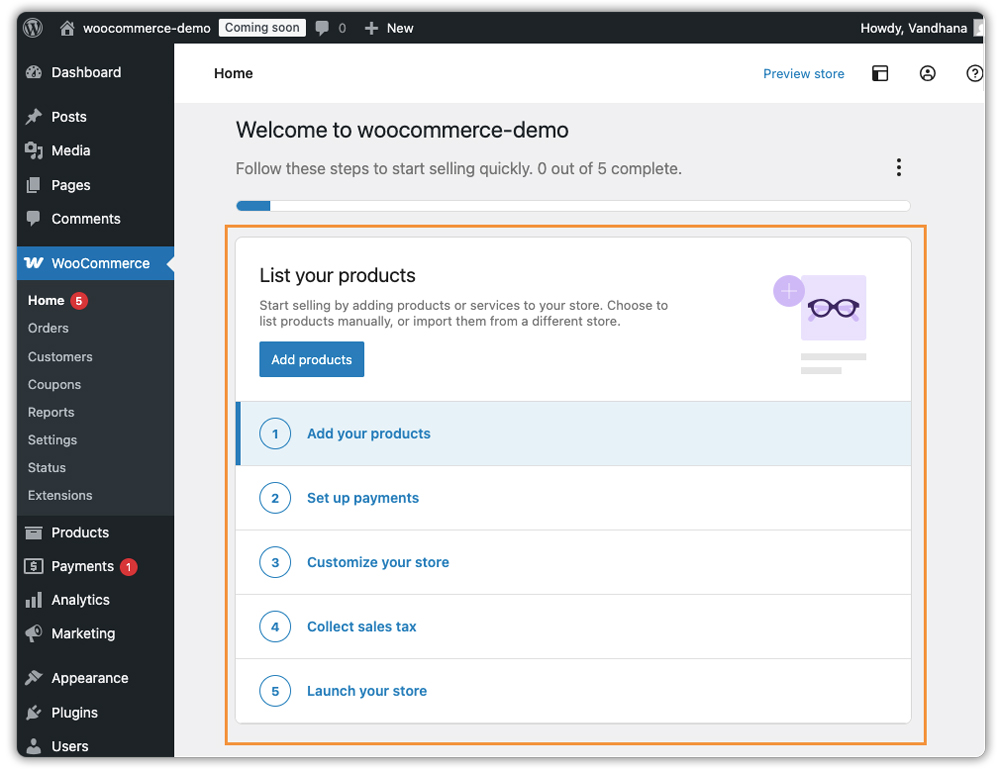
You can follow this checklist or use the left-hand menu to move to the next step.
WooCommerce Store Settings Overview
Go to WooCommerce → Settings to control how your store operates. Here are the sections that matter most when setting up for the first time.

- General: Set your store address, selling locations, shipping locations, and currency. This directly affects taxes and shipping calculations.
- Products: Configure weight and dimension units, enable reviews, and manage inventory settings like stock tracking and low-stock alerts.
- Taxes: Enable tax calculations and configure whether your displayed prices include or exclude tax. Set up Standard, Reduced, and Zero-rate tax classes to handle different product types and customer regions correctly. Configure this before your first sale, as changing it later can cause inconsistencies.
- Shipping: Create shipping zones and define methods like flat rate, free shipping, or local pickup based on customer location.
- Payments: Enable and configure payment methods like WooPayments, Stripe, PayPal, or Cash on Delivery.
- Accounts & Privacy: Control guest checkout, account creation, and privacy policy settings. Important for compliance and customer data handling.
- Emails: Customize transactional emails sent for orders, refunds, and updates. You can edit sender details and email design.
With these core settings in place, your store is structurally ready. Other tabs, like Integration, Advanced, and Point of Sale, can be configured later as your store grows. The next step is adding your products.
Adding and Managing Products in WooCommerce
Once your store settings are in place, the next step is adding your products. Go to Products → Add New from your WordPress dashboard.
At the top of the editor, fill in your product title, full description, and short description. Add a product image and a product gallery for additional angles. Use categories and tags to organise your catalogue and help customers find what they are looking for.

Product Types in WooCommerce
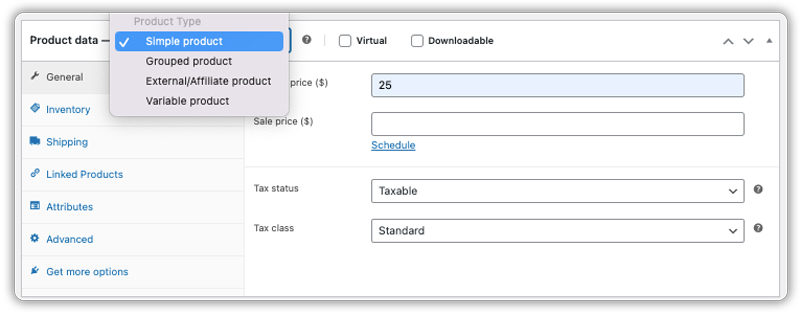
Before adding a product, you need to select the right product type from the Product Data panel. WooCommerce supports the following types:
- Simple Product: A single item with one price and no variations. The most common type suitable for most physical or digital goods.
- Variable Product: A product that comes in multiple options, such as size or colour. Each variation can have its own price, SKU, and stock level.
- Grouped Product: A collection of related simple products displayed together on one page. Each item can be added to the cart individually.
- External/Affiliate Product: A product listed on your store but sold on another website. The button redirects the customer to that external page.
- Virtual Product: An intangible product, like a service or membership, that does not require shipping.
- Downloadable Product: A digital file, such as an eBook, music, or software that customers can access immediately after purchase.
Key Product Settings to Configure
With the product type selected, work through these tabs in the Product Data panel before publishing:
- General – Set the regular price, sale price, and SKU
- Inventory – Manage stock quantity, backorder rules, and in/out of stock status

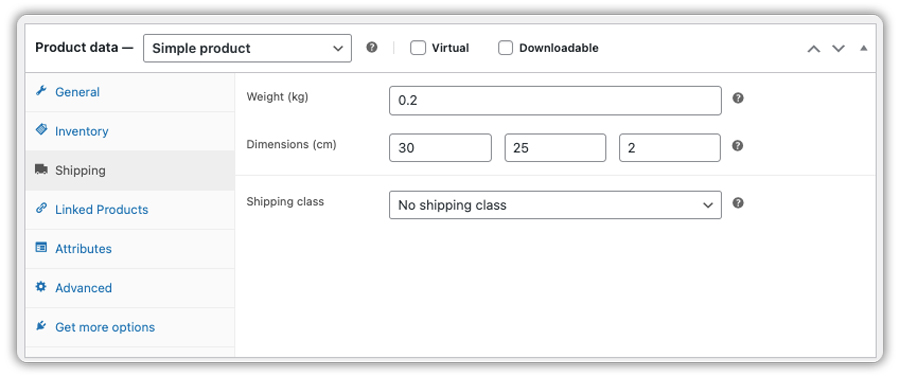
- Shipping – Enter product weight, dimensions, and assign a shipping class if needed
- Linked Products – Add upsells on the product page and cross-sells in the cart to encourage additional purchases
- Attributes and Variations – For variable products, define options like colour or size here, then configure pricing and stock per variation

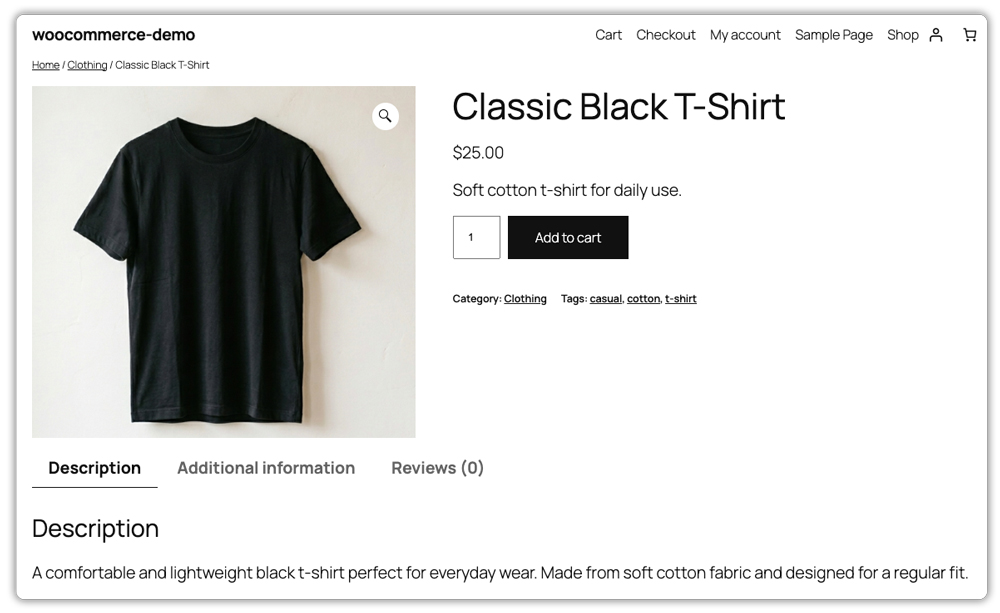
When everything is filled in, click Publish and the product goes live in your store immediately.
Setting Up Payment Gateways in WooCommerce
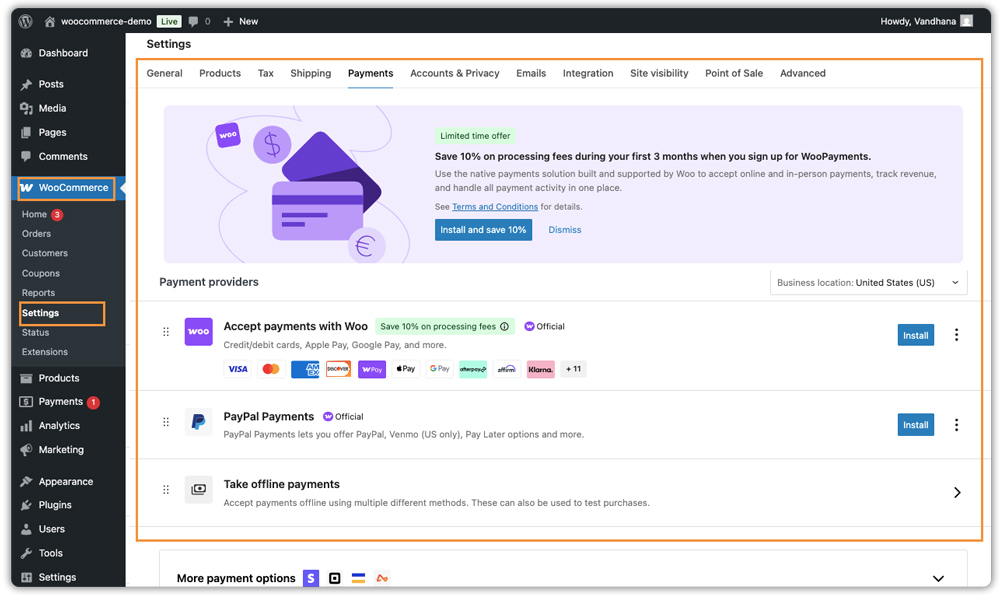
Go to WooCommerce → Settings → Payments to configure how your store collects money.
WooCommerce includes basic options like Bank Transfer and Cash on Delivery, but most stores need a card-based gateway. The three most popular choices are:
- WooPayments – Built into WooCommerce. Accepts cards, Apple Pay, and Google Pay with no redirects.
- Stripe – Best for stores that need subscriptions or advanced billing.
- PayPal – A familiar checkout option that builds customer trust.
If you’re just starting out, WooPayments is the easiest to get going with. You can add others later as your store grows. With payments ready, the next step is setting up shipping.
Setting Up Shipping in WooCommerce
WooCommerce Shipping Zones and Methods
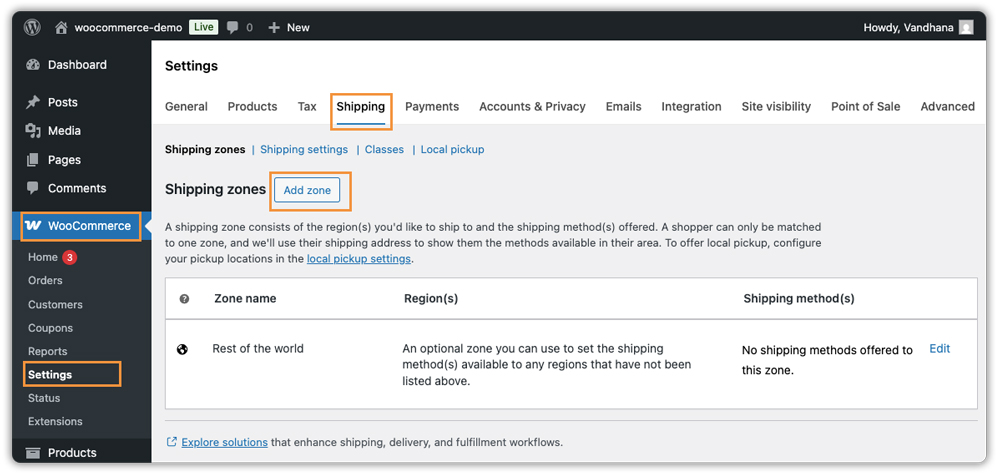
Go to WooCommerce → Settings → Shipping to configure how your store handles delivery.
Shipping in WooCommerce is built around Shipping Zones, geographic regions that each have their own set of shipping methods. When a customer checks out, WooCommerce automatically matches their address to the right zone and shows only the relevant options.
To create a zone, click Add Zone, enter a zone name, and select the region by country, state, or postcode.
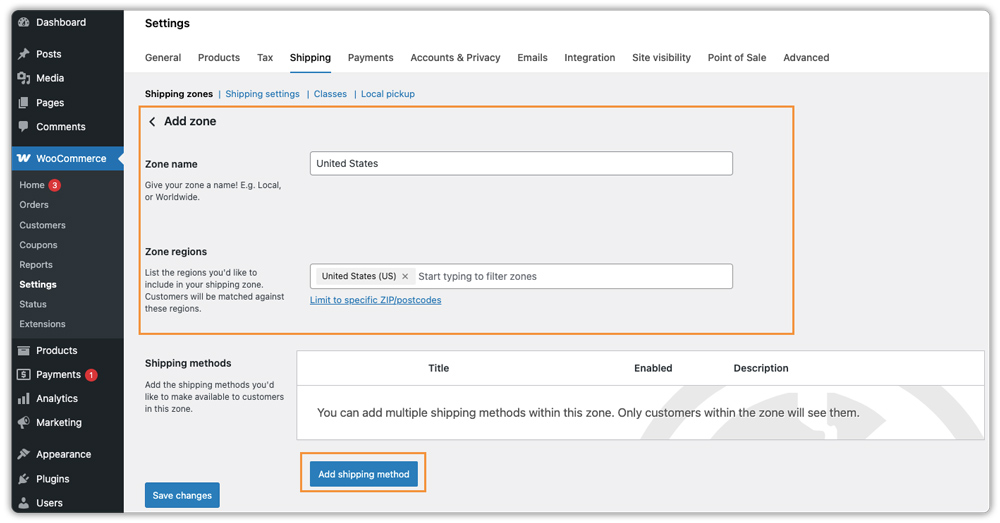
After creating the zone, click Add Shipping Method and choose one of the following: Flat Rate, Free Shipping, or Local Pickup.
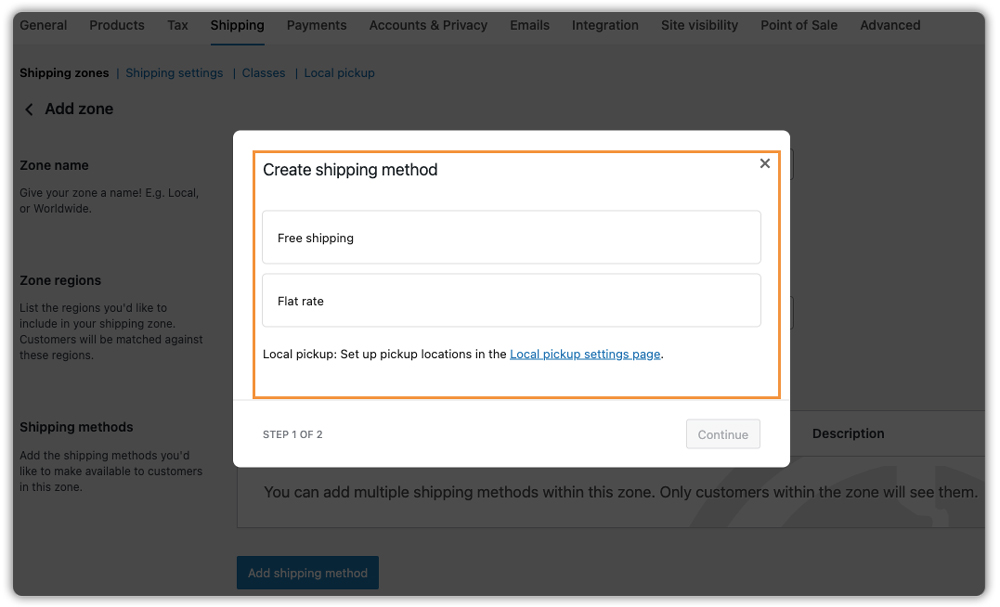
Click on the added method to configure it, such as setting the cost for a flat rate or conditions for free shipping.

If your products have different shipping requirements, such as heavy or lightweight items, use Shipping Classes to apply different rates automatically at checkout.

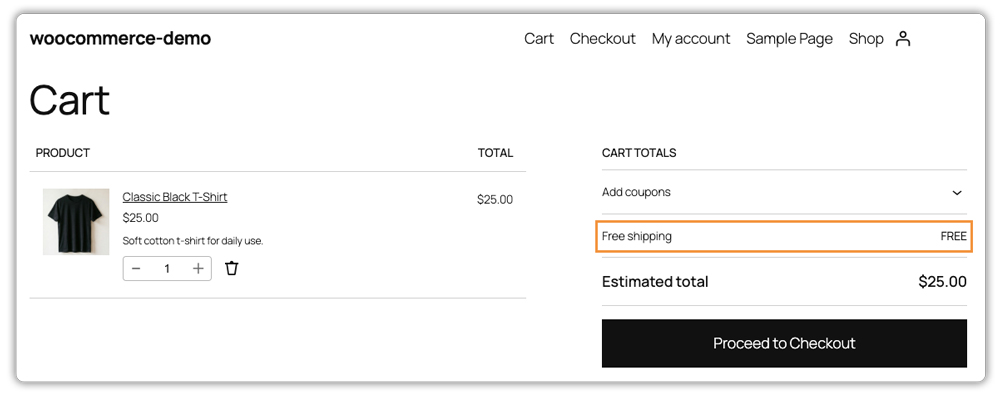
This is how the available shipping options will appear to customers during checkout, based on their location and the methods you’ve configured.
If you want a more detailed understanding of how shipping zones and methods work, check out this complete guide: WooCommerce Shipping Zones Ultimate Guide
Carrier Shipping Plugins for WooCommerce
WooCommerce’s built-in shipping methods do not connect to any carrier API. That means no live rates from FedEx, UPS, DHL, or USPS, no label printing from the order screen, and no automated tracking updates sent to customers. For stores shipping in any real volume, this creates manual work at every step of fulfilment.
PluginHive’s carrier shipping plugins solve each of these problems directly inside WooCommerce – live rates, label printing, and tracking built into every plugin.
US-Based Carriers
For stores shipping domestically within the United States, these three plugins connect directly to each carrier’s API and display live rates at checkout:
- FedEx Shipping Plugin for WooCommerce with Print Label
- WooCommerce UPS Shipping Plugin with Print Label
- PH USPS Shipping Plugin for WooCommerce with Print Label
International and Regional Carriers
For stores outside the US, PluginHive offers dedicated plugins for every major region:
- PH DHL Shipping Plugin for WooCommerce with Print Label for WooCommerce – global coverage
- PH Royal Mail Shipping with Tracking for WooCommerce – United Kingdom
- Canada Post Shipping Plugin for WooCommerce with Print Label – Canada
- Purolator Shipping Plugin for WooCommerce with Print Label – Canada
- PH Australia Post MyPost Business Shipping for WooCommerce – Australia
- PH PostNord Shipping Plugin for WooCommerce with Print Label – Nordic/Scandinavian region
- DHL Freight Sweden Shipping Plugin for WooCommerce with Print Label – Sweden
- PH Aramex Shipping Plugin for WooCommerce with Print Label – Middle East and South Asia
- Blue Dart Shipping Plugin for WooCommerce with Print Label – India
- PH TNT Shipping Plugin for WooCommerce with Print Label – Europe and international
- Amazon Shipping Plugin for WooCommerce – US and UK
- Chilexpress Shipping Plugin for WooCommerce with Print Label – Chile
- HongKong Post Shipping Plugin for WooCommerce with Print Label – Hong Kong
- PH TForce Freight Shipping Plugin for WooCommerce with Print Label – US freight
- PH ODFL Freight Shipping Plugin for WooCommerce with Print Label – US freight
Shipping Management Tools
Beyond individual carriers, PluginHive also offers tools to manage how shipping works across your store.
The Multi-Carrier Shipping Plugin displays rates from multiple carriers simultaneously at checkout so customers can compare and choose. The PH Table Rate Shipping Pro Plugin for WooCommerce lets you define custom rates by weight, order total, item count, or destination. The PH Hide Shipping Methods & Rate Adjustment for WooCommerce gives you control over which methods appear at checkout and lets you apply surcharges or discounts on top of any rate. For multi-vendor marketplaces, the PH Multi-Vendor Shipping Addon allows each vendor to manage their own shipping configuration independently.
Managing Your WooCommerce Store
Once your store is live, WooCommerce gives you a set of dedicated sections to manage orders, customers, promotions, and performance, all from your WordPress dashboard.
WooCommerce Orders
All orders are available under WooCommerce → Orders, where you can view, search, and filter orders by status, such as pending payment, processing, completed, refunded, or failed.
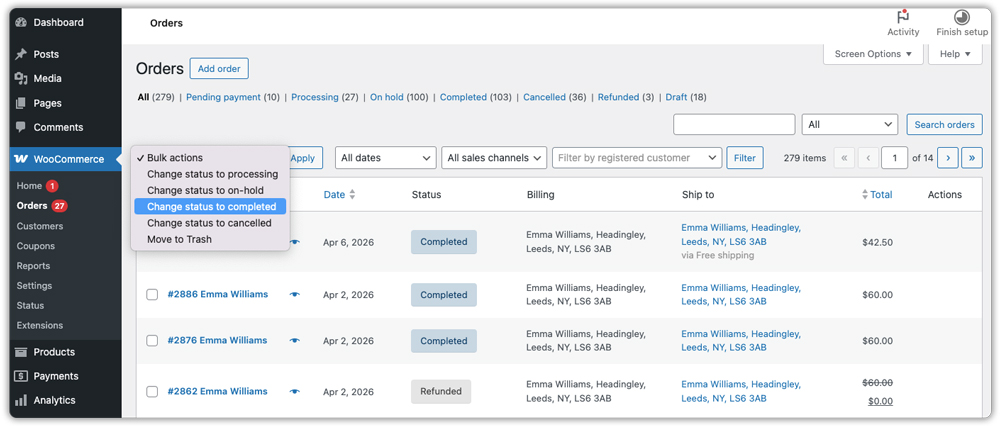
You can also use bulk actions to update multiple orders at once, such as changing order status or deleting orders, which is useful when managing high order volumes.
Clicking on an order opens the full order details, where you can update the order status, edit billing and shipping information, add internal or customer notes, resend order emails, and issue full or partial refunds.

With High-Performance Order Storage (HPOS) enabled by default, the Orders page remains fast and responsive even as your store grows.
WooCommerce Customers
You can manage your customers under WooCommerce → Customers, where you get an overview of all users and their activity. This section shows details like customer name, email, order count, total spend, average order value, and location.

WooCommerce Coupons
Discount codes are managed under Marketing → Coupons. You can create percentage-based, fixed cart, or fixed product discounts and control exactly how they work with expiry dates, minimum order requirements, usage limits per customer, and product or category restrictions.

For more details, see this WooCommerce Coupons guide.
WooCommerce Analytics
WooCommerce now uses the dedicated Analytics section for store reporting, replacing the older Reports tab. Analytics → Overview gives you a real-time snapshot of revenue, orders, products sold, and customer activity with date filtering and exportable data to track growth and spot trends.

With these sections, you can manage orders, customers, and store performance from one place. Next, let’s look at how to extend your store with plugins.
WooCommerce Plugins to Extend Your Store
WooCommerce’s core handles products, payments, and order management well. For delivery transparency, bookings, and product customisation, PluginHive offers plugins that address the gaps growing stores run into.
Shipment Tracking and Estimated Delivery Dates
Once an order ships, customers want to know where it is. Without a system in place, that question lands in your support inbox repeatedly. The Shipment Tracking Pro for WooCommerce adds tracking numbers to orders, sends automated email notifications at every carrier status update, and displays live shipment status on the customer’s My Account page, supporting 80+ carriers.
The Estimated Delivery Date Plugin for WooCommerce shows customers an expected delivery date on the product page, cart, and checkout before the order is placed. When customers know when to expect their delivery, they are more likely to complete the purchase and more likely to be available when it arrives.
Bookings and Appointments
For stores that sell services rather than physical products, the Bookings and Appointments for WooCommerce plugin turns standard products into bookable services. Customers see live availability, select a time slot, and receive an automatic confirmation with no manual scheduling on your end. It supports staff profiles, group bookings, buffer time between sessions, and calendar sync with Google Calendar, Outlook, and iCalendar.
For additional booking needs, PluginHive offers PH Recurring Bookings for repeat sessions, Multiple Non-Adjacent Bookings for customers booking across different dates in one checkout, Zoom Integration for automatic meeting link generation, and Dokan Bookings Integration for marketplace vendors managing their own schedules.
Product Customisation and Deposits
Standard WooCommerce variations handle size and colour. For stores where customers need to provide specific input, custom text, uploaded artwork, engraving details, or special instructions, the PH Product Add-ons for WooCommerce plugin adds the right input fields directly on the product page. Buyers submit complete order details from the first click with no follow-up emails needed.
For stores that collect deposits on custom orders, high-value purchases, or bookings, the PH Deposits for WooCommerce plugin lets you take a partial payment at checkout and the remaining balance closer to fulfilment, giving customers the flexibility to commit without paying in full upfront.
Conclusion
WooCommerce gives you everything you need to build and run a serious online store without platform fees or restrictions. The core plugin handles products, payments, and orders. The right plugins take care of shipping automation, carrier integrations, delivery transparency, bookings, and product customisation.
Follow the steps in this guide, get your first product live, and test the complete checkout flow before driving any traffic. Once the fundamentals are solid, layer in the plugins that match your specific business requirements.
If you need help setting up any PluginHive plugin on your WooCommerce store, the PluginHive support team is available to assist with configuration and guidance.
FAQs
1. Is WooCommerce free to use?
Yes, the core plugin is completely free. You pay for hosting, any premium themes, and the paid plugins you choose, but WooCommerce itself charges no transaction fees or monthly platform costs.
2. What is the best payment gateway for WooCommerce?
WooPayments is the easiest to get started with since it is built directly into WooCommerce. Stripe for WooCommerce and PayPal Payments are strong alternatives for stores with more advanced payment requirements.
3. What is the best hosting for WooCommerce?
Managed WordPress hosting providers like Cloudways, Kinsta, and WP Engine are well-suited for WooCommerce. They offer optimised server environments, built-in SSL, and reliable uptime that shared hosting often cannot match at scale.
4. How do I display live carrier rates at WooCommerce checkout?
WooCommerce’s built-in shipping does not connect to carrier APIs. To show real-time rates from FedEx, UPS, USPS, DHL, Canada Post, or other carriers, you need a dedicated carrier plugin. PluginHive offers plugins for all major carriers that pull live rates, print labels, and send tracking updates automatically.
5. Can I sell both physical products and services on the same WooCommerce store? Yes. WooCommerce supports multiple product types in the same store. You can sell physical products alongside bookable services using the Bookings and Appointments for WooCommerce plugin by PluginHive.