



Setting Up Shopify Carrier Calculated Shipping Rates
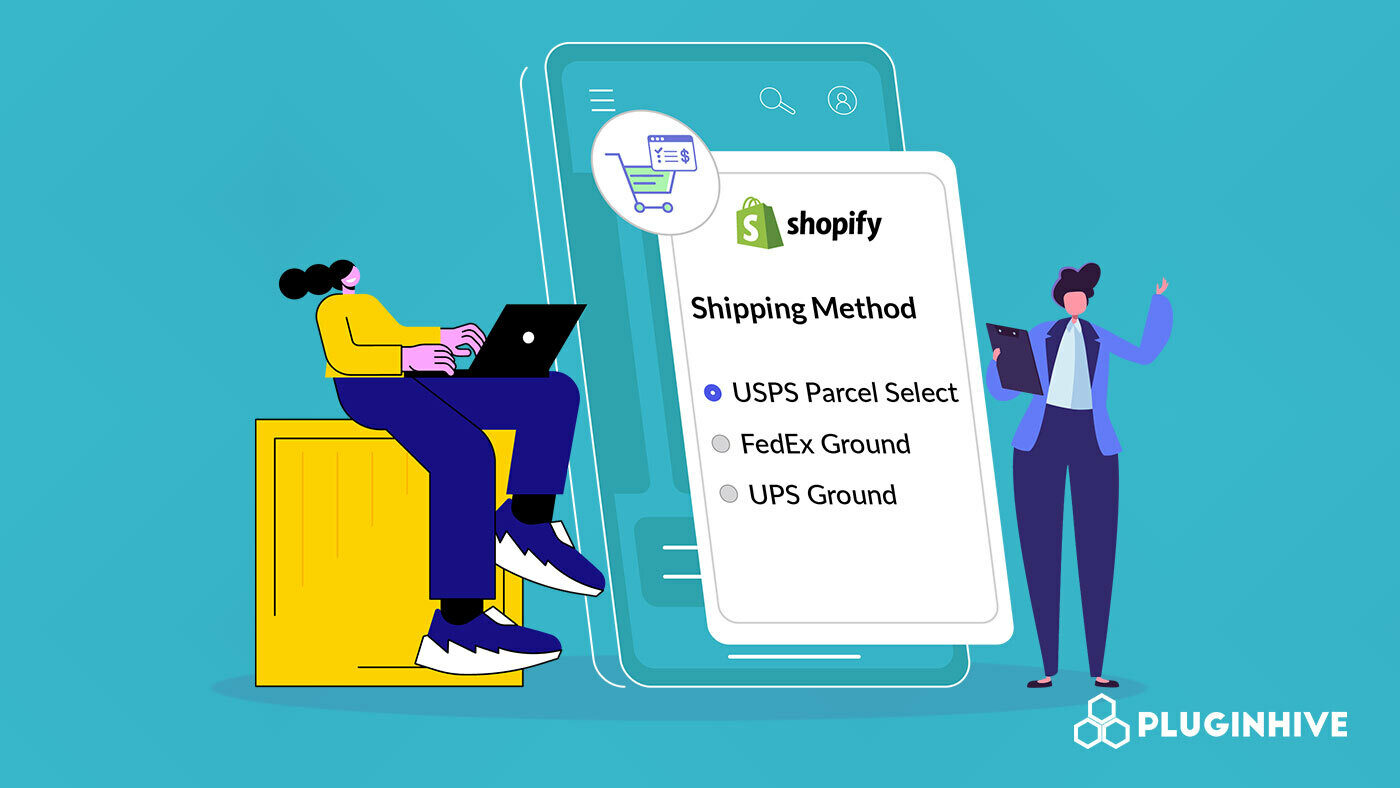
Shopify merchants can use their own accounts with a shipping carrier to display carrier shipping rates to customers at checkout. This feature is called carrier-calculated shipping rates. In this guide, we will learn how to set them up.
All you need to do for that is to follow the steps below.
- Get Shopify Carrier Calculated Shipping Rates enabled for your store
- Install Third Party Shipping app(s) on your Shopify store
- Understand and Set Up Shopify Shipping Profiles
- Enable the Shopify app(s)
- Validate product weight
- Verify Shipper Address
- Configure the Shipping App to get the Shopify Checkout Rate
1. Choose the Shopify plan supporting Carrier Calculated Shipping Rates
To connect your own shipping carrier accounts to Shopify, you need to have the carrier-calculated shipping feature on your store’s Shopify subscription plan. The Shopify Advanced Plan, Plus Plan, and Grow Plan (with annual billing) include this feature. You can also enable it on the Basic Plan by contacting Shopify support and paying an additional fee.
Reference: Know more about the Shopify Pricing Plan
2. Install Third-Party Shipping app(s) on your Shopify store
By default, Shopify offers shipping solutions for certain carriers; however, if you want to use a complete shipping solution covering third-party calculated shipping rates, labels, tracking & other shipping specificities like LTL Freight Shipping, scheduling pickups, printing manifests, custom documents, and HazMat Shipping, you can use any of the following Shopify Apps.
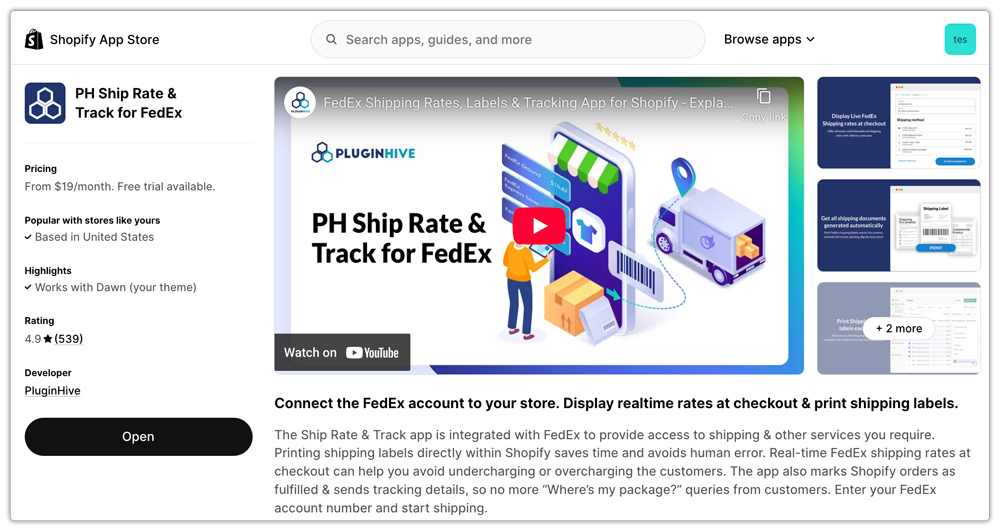
- PH Ship, Rate & Track for FedEx app for shipping with FedEx
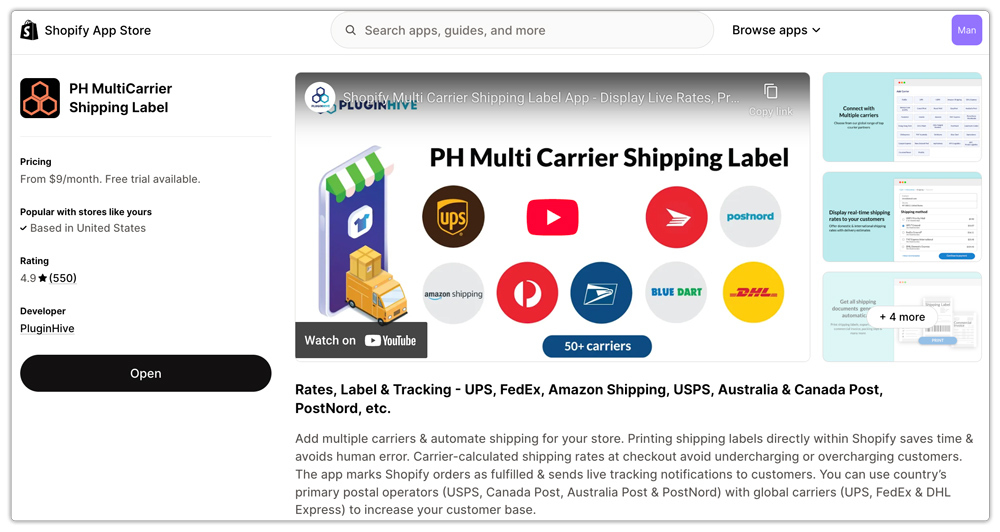
- PH Multi-Carrier Shipping Label app for shipping with multiple carriers
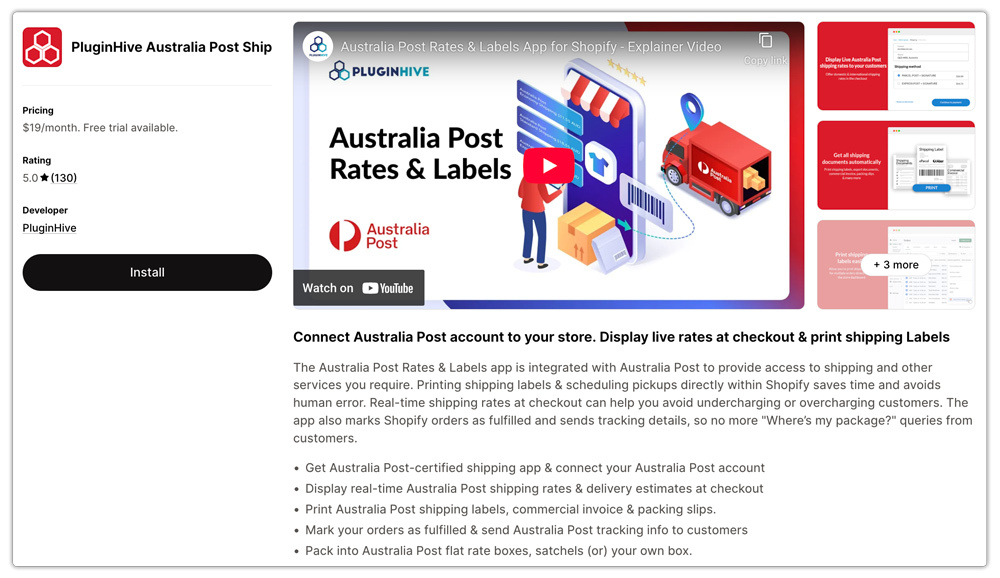
- PluginHive Australia Post Ship app for shipping with Australia Post
3. Understand and Set Up Shopify Shipping Profiles
Before configuring carrier-calculated shipping rates, it’s important to understand what a shipping profile is and how it works.
A Shopify Shipping Profile is a set of shipping rules assigned to specific products and fulfillment locations. Shipping profiles allow you to create different shipping rates, shipping zones, and carrier services for selected products instead of using one shipping setup for your entire store.
For example, you can use shipping profiles to:
- Charge different shipping rates for heavy or fragile products
- Use different carriers for specific products
- Configure warehouse-specific shipping rules
- Display accurate carrier-calculated shipping rates at checkout
Shopify offers two types of shipping profiles:
- General Shipping Profile – The default profile that applies to all products in your store.
- Custom Shipping Profile – A separate profile for products requiring different shipping rules or carrier rates.
Custom shipping profiles are especially useful when using carrier-calculated shipping apps because they help you control which products use specific shipping services and rates.
How to Set Up Shopify Shipping Profiles
Head over to:
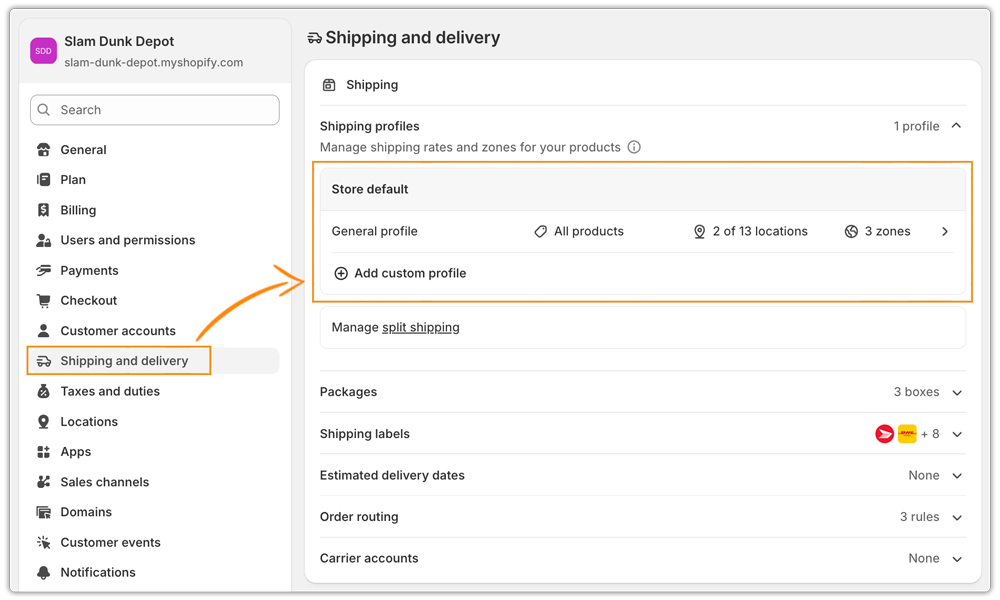
Shopify Admin → Settings → Shipping and Delivery
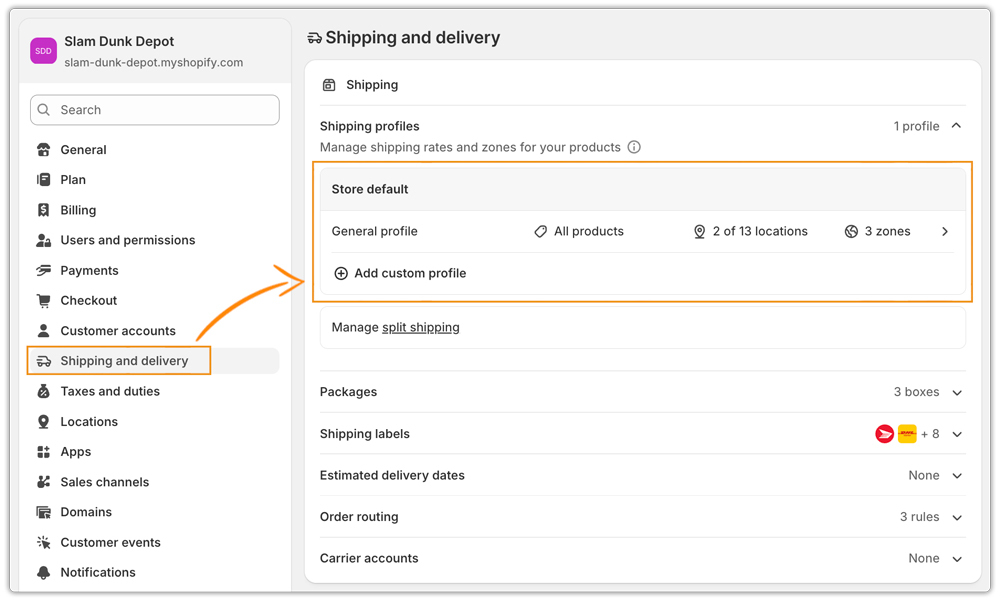
Under the Shipping Profiles section:
- Click General Profile to edit your default shipping setup. This profile contains all products by default that are not assigned to a custom shipping profile.
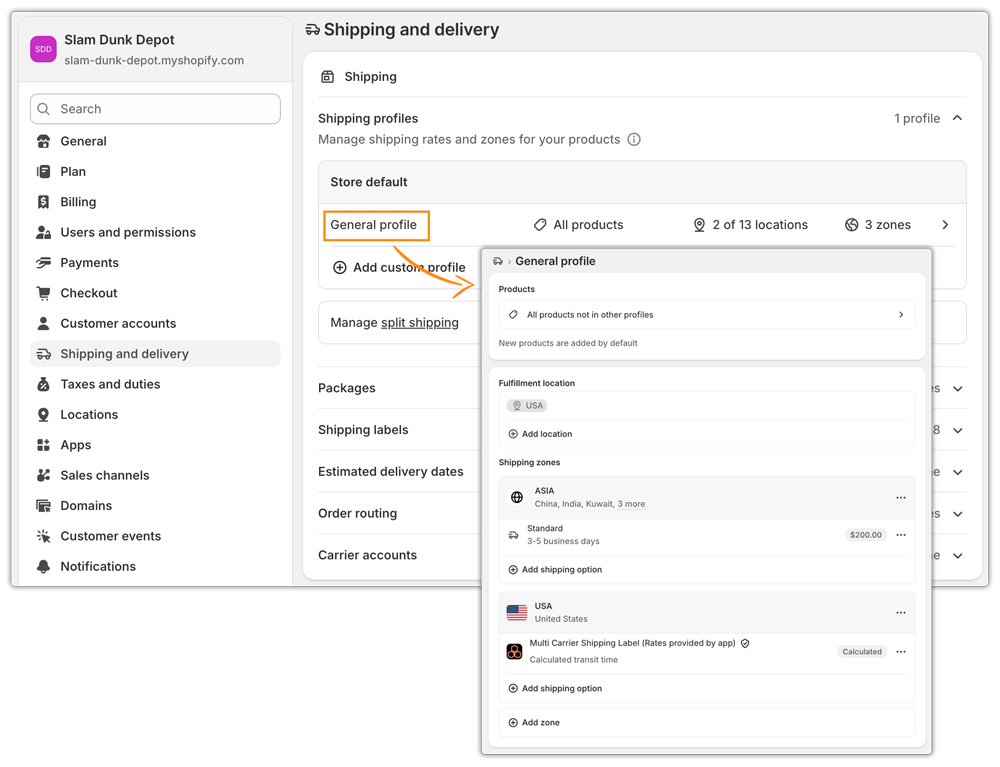
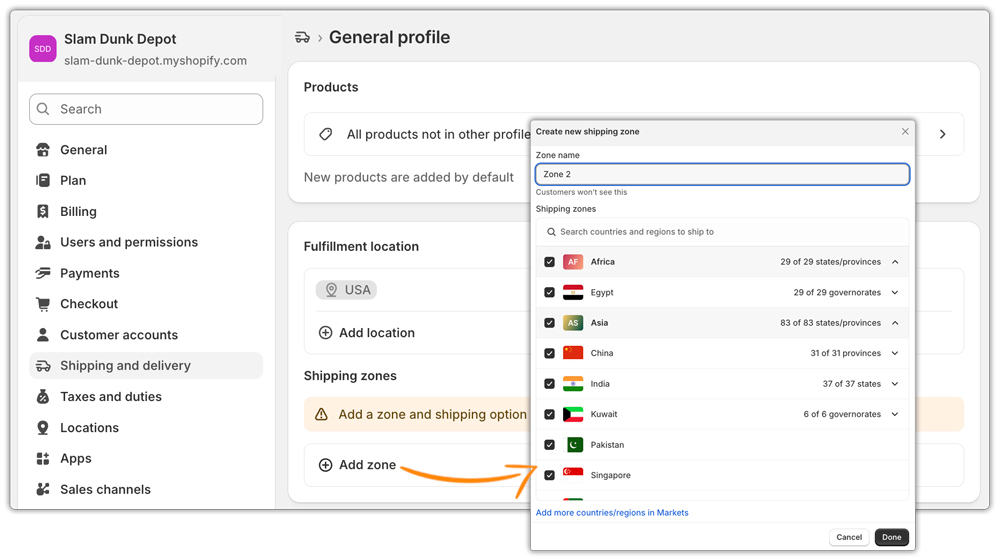
- Within the General Profile, you can configure fulfillment locations and create shipping zones for different regions.
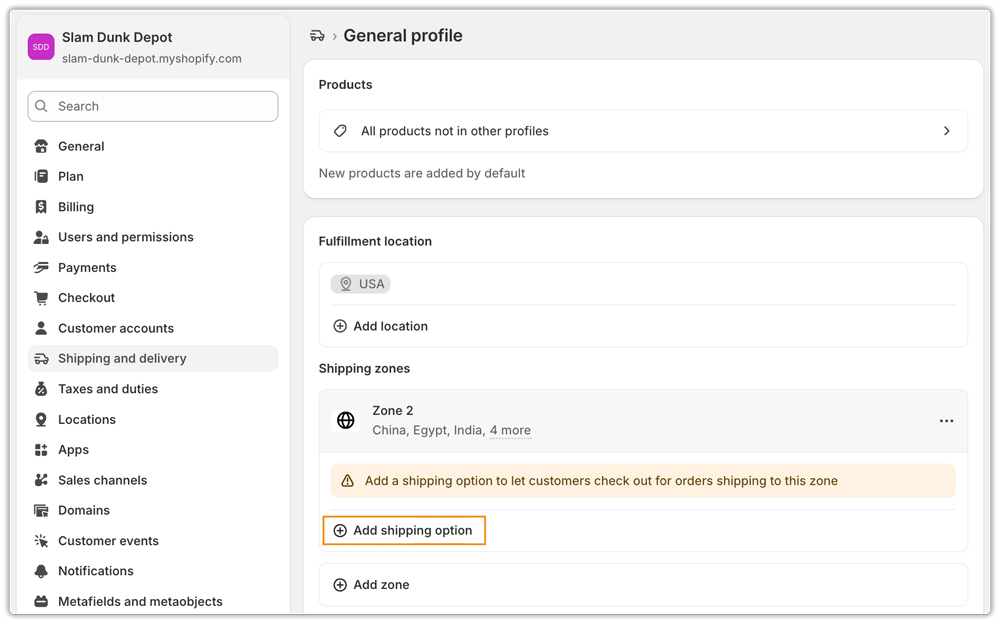
- After configuring your shipping zones, click Add shipping option to set the shipping rates for each zone based on your business requirements.
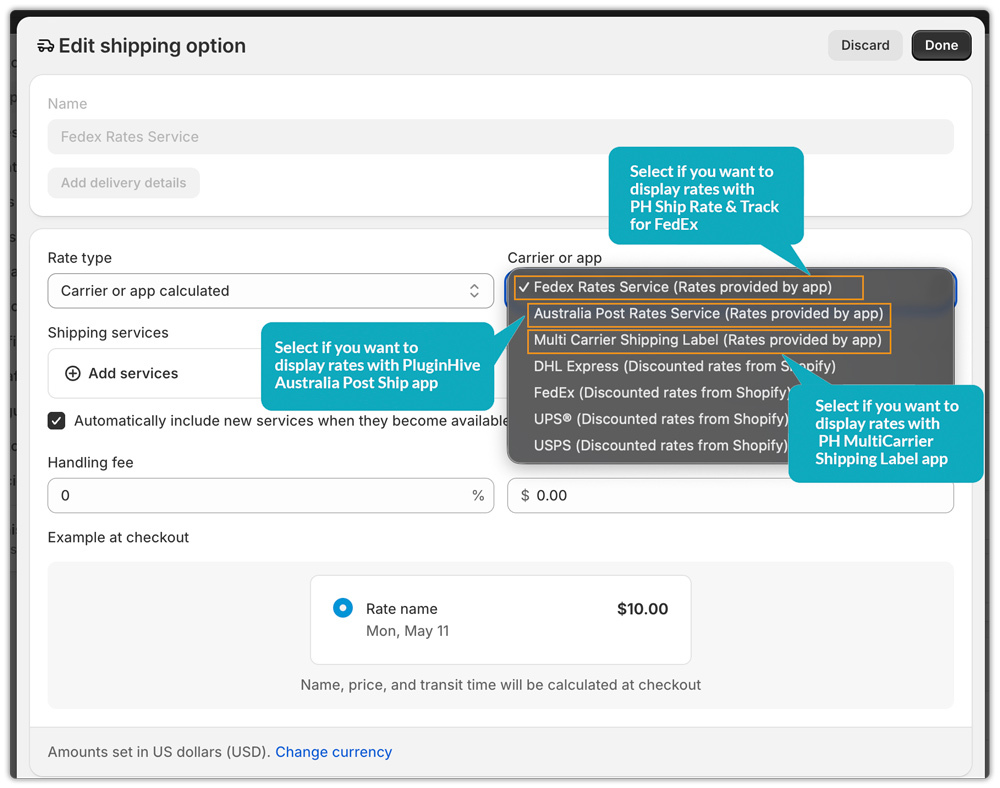
- If you want to display live carrier rates provided by PluginHive apps, select Use “carrier or app calculated rates”. Then choose the rates from the specific app you want to use at checkout.
Setting Up Custom Profile:
- The other method of setting up the profile is custom configuration. For this, all you need to do is click “Add Custom Profile” to create a new shipping configuration.
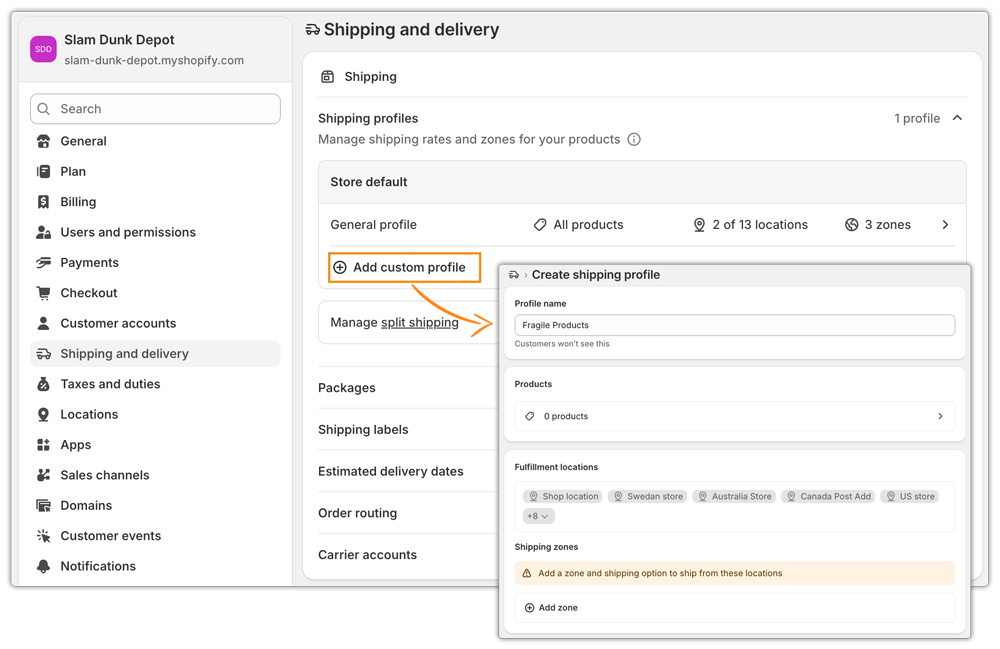
While setting up the profile:
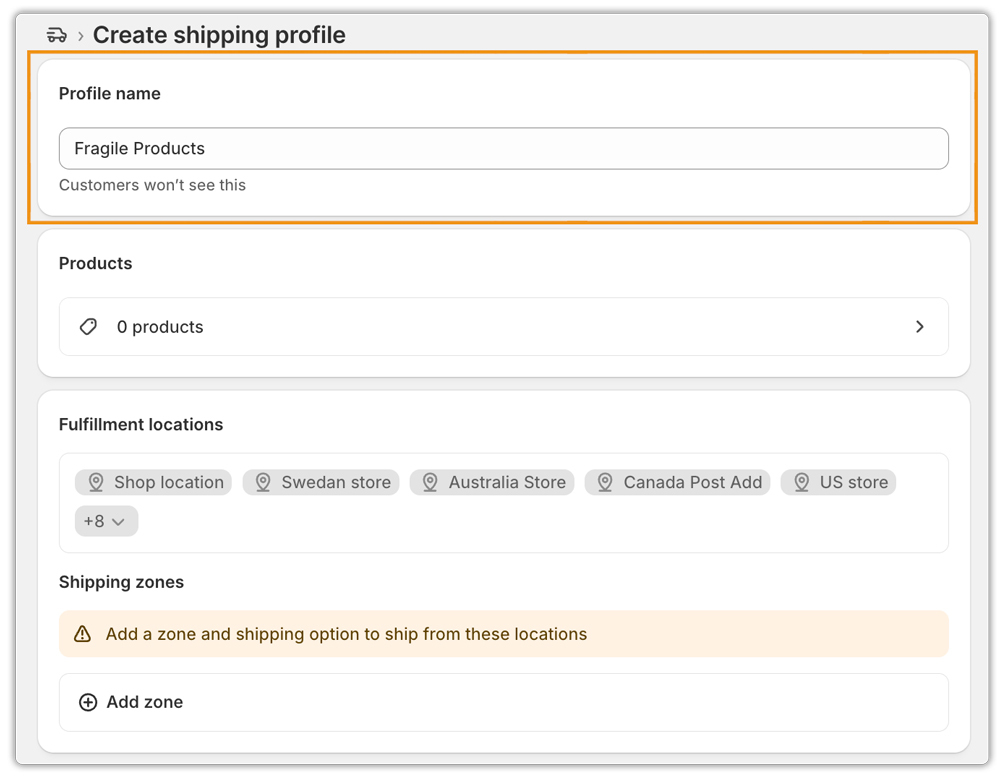
- Enter a profile name.
- Add the products you want to the profile and click on “done.”

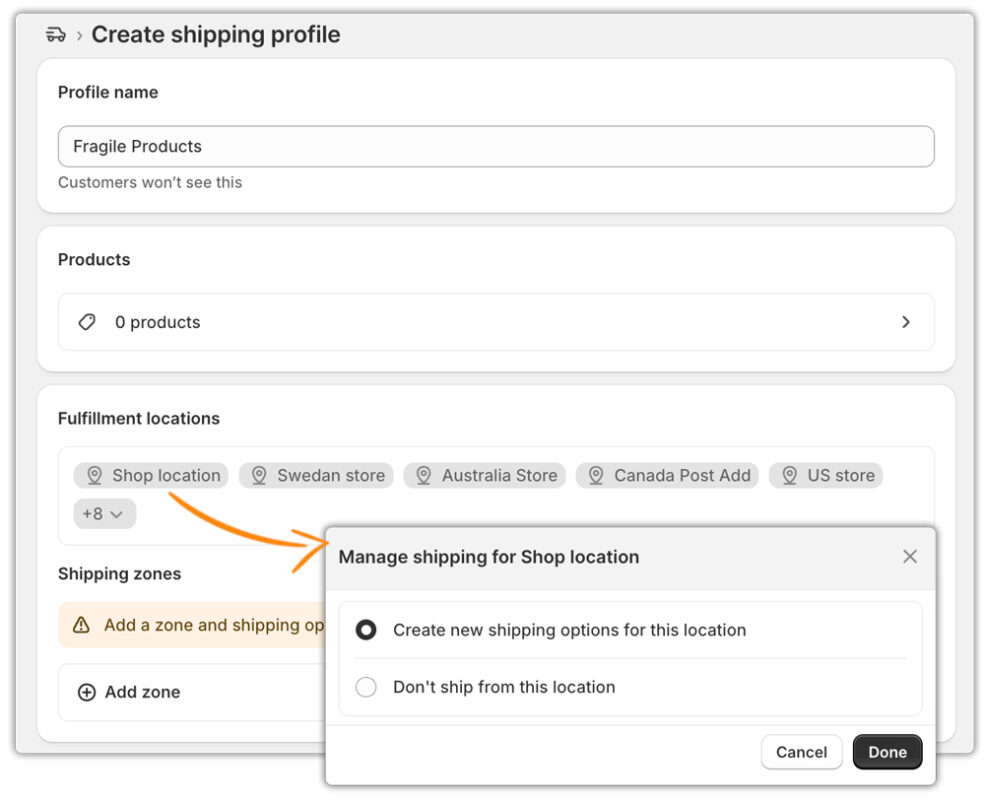
- Configure fulfillment locations; by default, all the warehouses you have will be displayed here. If you don’t want to configure a certain warehouse, click on the warehouse and select “don’t ship from this location.”
- Now, create shipping zones based on countries or regions that you want to ship to for this profile.
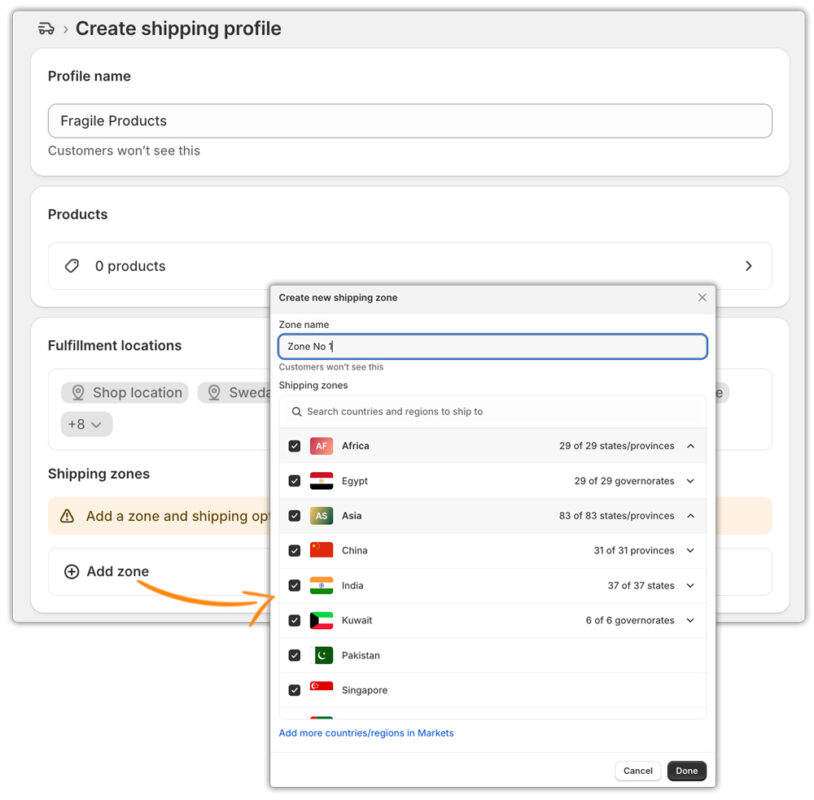
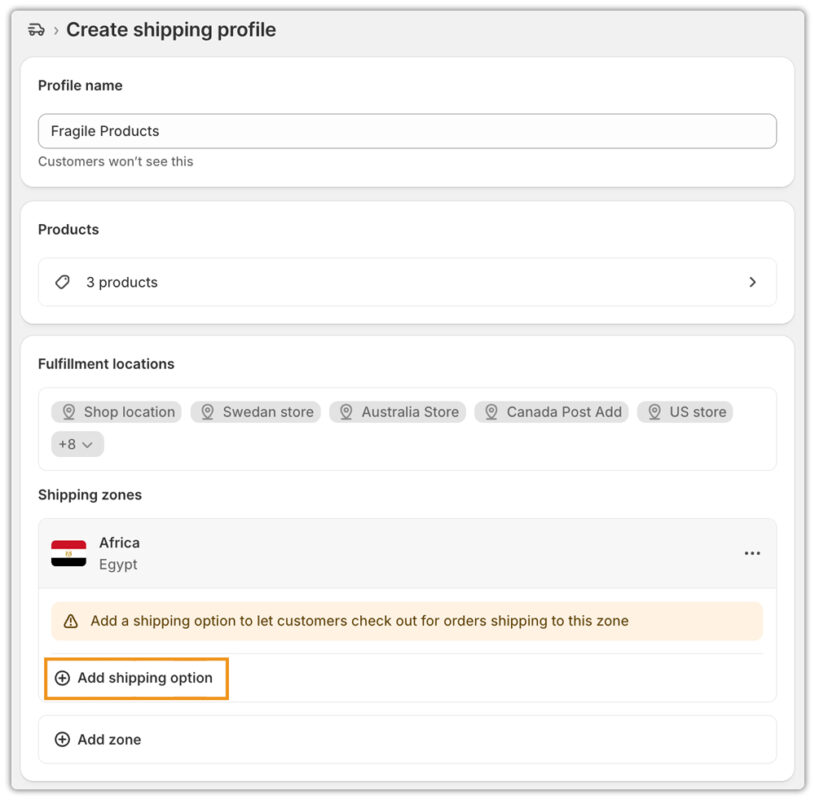
- Now, to display rates for this profile, click the “Add Shipping option”.
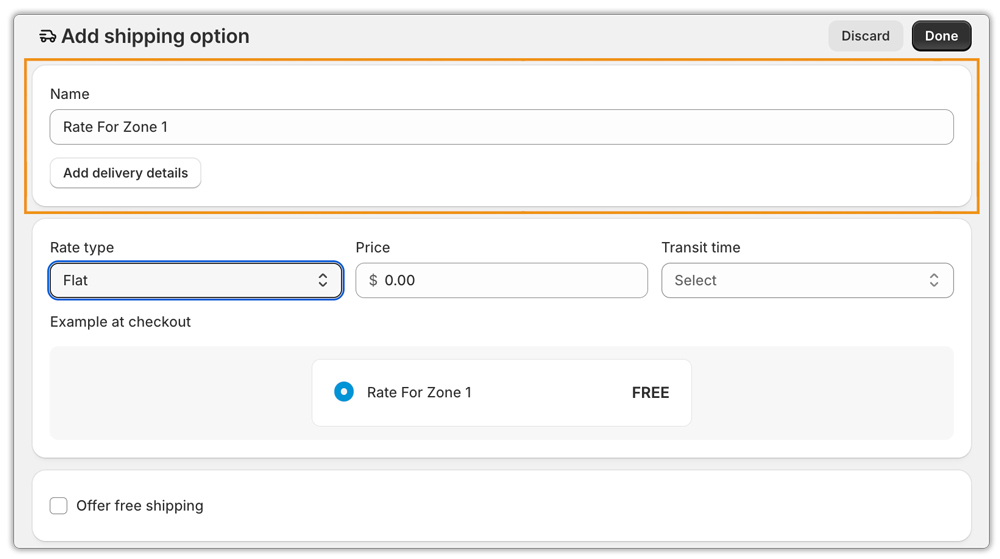
- Here you can give a name to your rates. This is the name that will be displayed at checkout.
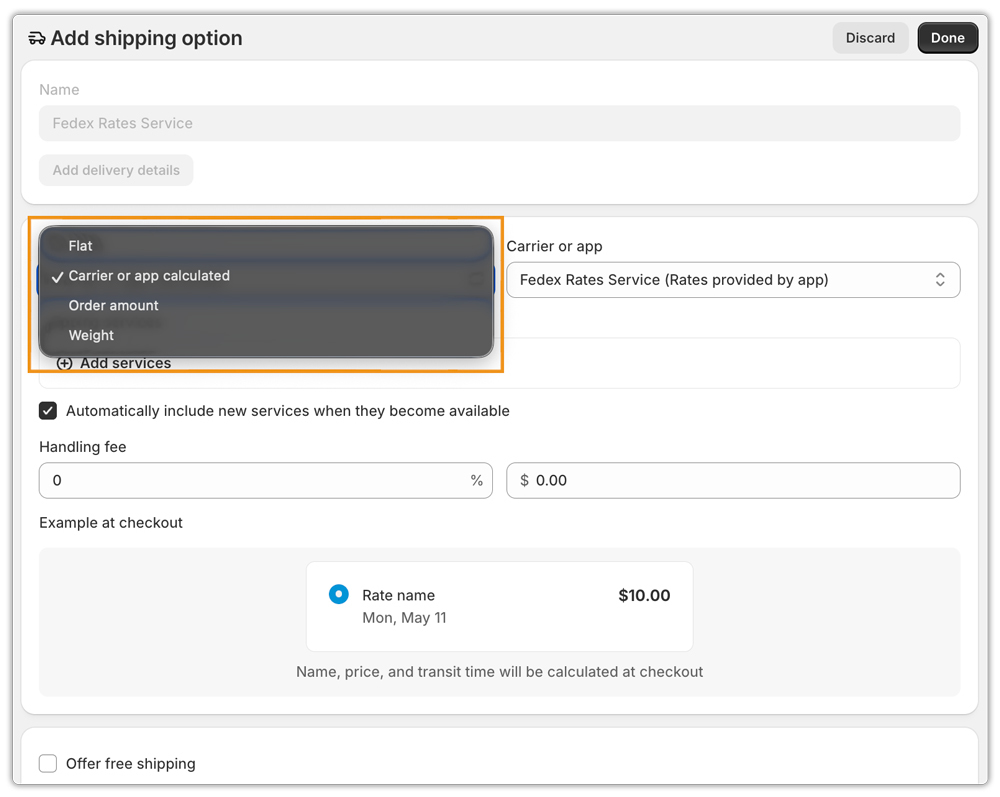
- Also, here, you can select the type of shipping rate you want to display at checkout. Shopify allows you to configure different rate types such as flat rates, carrier-calculated rates, order value-based rates, or weight-based rates, giving you complete flexibility to define shipping prices based on your business requirements.
- Once configured, Shopify automatically displays the appropriate shipping rates at checkout based on the product, shipping zone, fulfillment location, and carrier configuration.
4. Enable the Shopify app(s)
Now, to enable the app for your Shopify Shipping Profile. We will follow the same steps we followed to add rates to the general profile. Head over to Shopify Settings > Shipping & Delivery and click on the profile you wish to select.
- Under the fulfillment location from which you want to ship your products, click “Add Zone” and select the countries or regions you want to deliver.
- After creating the shipping zone, select the zone to which you want to add shipping rates and click “Add shipping option” to configure the shipping method and pricing.
- Then, on the rate type, choose “carrier or app calculated” & select the app for which you want to fetch rates as shown below:
- After you complete this setup, your store displays live shipping rates at checkout using your shipping profile.
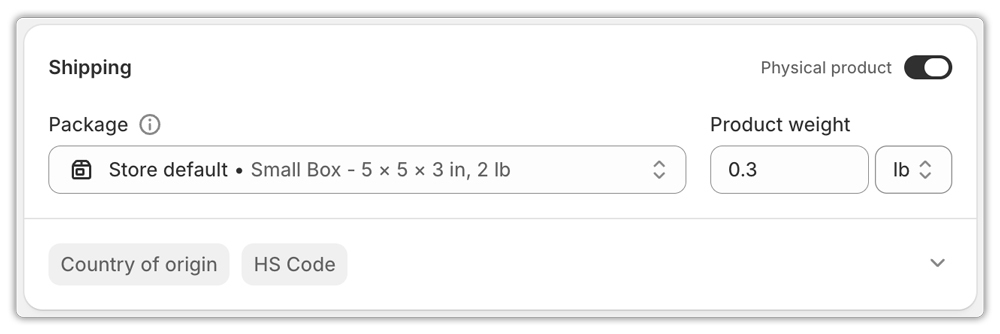
5. Validate product weight
Head over to the Product section and select your products. Now scroll down to check the weight under Shipping as shown below:
6. Verify Shipper Address
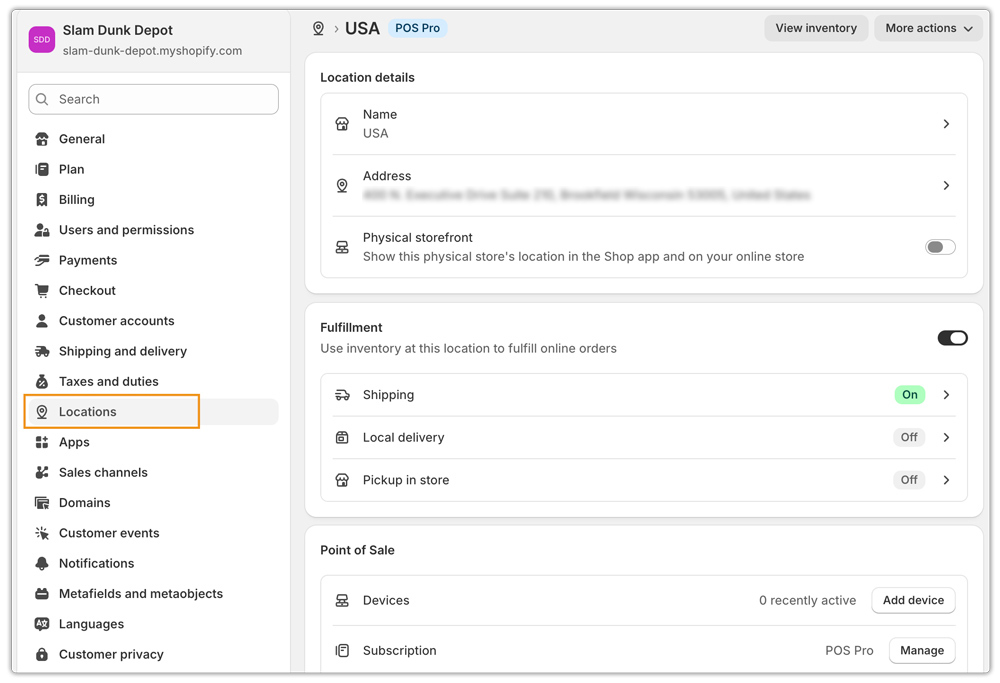
Click on Settings > Locations & verify whether the shipper address is correct (use the same warehouse that is configured in the shipping and delivery section), as shown below:
7. Configure the Shipping App to get Shopify Checkout Rates
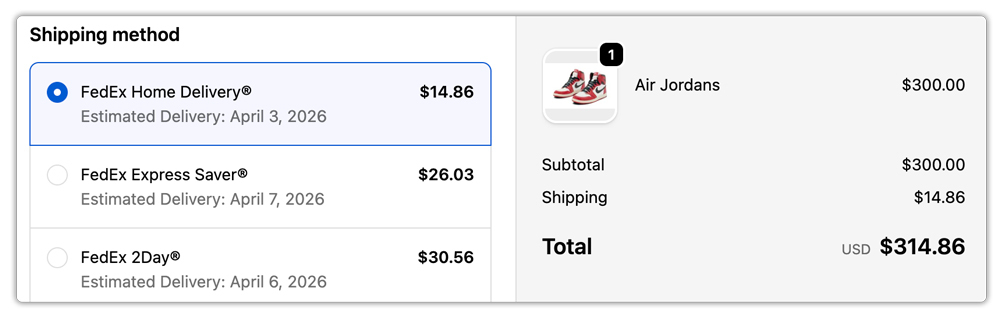
To get FedEx real-time rates on checkout
- Add the FedEx Rates and Services option to your Shopify Shipping & Delivery settings. Once the PH Ship, Rate & Track for FedEx app is properly configured, the app will automatically start displaying FedEx real-time shipping rates at checkout.
- After that, head over to App Settings → Carrier Services within the app and enable the specific FedEx services you want to display to your customers at checkout.
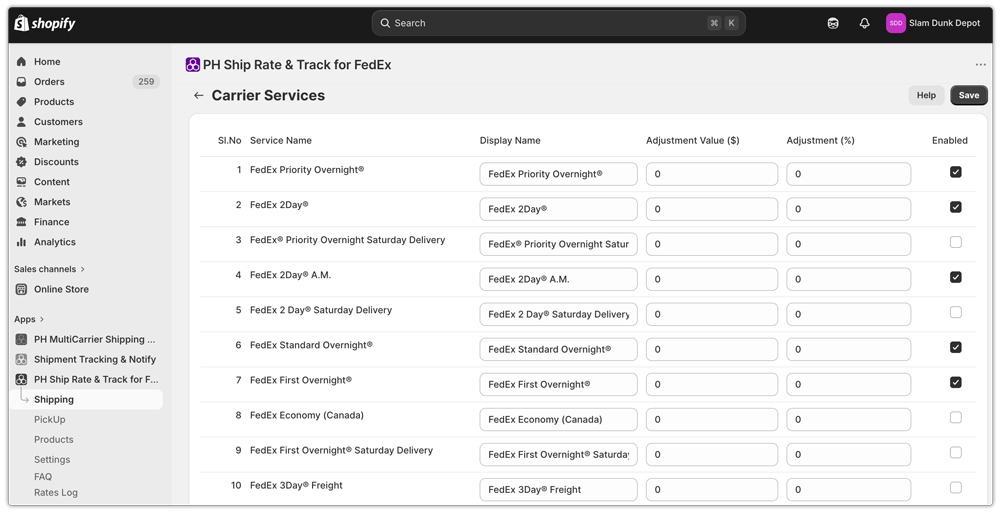
- After enabling it, you can see the FedEx shipping rates at Shopify checkout as shown below.
Follow the link to configure the app correctly within your Shopify store – FedEx Ship Rate & Track Setup
To get Australia Post real-time rates on checkout
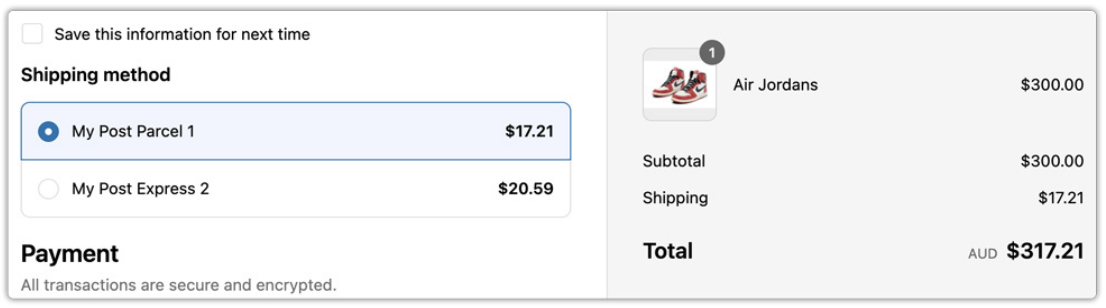
- Add the Australia Post Rates Services option to your Shopify Shipping & Delivery settings. Once the PluginHive Australia Post Ship app is properly configured, the app will automatically start displaying Australia Post real-time shipping rates at checkout.
- After that, head over to App Settings → Carrier Services within the app and enable the specific Australia Post services you want to display to your customers at checkout.
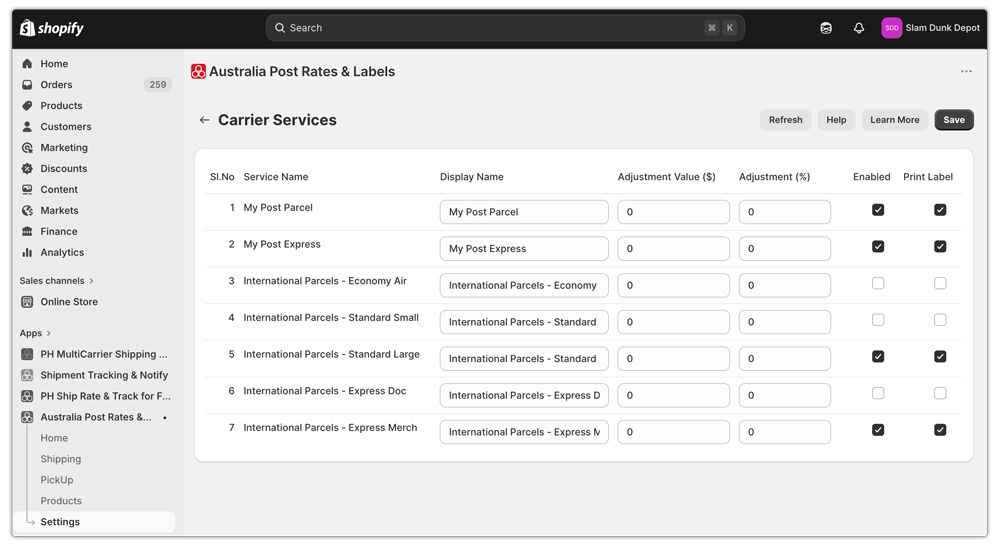
- After enabling, you will be able to see the Australia Post shipping rates at Shopify checkout, as shown below.
Follow the link to configure the app correctly within your Shopify store – Australia Post setup
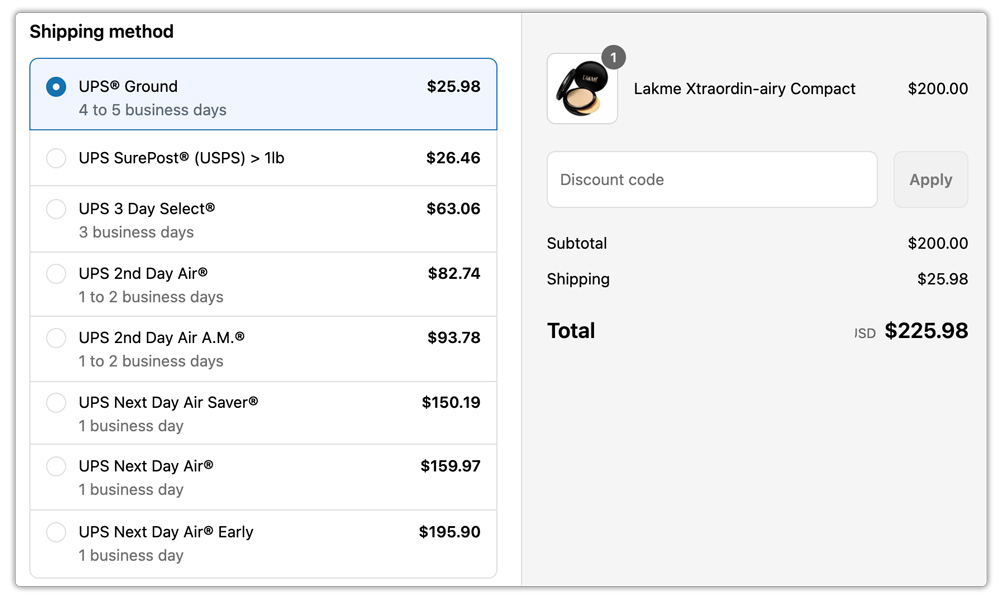
To Get Real-Time rates with the PH Multi-Carrier Shipping Label App
- Add the Multi Carrier Shipping Label Services option to your Shopify Shipping & Delivery settings. Once you properly configure the PH MultiCarrier Shipping Label app, it automatically displays real-time shipping rates at checkout.
- After that, head over to App Settings → Shipping Rates → Carrier Services within the app and enable the specific services you want to display to your customers at checkout.

- After the verification is successfully completed, the shipping rates will be displayed at checkout.
Follow the link to configure the app correctly within your Shopify store: PH Multi-Carrier Shipping Label App Setup
Conclusion
Setting up Shopify carrier-calculated shipping rates allows merchants to display accurate, real-time shipping costs directly at checkout using their own carrier accounts. By properly configuring Shopify shipping profiles, fulfillment locations, shipping zones, product weights, and carrier services, you can create a flexible shipping setup tailored to your business requirements.
Whether you use the PH Ship, Rate & Track for FedEx app, PluginHive Australia Post Ship app, or the PH Multi-Carrier Shipping Label app, Shopify’s carrier-calculated shipping feature helps automate rate calculation, improve checkout transparency, and reduce manual shipping work.
Once configured correctly, your customers will see live carrier shipping rates based on the products in their cart, shipping destination, fulfillment location, and selected shipping services, helping you deliver a more accurate and reliable checkout experience.