


WooCommerce Order Fulfilment Made Easy with Touchless Label Printing
In this article, we’ll walk you through on how to set up Touchless Label Printing using the QZ Tray and WooCommerce Shipping Services plugin on both Windows and Mac OS.
This powerful feature allows you to automatically print shipping labels and fulfill orders in a single click, streamlining your fulfillment process and saving valuable time. Whether you’re shipping domestically or internationally, this setup works seamlessly with carriers like FedEx, UPS, DHL Express, USPS, and Amazon Shipping.
On This Page
- Why Automate Shipping Label Printing?
- Configure QZ Tray & Printing Labels on Windows
- Configu QZ Tray & Printing Labels on Mac
- Real-World Use Case
- Ready to Streamline?
Why Automate Shipping Label Printing?
- Fully Automated Workflow: Instantly generates, prints, and fulfills orders in one seamless step, eliminating manual effort and saving time.
- Faster Order Processing: Speeds up fulfillment operations, making it ideal for handling high order volumes efficiently.
- Reduced Risk of Errors: Automation ensures accuracy in label generation and order fulfillment, minimizing common manual mistakes.
- Improved Team Efficiency: Frees up staff from repetitive tasks, allowing them to focus on customer service and business growth.
- Seamless Thermal Printer Integration: Works directly with your default thermal printer via QZ Tray, ensuring consistent and reliable label printing.
Configuring QZ Tray & Printing Labels on Windows with WooCommerce Shipping Services plugin
Prerequisite:
- Install PluginHive’s WooCommerce Shipping Services plugin on your WooCommerce store.
- Ensure your thermal printer is properly configured and set as the default printer on your Windows system.

Follow the steps below to set up automated (touchless) label printing on your Windows system using QZ Tray and the Woocommerce Shipping Services (WSS) plugin:
Step 1: Download and Install QZ Tray
- Visit the Official QZ Tray website and download the installer compatible with your Windows system.

- Run the downloaded file and follow the on-screen installation instructions.
- During installation, grant all requested permissions to ensure QZ Tray functions correctly.
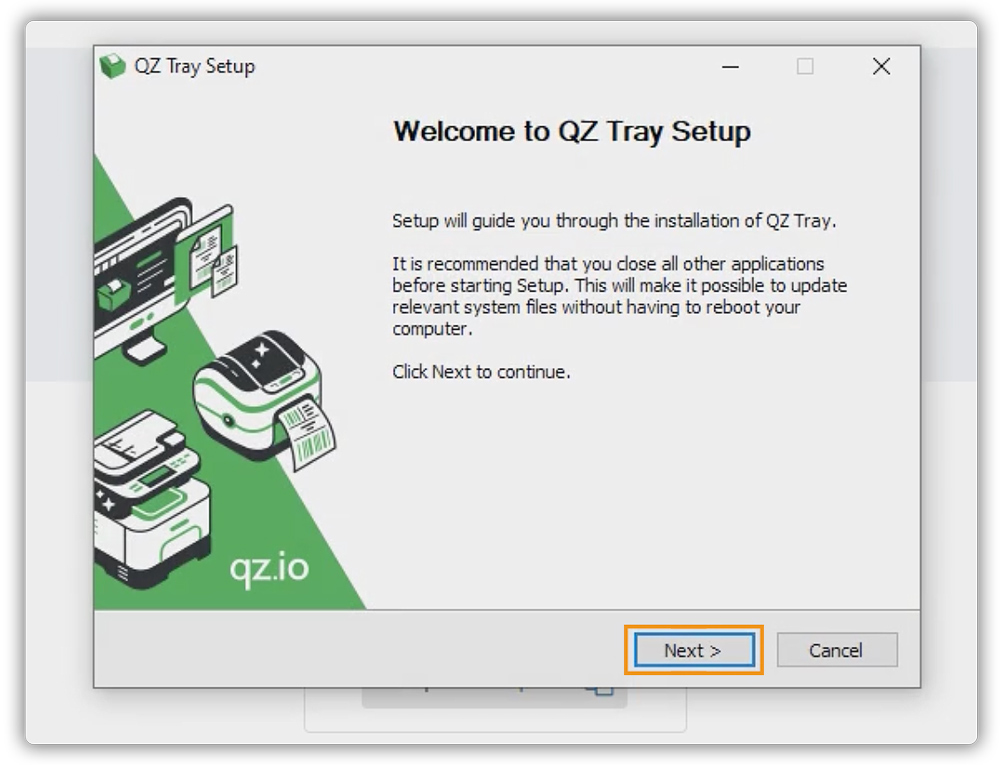
Step 2: Generate Certificate and Key from the WooCommerce Shipping Services plugin
- Log in to your WooCommerce store and open the WooCommerce Shipping Services plugin.
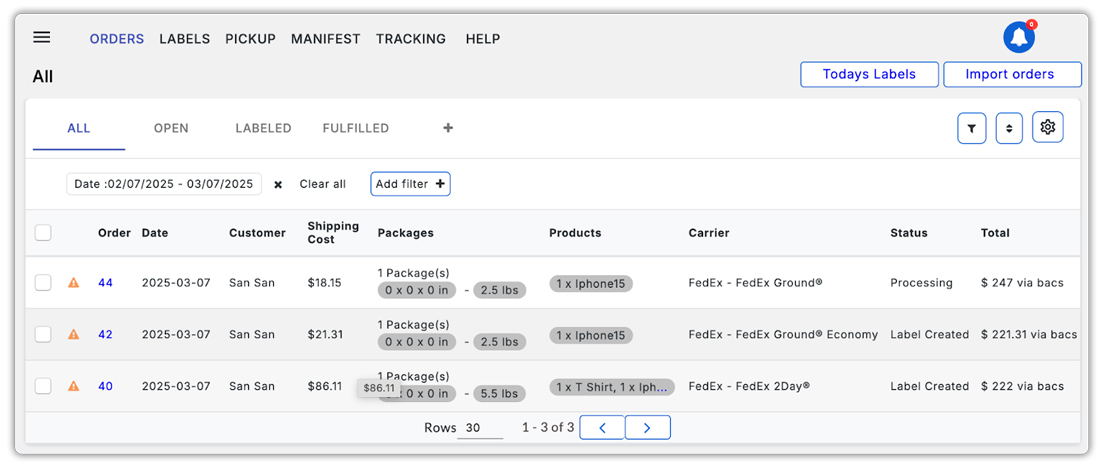
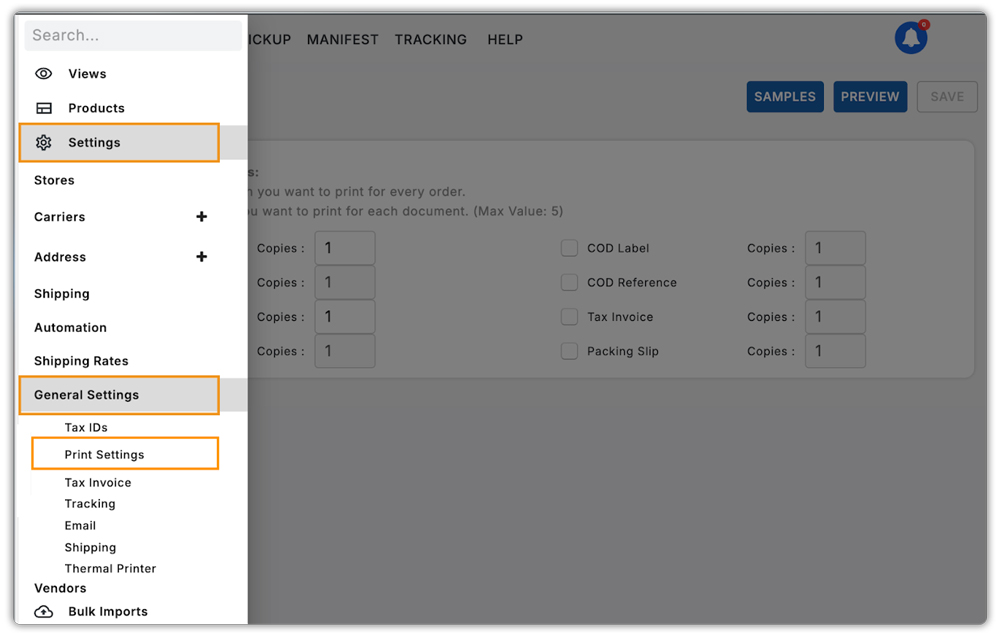
- Navigate to: Settings > General Settings > Print Settings (Alternatively, you can use the search bar to find “Print Settings”)
- Enable the Touchless Printing option and click Save.
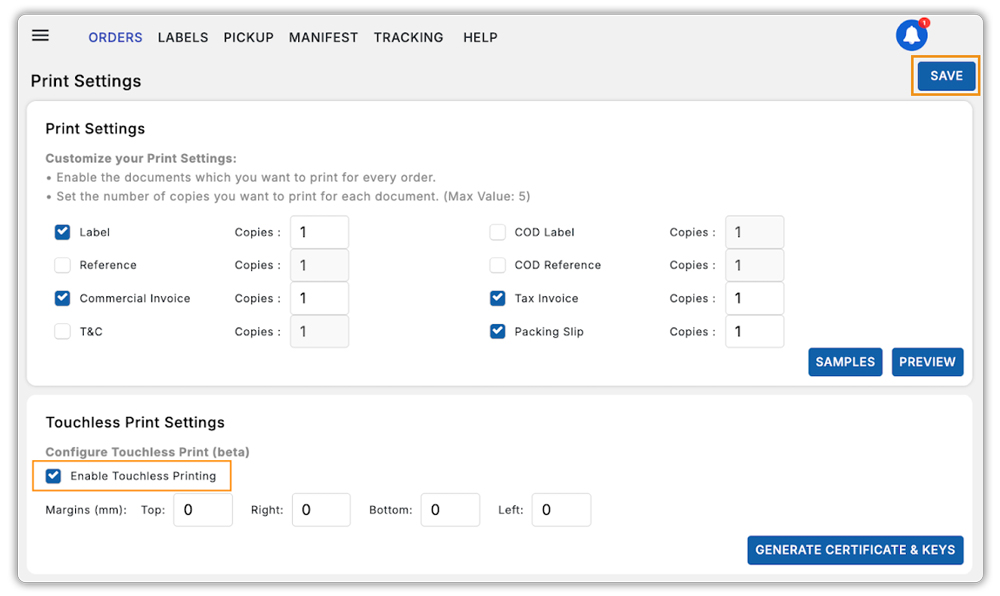
- Click on Generate Certificate and Key to download a ZIP file containing your digital certificate and private key.

Step 3: Add the WooCommerce Shipping Service Digital Certificate to QZ Tray
- Locate the downloaded ZIP file (usually in your Downloads folder) and extract its contents. The extracted folder will contain the following files:
- Digital-certificate.txt
- private-key.pem

- Go to your Windows System Tray (bottom-right corner of the taskbar), right-click on the QZ Tray icon.
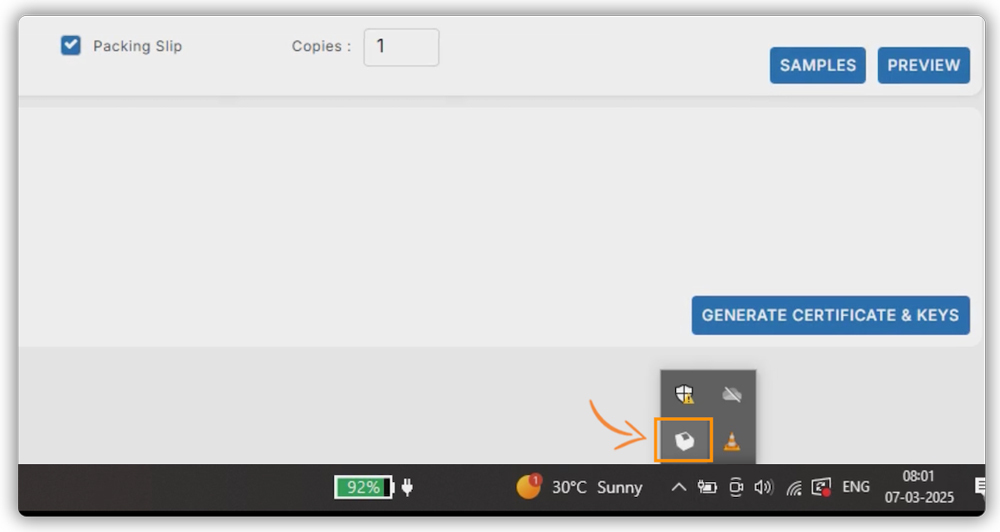
- Select Advanced > Site Manager.

- In the Site Manager window, click the “+” icon to add a new certificate.
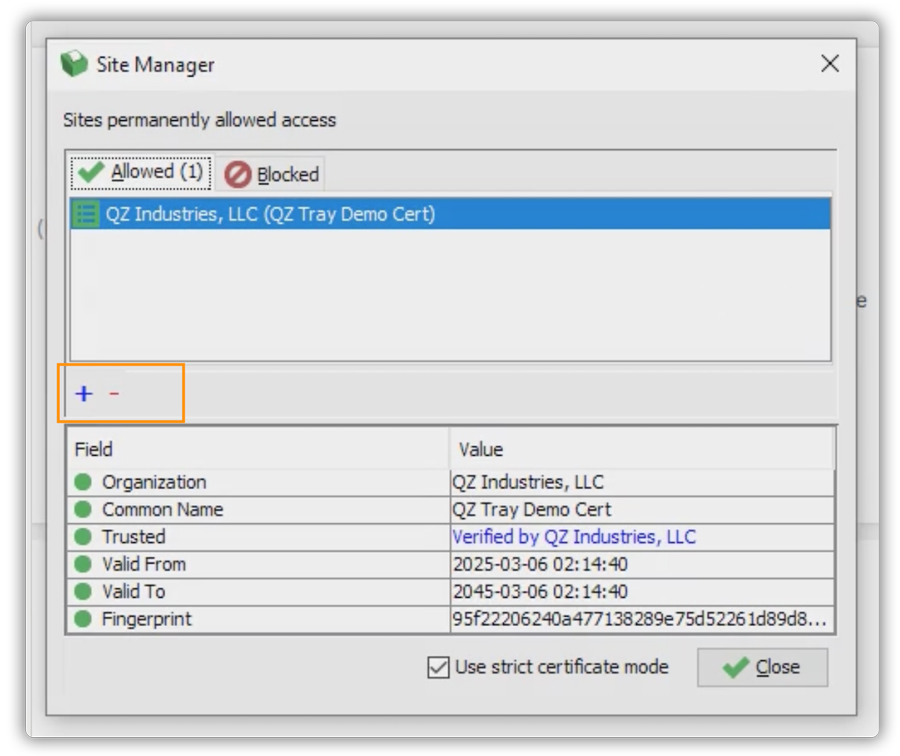
- Click Browse, navigate to the extracted folder, and select digital-certificate.txt.

- When prompted, grant all necessary permissions to complete the setup.

- Once added, you should see PluginHive listed in the QZ Tray Site Manager, confirming the certificate has been successfully installed.

Step 4: Shipping Label Printing from WSS Using QZ Tray
- Open the WooCommerce Shipping Services(WSS) plugin in your WooCommerce Store and go to the Orders section.
- Click on the desired Order Number to open the Order Summary Page.

- Review the order details and update the shipping information if necessary.

- Click on the Generate Label & Fulfil option.
- The system will automatically:
- Generate the shipping label,
- Print the label using your default printer,
- And fulfills the order, all in a single step, as shown below.
Touchless Label Printing works only for printing a label for one order at a time and can only be used when you use the “Generate Label & Fulfill” button available on the Order Summary page.

Configuring QZ Tray & Printing Labels on Mac with WooCommerce Shipping Services plugin
Similar to the configuration on Windows, you can set it up on Mac as well. Follow the instructions below to complete the setup.
Prerequisite:
- Install PluginHive’s WooCommerce Shipping Services plugin on your WooCommerce store.
- Make sure your thermal printer is installed, working correctly, and set as the default printer on your Mac.

Follow the steps below to set up automated (touchless) label printing on your Mac using QZ Tray and the WooCommerce Shipping Services (WSS) plugin:
Step 1: Download and Installation QZ Tray (Mac)
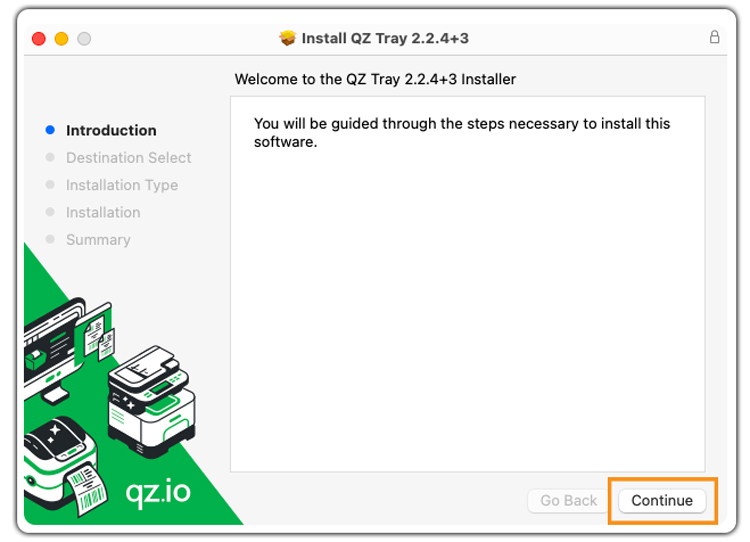
- Go to the Official QZ Tray website and download the installer compatible with your macOS version.

- Run the installer and follow the setup wizard.
- During installation, grant the required permissions so QZ Tray can function without issues.
Step 2: Get the Certificate and Key from the WooCommerce Shipping Services plugin
- Log in to your WooCommerce admin panel and open the WooCommerce Shipping Services plugin.
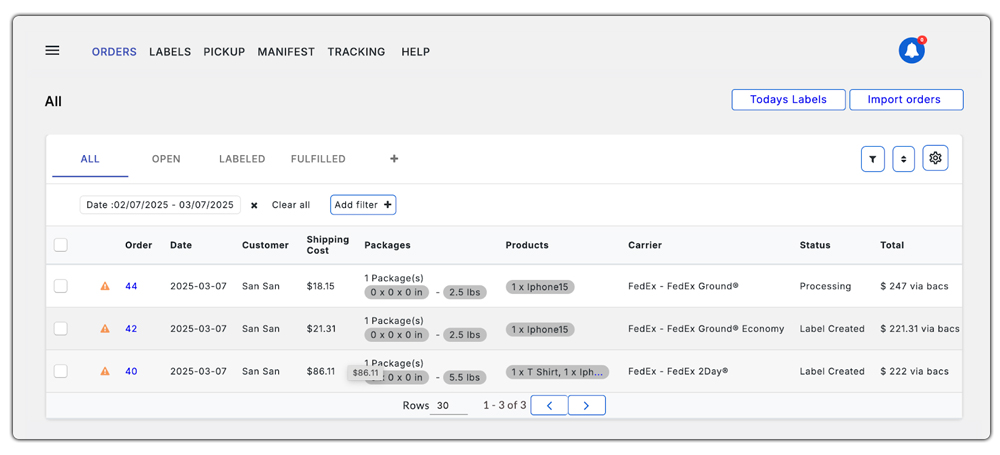
- Navigate to: Settings > General Settings > Print Settings (Alternatively, you can use the search bar to find “Print Settings”)

- Enable the Touchless Printing option and click Save.

- Click on Generate Certificate and Key to download a ZIP file containing your digital certificate and private key.

Step 3: Import the digital certificate into QZ Tray
- Locate and unzip the downloaded file (found in your Downloads folder by default). The extracted folder will contain the following files:
- Digital-certificate.txt
- private-key.pem

- Open the QZ Tray menu from your macOS menu bar.
- Right-click the QZ Tray icon in the Mac menu bar.
- Go to Advanced > Site Manager.

- In the Site Manager window, click the “+” icon to add a new certificate.

- Browse to the unzipped folder and select digital-certificate.txt.

- When prompted, grant all necessary permissions to complete the setup.
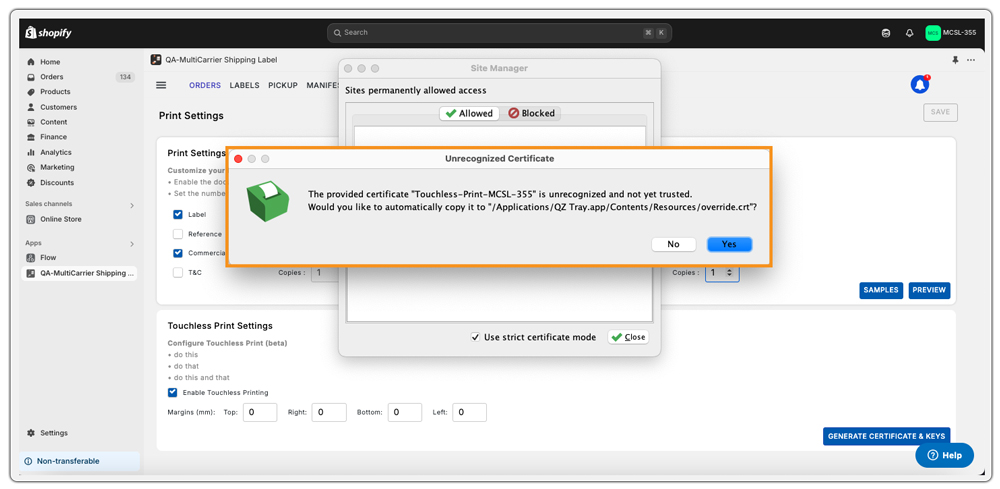
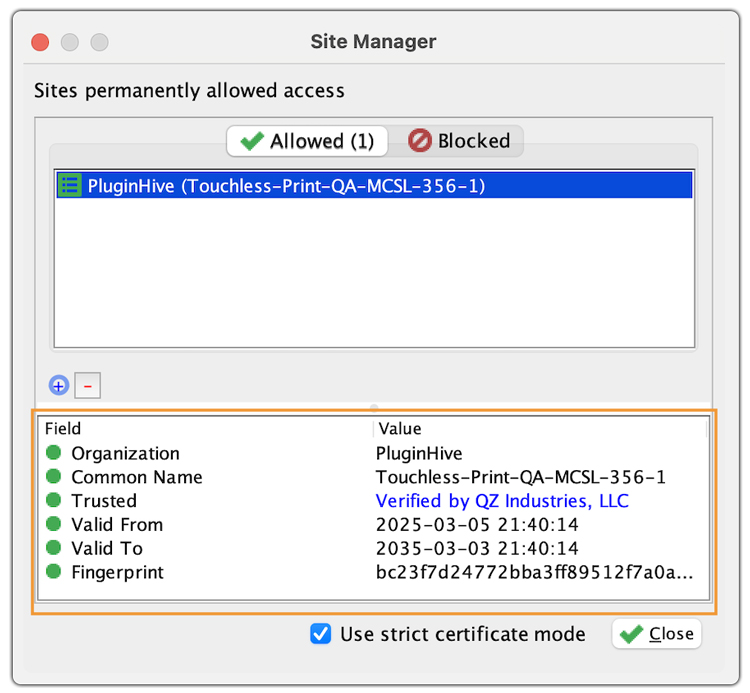
- Once complete, you’ll see PluginHive listed in the QZ Tray Site Manager, confirming the certificate is active.
Step 4: Print Shipping Labels from WSS Using QZ Tray
- Open the WooCommerce Shipping Services(WSS) plugin in your WooCommerce Store and go to the Orders tab.
- Click on the desired Order Number to open the Order Summary Page.

- Review shipping information and make updates if needed.

- Click on the Generate Label & Fulfil option.
- The system will automatically:
- Create the shipping label,
- Print the label using your default printer,
- And automatically fulfils the order, all in a single step, as shown below.
Touchless Label Printing works only for printing a label for one order at a time and can only be used when you use the “Generate Label & Fulfill” button available on the Order Summary page.

Real-World Use Case: Barcode-Based Touchless Fulfilment
How a WooCommerce Store Simplified Order Processing
A WooCommerce store selling specialized communication and outdoor equipment had a unique fulfillment requirement. Each WooCommerce Order ID was printed as a barcode on the package, and the warehouse team needed a fast, error-free workflow that allowed them to scan a barcode and complete the entire shipping process with minimal interaction.
The goal was simple: scanning the barcode should instantly open the correct WooCommerce order, without manual searching, and allow the order to be fulfilled in a single action.
How Touchless Printing Solves This
To achieve this, PluginHive implemented a tailored enhancement using the WooCommerce Shipping Services plugin with Touchless Label Printing. An Order Search function was introduced that works seamlessly with the store’s barcode-scanning workflow.
Here’s how the process works:
- Each package is labelled with a barcode representing a single WooCommerce Order ID.
- When the barcode is scanned, the Order Summary page for that specific order automatically opens in the WooCommerce Shipping Services plugin.
- The warehouse staff simply clicks “Generate Label & Fulfill.”
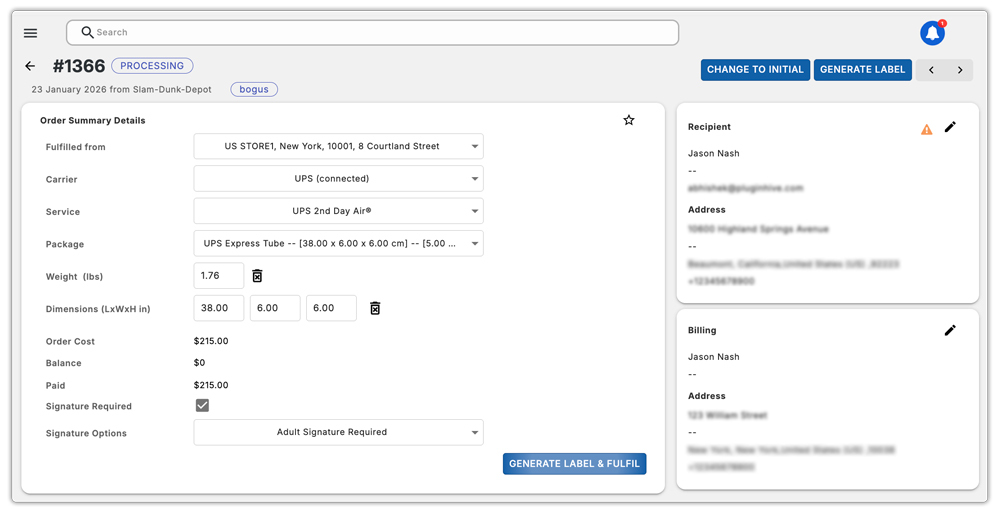
With one click, the system instantly:
- Generates the shipping label
- Marks the WooCommerce order as fulfilled
- Sends the label directly to the printer
All of this happens seamlessly, eliminating manual steps, reducing handling time, and minimizing fulfillment errors.
For WooCommerce stores handling high order volumes, Touchless Label Printing turns barcode scanning into a one-click fulfillment process, speeding up operations, reducing errors, and significantly improving warehouse efficiency.
Ready to Streamline?
By configuring Touchless Shipping Label Printing with QZ Tray and the WooCommerce Shipping Services plugin, WooCommerce merchants not only save time but also improve their shipping process. With just a single click, you can generate the label, print it instantly, and fulfil the order, reducing manual effort, minimizing errors, and accelerating order processing. It’s a simple yet powerful way to boost efficiency and focus on growing your business.