
Setting Up WooCommerce Zoom Meetings with Bookings Plugin
The Zoom Integration with Bookings and Appointments for WooCommerce helps you automatically create meeting links when customers make a booking. Ideal for online classes, coaching sessions, consultations, and webinars, it removes the need for manual scheduling.
In this guide, we’ll show you how to integrate the Zoom Integration Addon with the Bookings and Appointments for WooCommerce.
In This Guide
- Prerequisites
- Install & Activate the Zoom Integration Addon
- Activate the Plugin License
- Access to Zoom Plugin Settings for Zoom Integration
- How to Obtain Zoom API Credentials
- Connect Your WooCommerce Store to Zoom
- Configure Zoom Meeting Settings
- Customer Booking Workflow
- Final Thoughts
1. Prerequisites
Before you set up the plugin, ensure you have:
- WooCommerce is installed and activated.
- Bookings and Appointments for WooCommerce Plugin (or a compatible booking plugin).
- A Zoom account (Pro or higher is recommended for longer meeting durations).
2. Install & Activate Zoom Integration Addon
- Download the plugin ZIP file from your PluginHive account and then go to WordPress Dashboard → Plugins → Add New
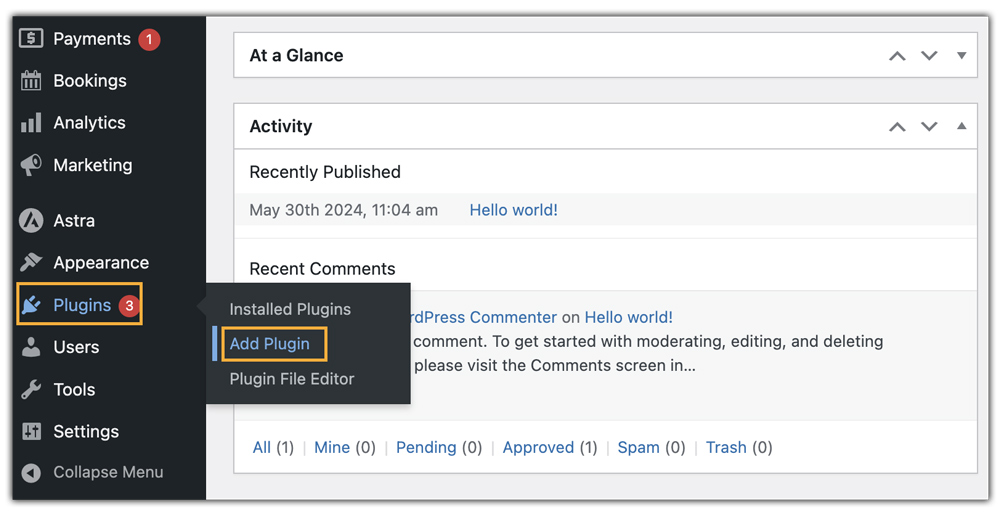
- Click Upload Plugin to upload the Zoom meeting plugin.

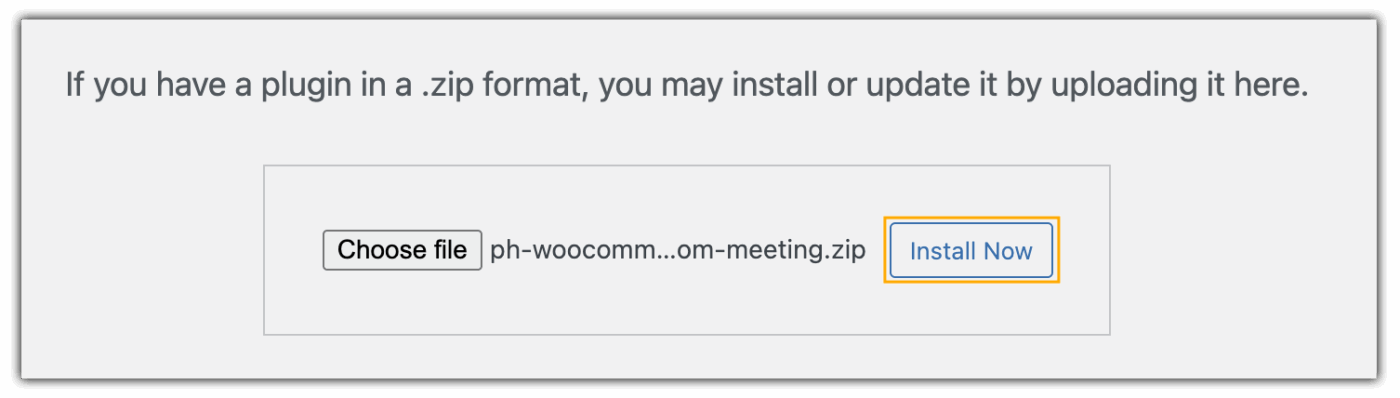
- After uploading the plugin zip, click Install Now.
- Once installed, click Activate Plugin.
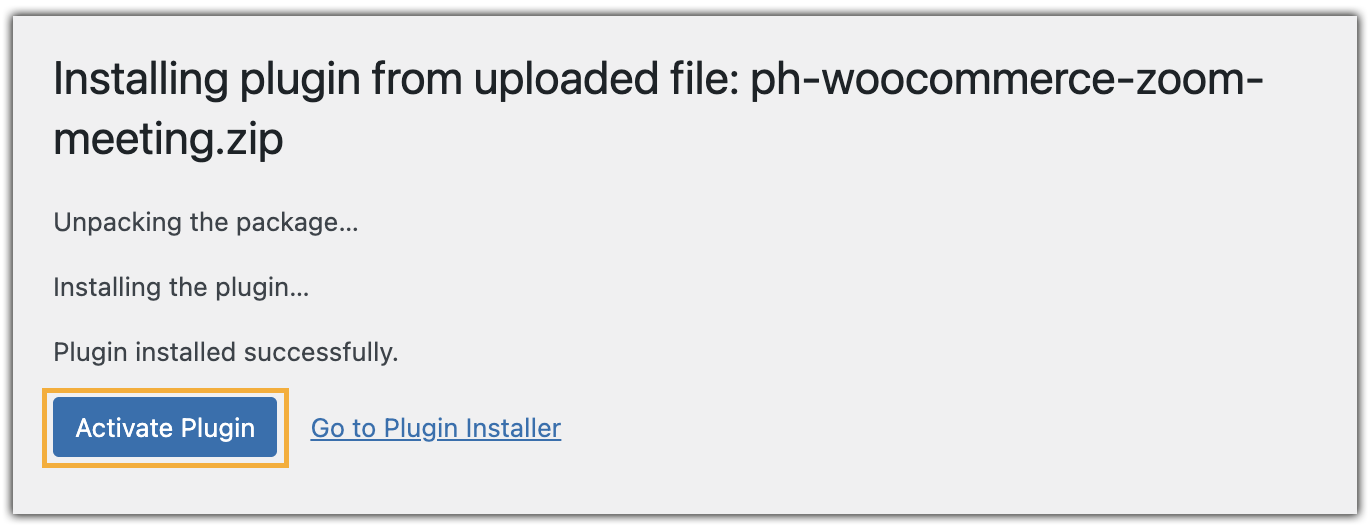
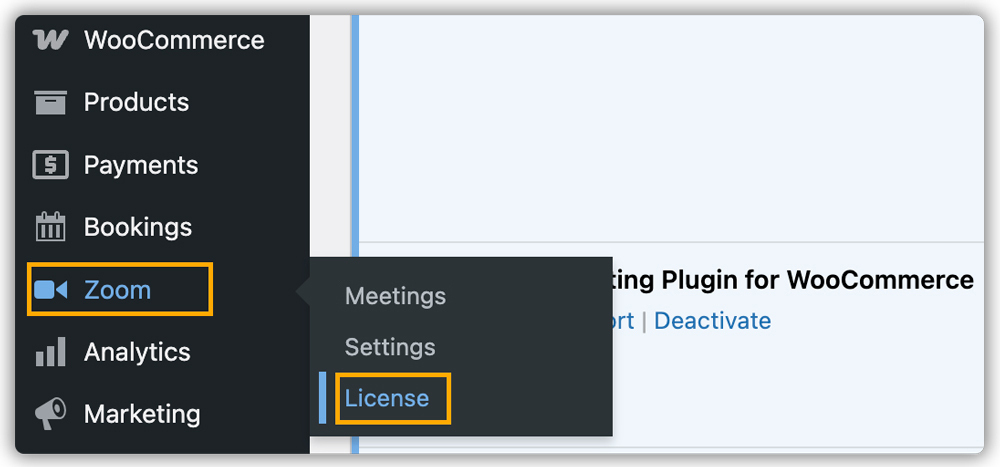
- You will now see a Zoom menu in your WordPress dashboard.
3. Activate the Plugin License
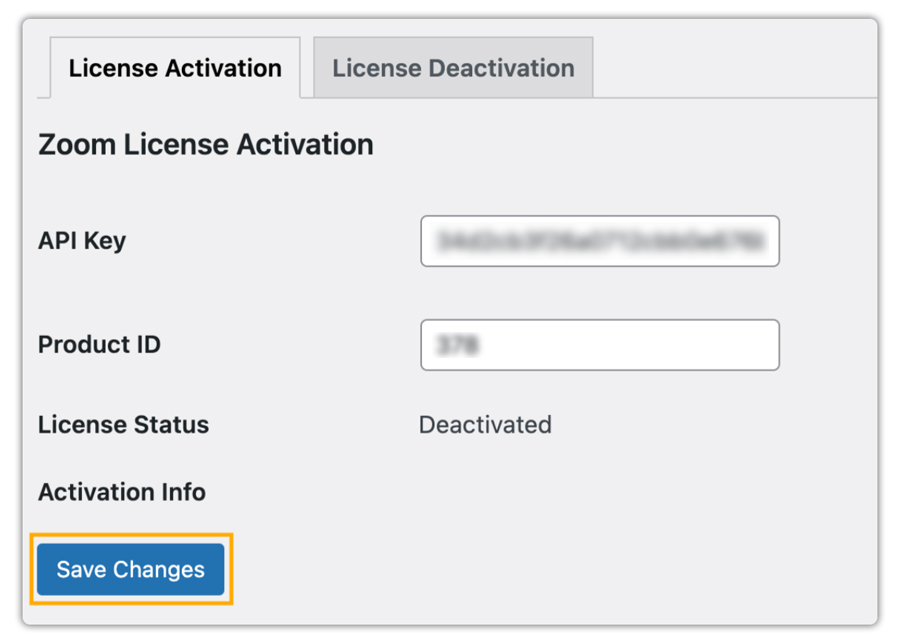
To activate the license key, you need to enter the Product Order API Key and the Product ID that you received upon purchase. You can obtain the API Key and Product ID from the API KEYS section under My Account in PluginHive.
Now, navigate to License under the Zoom Settings option.
Next, enter your API Key and Product ID credentials, click Save Changes, and your API Key Status will be activated.
4. Access to Zoom Plugin Settings for Zoom Integration
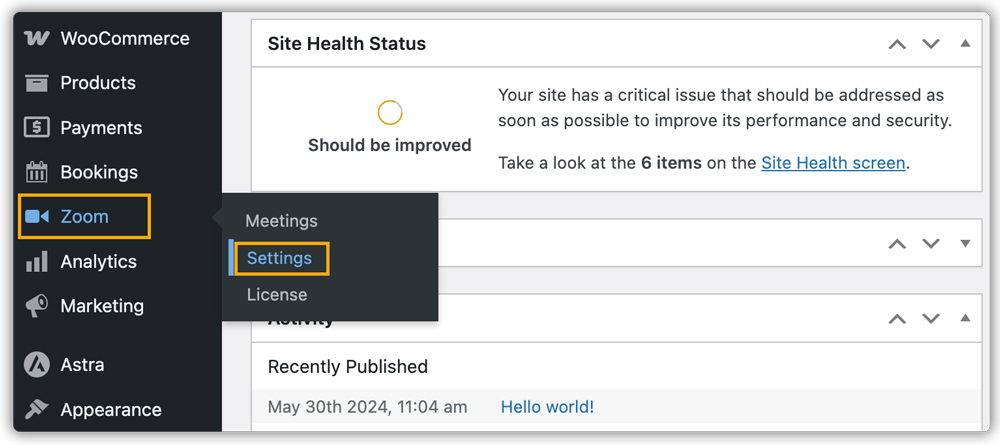
- To access the Zoom meeting plugin settings, navigate to Zoom –> Settings.
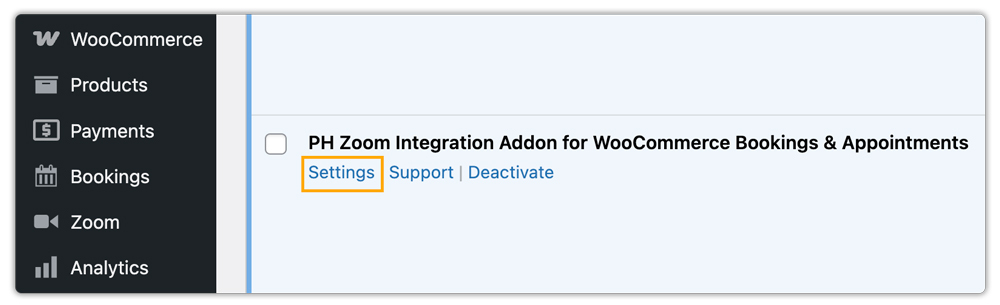
- Or, access the setting via the Settings option available under the PH Zoom Integration Addon for WooCommerce Bookings & Appointments.
Here, you will have to enter your Zoom API credentials, such as OAuth Account ID, OAuth Client ID, and OAuth Client Secret from your Zoom account.
5. How to Obtain Zoom API Credentials
To integrate with Zoom, you’ll need Server-to-Server OAuth API credentials. Follow the steps below to set them up.
- Sign in to Your Zoom Account
Go to the Zoom App Marketplace. And sign in with your Zoom account. If you don’t have one, create a free account first.
- Create a Server-to-Server OAuth App
On the Marketplace, click Develop –> Build App.

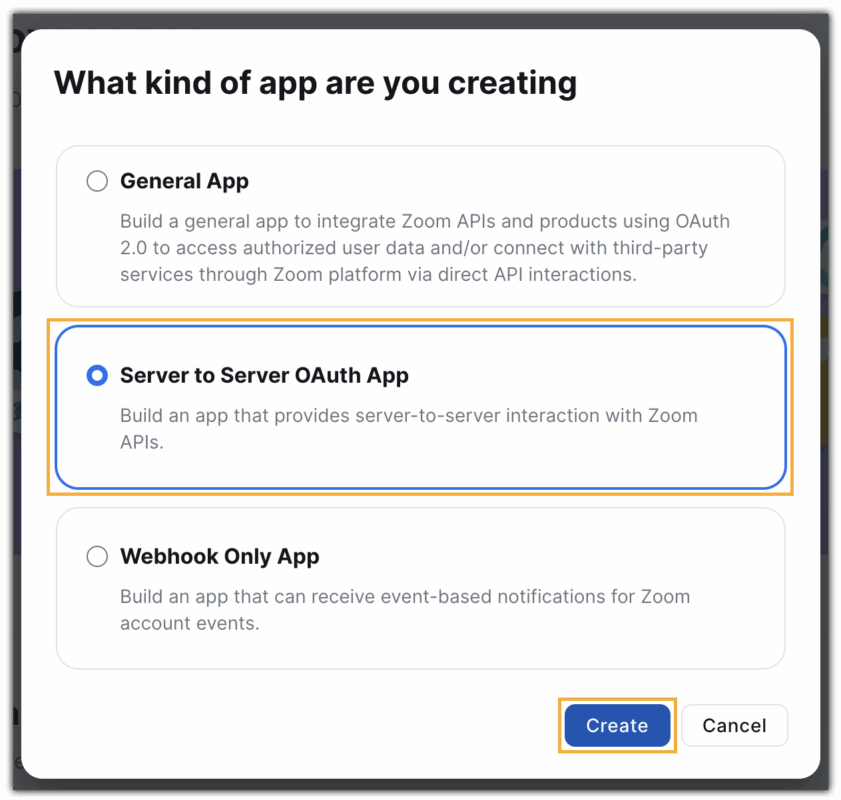
In the pop-up, select Server-to-Server OAuth and click Create.
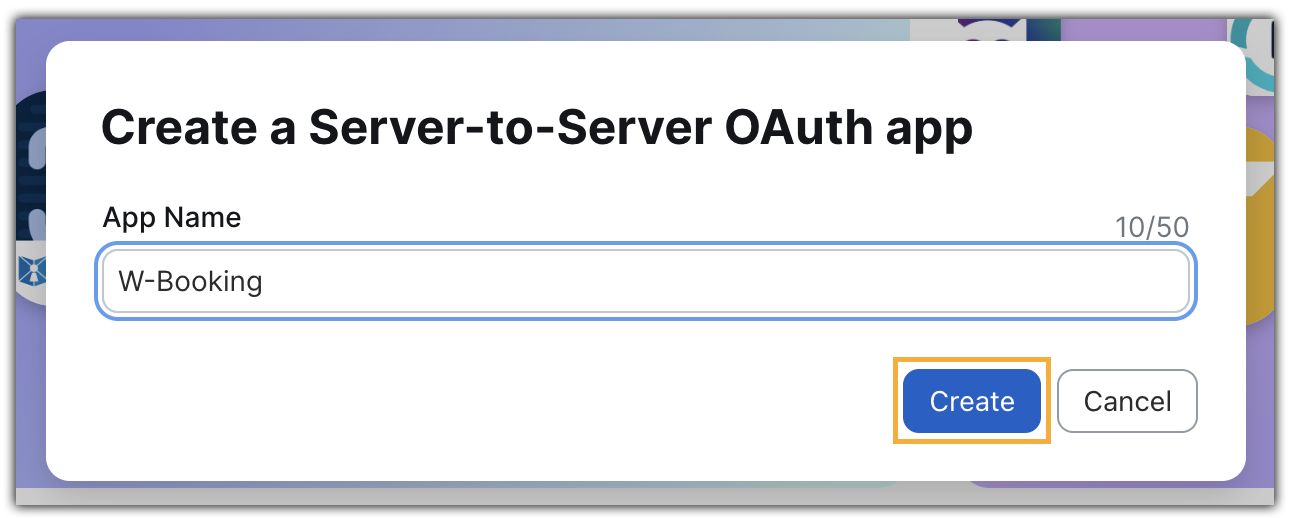
Enter a name for your app and click Create again.
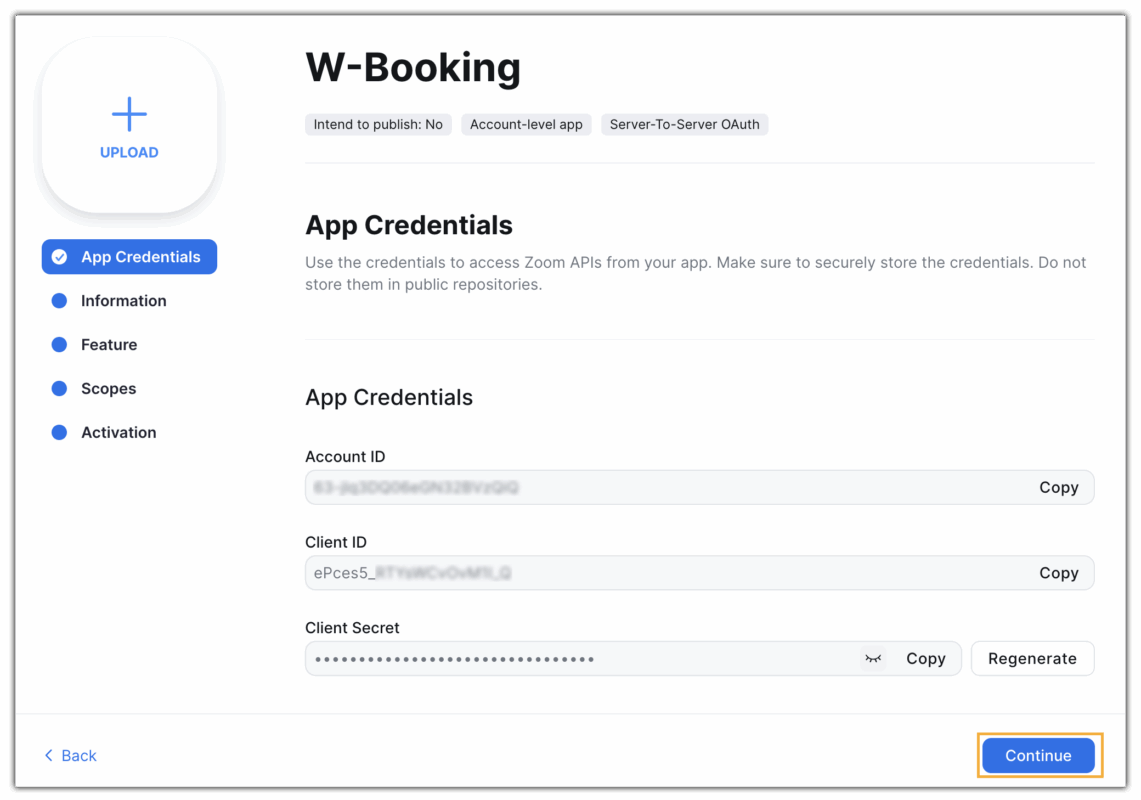
Your API credentials (Account ID, Client ID, Client Secret) will now be generated in the App Credentials section. Click Continue to go to the Information page.
- Fill in the App Information
Complete the required fields, such as the company name, app details, developer contact info, and click on Continue.

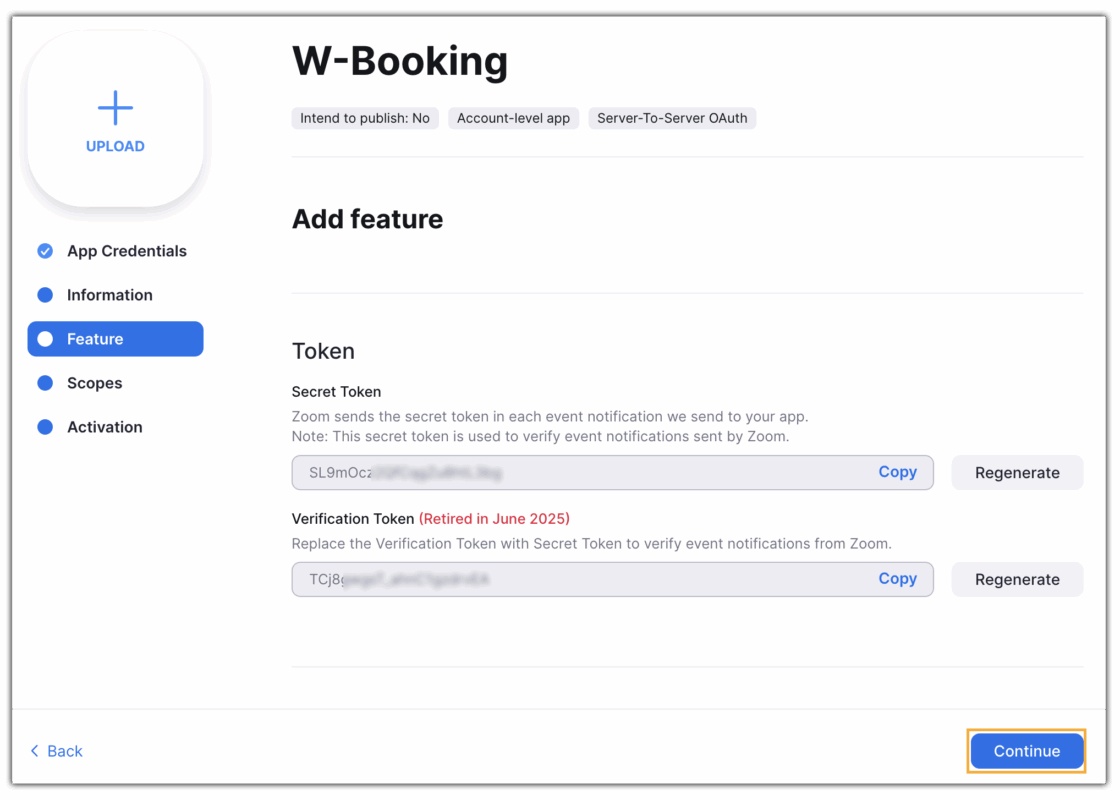
You can skip the Feature step.
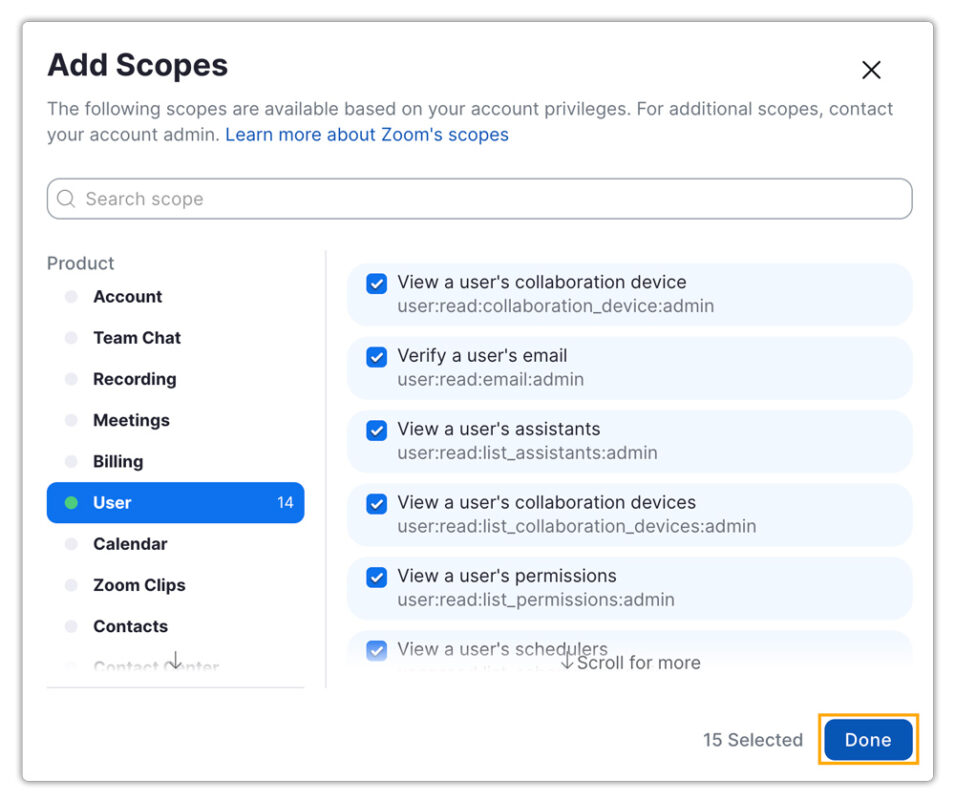
- Add Required Scopes
Go to the Scopes tab and click Add Scopes. You can use the search bar to find the needed permissions quickly.

To ensure seamless integration between the Zoom plugin and the Booking & Appointment plugin in WooCommerce, make sure to add all of the following scopes:
| Necessary Scopes |
|---|
| user:read:list_users:admin |
| user:write:user:admin |
| user:read:user:admin |
| user:update:user:admin |
| user:delete:user:admin |
| user:update:status:admin |
| user:update:password:admin |
| user:read:list_assistants:admin |
| user:write:assistant:admin |
| user:delete:assistant:admin |
| user:write:profile_picture:admin |
| user:read:token:admin |
| user:read:zak:admin |
| user:delete:token:admin |
| user:read:list_permissions:admin |
| user:read:list_schedulers:admin |
| user:delete:scheduler:admin |
| user:update:email:admin |
| user:read:email:admin |
| user:read:pm_room:admin |
| user:update:presence_status:admin |
| user:read:settings:admin |
| user:update:settings:admin |
| user:write:virtual_background_files:admin |
| user:delete:virtual_background_files:admin |
| user:read:summary:admin |
| user:write:feature:admin |
| user:read:list_collaboration_devices:admin |
| user:read:collaboration_device:admin |
| user:update:user_account:admin |
| user:read:presence_status:admin |
| user:read:personal_note:admin |
| user:delete:profile_picture:admin |
| user:read:list_users:master |
| user:write:user:master |
| user:read:user:master |
| user:update:user:master |
| user:delete:user:master |
| user:update:status:master |
| user:update:password:master |
| user:read:list_assistants:master |
| user:write:assistant:master |
| user:delete:assistant:master |
| user:write:profile_picture:master |
| user:read:token:master |
| user:delete:token:master |
| user:read:list_permissions:master |
| user:read:list_schedulers:master |
| user:delete:scheduler:master |
| user:update:email:master |
| user:update:presence_status:master |
| user:read:settings:master |
| user:update:settings:master |
| user:write:virtual_background_files:master |
| user:delete:virtual_background_files:master |
| user:read:summary:master |
| user:write:feature:master |
| user:update:user_account:master |
| user:read:presence_status:master |
| user:read:personal_note:master |
| user:delete:profile_picture:master |
| meeting:read:list_meetings:admin |
| meeting:write:meeting:admin |
| meeting:read:meeting:admin |
| meeting:update:meeting:admin |
| meeting:delete:meeting:admin |
| meeting:read:list_registrants:admin |
| meeting:read:registrant:admin |
| meeting:read:list_registration_questions:admin |
| meeting:read:livestream:admin |
| meeting:read:list_polls:admin |
| meeting:read:poll:admin |
| meeting:read:invitation:admin |
| meeting:write:invite_links:admin |
| meeting:read:list_templates:admin |
| meeting:read:summary:admin |
| meeting:read:past_meeting:admin |
| meeting:read:list_past_instances:admin |
| meeting:read:list_past_participants:admin |
| meeting:read:list_poll_results:admin |
| meeting:read:survey:admin |
| meeting:read:participant:admin |
| meeting:read:participant_feedback:admin |
| meeting:read:participant_callout:admin |
| meeting:read:alert:admin |
| meeting:read:participant_sharing:admin |
| meeting:read:device:admin |
| meeting:read:risk_alert:admin |
| meeting:read:chat_message:admin |
| meeting:read:list_summaries:admin |
| meeting:read:list_upcoming_meetings:admin |
| meeting:write:meeting:master |
| meeting:update:meeting:master |
| billing:read:user_entitlement:admin |
After selecting the scopes, click Done.
After adding all the necessary scopes and click on Continue.

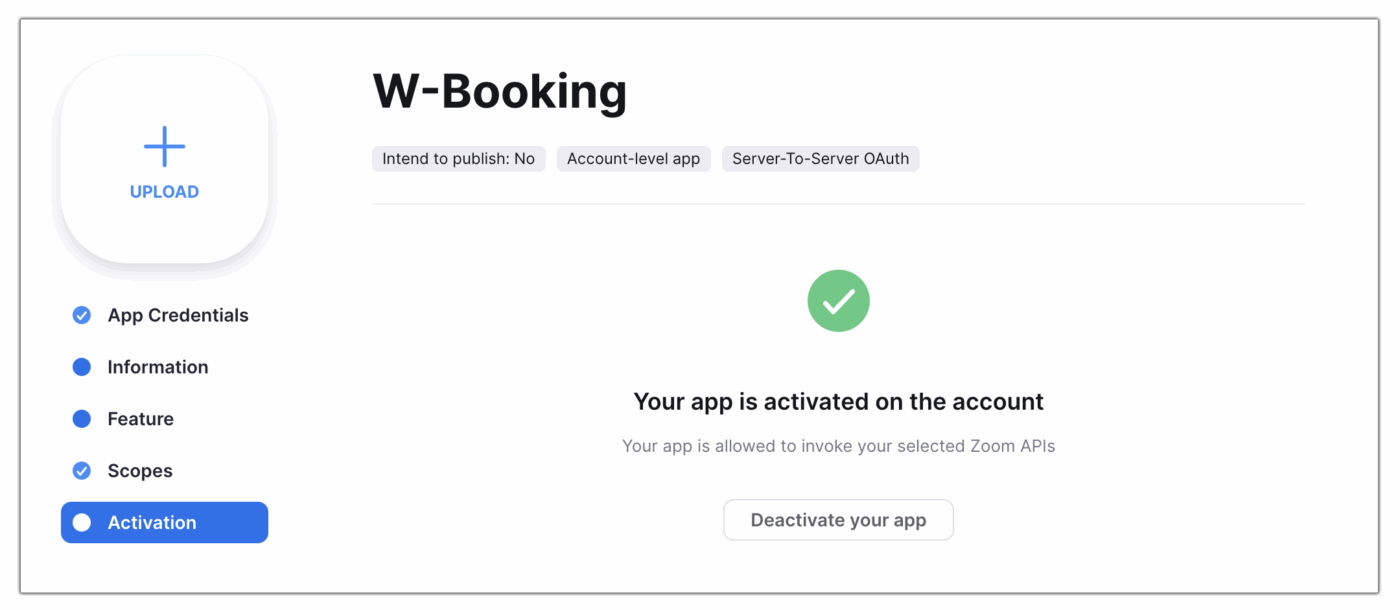
- Activate the App
Click Activate Your App to enable the Server-to-Server OAuth connection.

Once activated, your app will be enabled on your account and allowed to invoke the selected Zoom APIs.
6. Connect WooCommerce with Zoom
From your Zoom App, copy the Account ID, Client ID, and Client Secret. Paste each credential into its respective field in the plugin’s Integration Settings. Click Connect with Zoom to complete the integration.

7. Configure Zoom Meeting Settings
Once you’ve completed all previous steps and successfully connected WooCommerce with Zoom, you can configure the meeting settings in the Settings tab of the plugin.

7.1. Add Host Details
In Meeting Host, select the primary host for your Zoom meetings from the dropdown list. This should be a Zoom account connected to your integration.

7.2. Allow Newly Added Users to Schedule Zoom Meetings
To add a new user to your Zoom account and enable them to create meetings via the Zoom Integration with Bookings and Appointments for WooCommerce plugin, follow these steps:
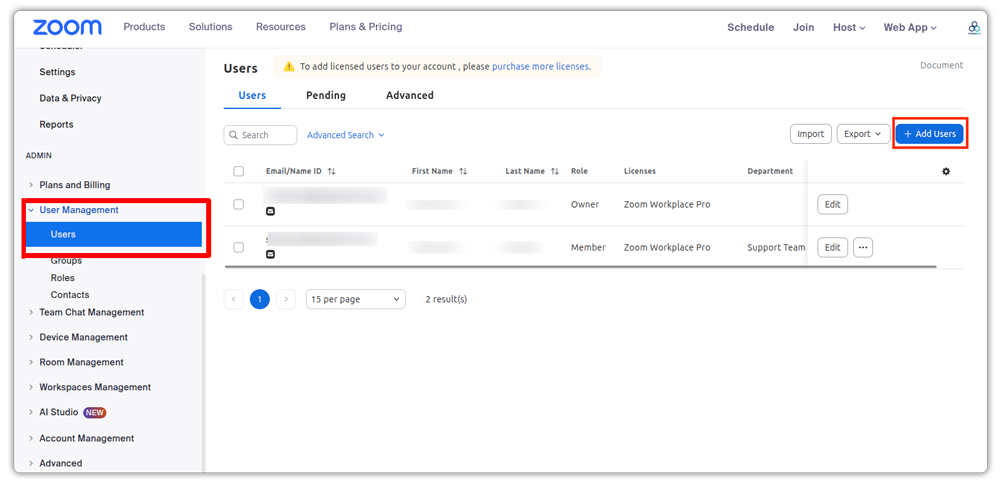
- Add a New User
Sign in to your Zoom account, go to Admin → User Management → Users, and click Add Users to add a new account.
Fill in the details and click on Add
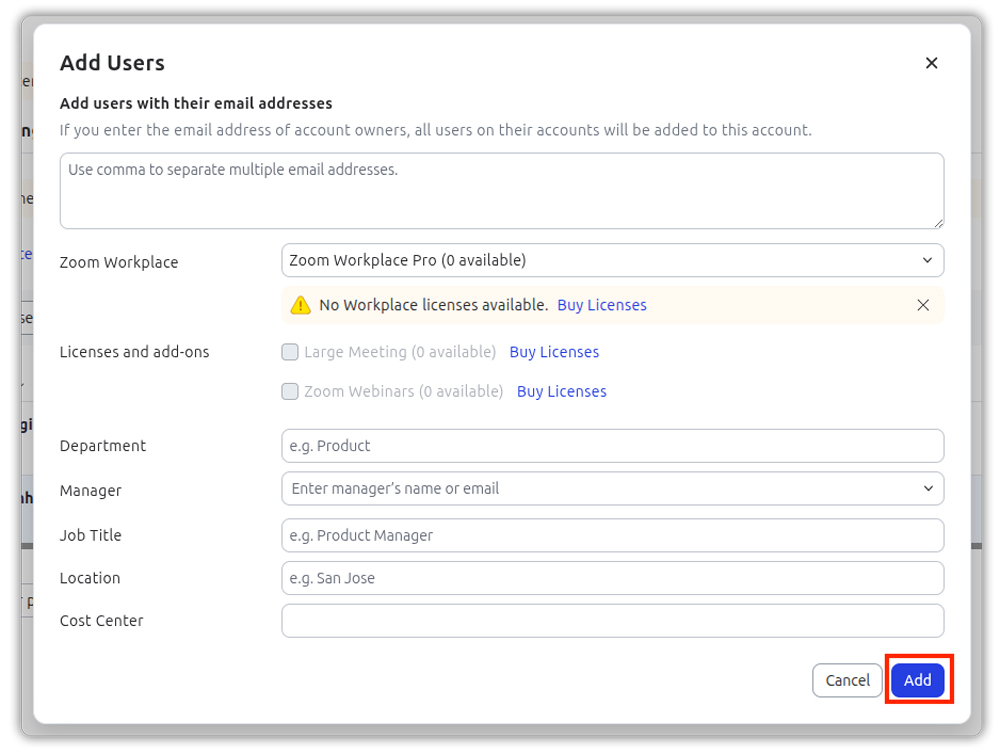
Ensure the newly added user has an active Zoom license. Without a license, the user cannot create meetings.
- Verify in Plugin Settings
After adding the user, you can see them in the Meeting Host dropdown in the plugin settings. You can also assign them as an alternative host here.

However, simply adding a user isn’t enough; they need scheduling privileges to create meetings via the plugin.
- Grant Scheduling Privileges:
To enable the new user to create meetings, log in to the Zoom Web Portal using the newly added user’s email ID.
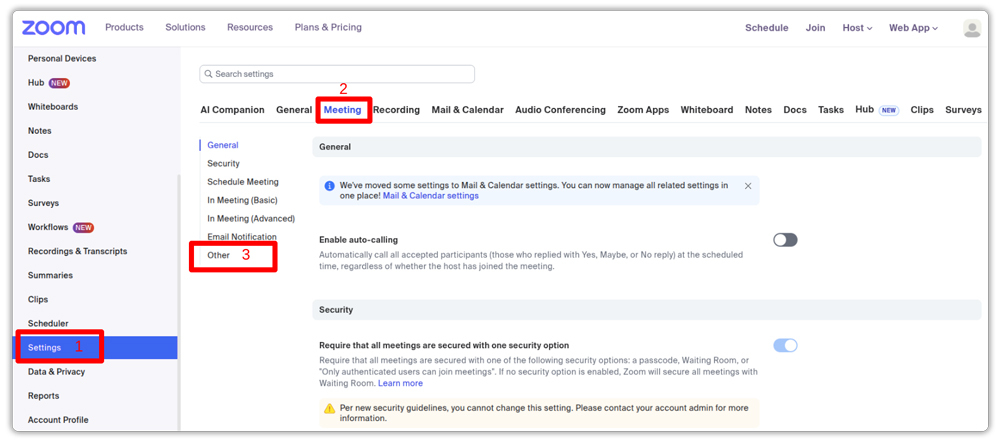
In the left-hand menu, go to Settings → Meetings tab → Other.
Scroll to the section at the bottom and locate Scheduling Privilege and click Add.
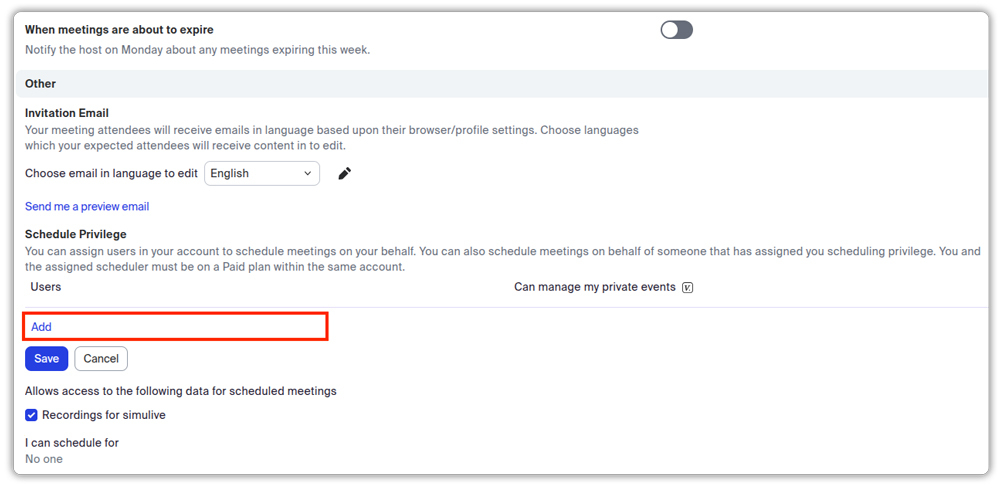
Enter the email ID of the authenticated user associated with the plugin (the main host email ID used to create the Zoom app for integration) and click Save to complete the setup.

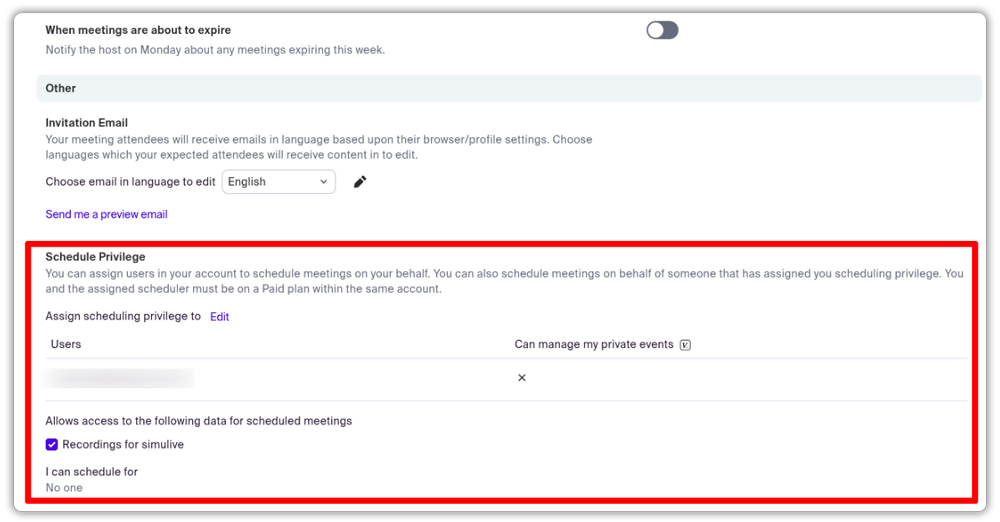
Now you will see that the main meeting host has been successfully added.
Once these steps are completed, the newly added user will be able to schedule Zoom meetings via the WooCommerce Zoom Integration Addon.
7.3. Add Alternate Host Details
In Alternate Meeting Hosts: Enter the email addresses of any alternate hosts who can start and manage meetings on your behalf.

A paid Zoom account is required to add alternate hosts. If adding multiple hosts, separate their email addresses with commas.
7.4. Enable Debug Mode
Enable this to record detailed logs in WooCommerce. It will be useful for troubleshooting integration or meeting creation issues.

7.5. Cancel Zoom Meeting Along with Booking
Enable this option to automatically cancel the Zoom meeting when its associated WooCommerce booking is cancelled.

If disabled, only the booking will be cancelled while the Zoom meeting remains active.
7.6. Default Meeting Settings
This section lets you control how your Zoom meetings will behave by default when they are created through WooCommerce bookings. These settings apply globally, ensuring consistency for all meetings unless you override them at the product level.
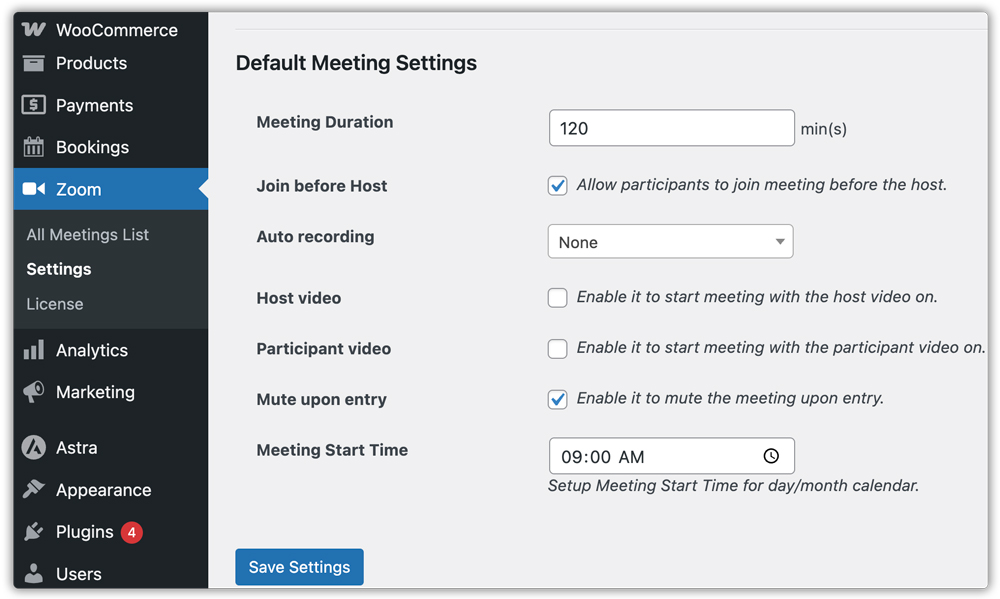
Meeting Duration: Set how long each meeting will last in minutes. This determines the scheduled end time for the meeting, though participants can remain connected beyond this time if allowed in Zoom.

Join Before Host: If enabled, participants can enter the meeting room before the host arrives.

Auto Recording: Choose if and where meetings should be recorded automatically:
- None – No automatic recording.
- Local – Recording is saved to the host’s device.
- Cloud – Recording is stored on the Zoom cloud (requires a Pro or higher account).
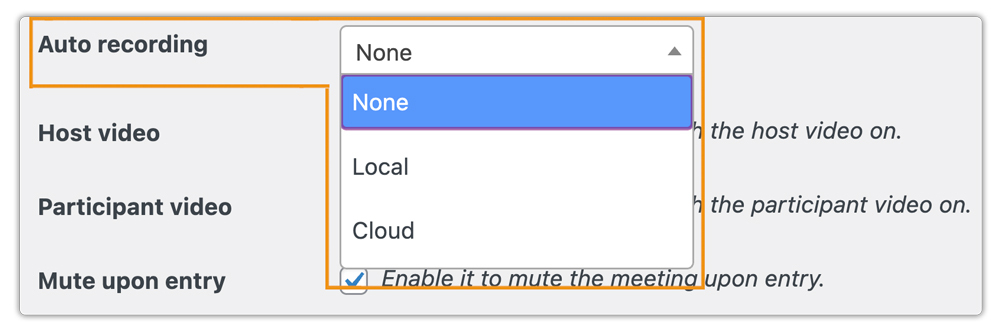
Start Meeting with Video On: You have two options:
- Host Video – Enable this if you want the meeting to start with the host’s video turned on automatically.
- Participant Video – Enable this to have participants join with their cameras already on.

Mute Upon Entry: When enabled, all participants will be muted as they join. This helps maintain order in large meetings or webinars until the host is ready to begin.

In the Meeting Start Time section, you can set the default meeting start time for your bookings. It’s required only when using the day or month calendar.

Once you’ve adjusted all these settings according to your meeting style, click Save Settings to apply your changes.
These settings serve as global defaults for all bookable products. You can override them for specific products, such as setting different rules for coaching sessions and webinars, in the Product Settings section.
7.7. Enable Zoom for Bookable Products
If you need a bookable product to follow its own Zoom meeting rules, different from the global defaults, you can configure them directly in that product’s Zoom settings.
In your WordPress dashboard, go to Products → All Products.
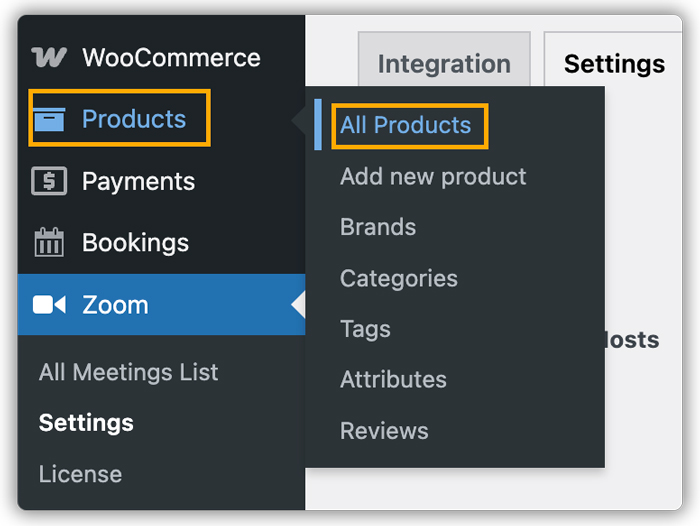
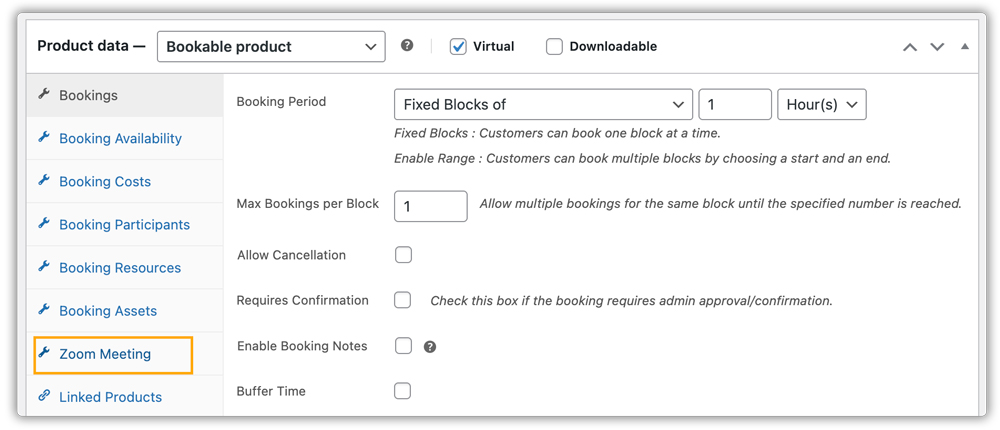
Edit the booking product you want to link with Zoom.

In the Product data panel, open the Zoom Meeting tab (as shown in the image).
Tick Enable Zoom to activate Zoom integration for this product.
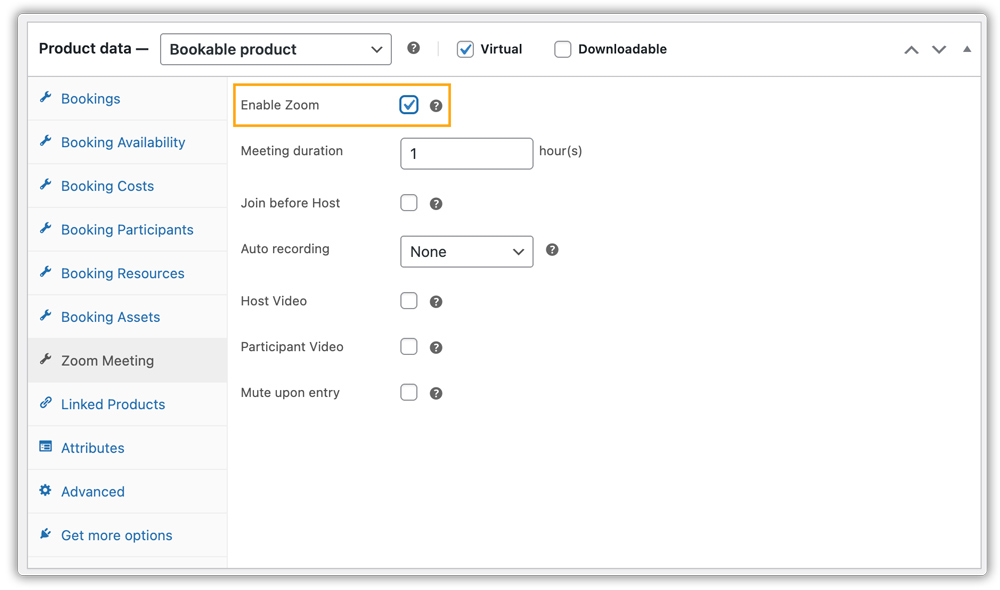
Configuring Product-Specific Meeting Settings:
- Meeting Duration – Enter the length of the meeting in hours.
If your booking period is set in minutes or hours, simply define the meeting length here in hours.

- If your booking period is set in days or months, you’ll also see a Start Time option. Specify the time of day when the meeting should start. At that exact time, the Zoom meeting will begin.
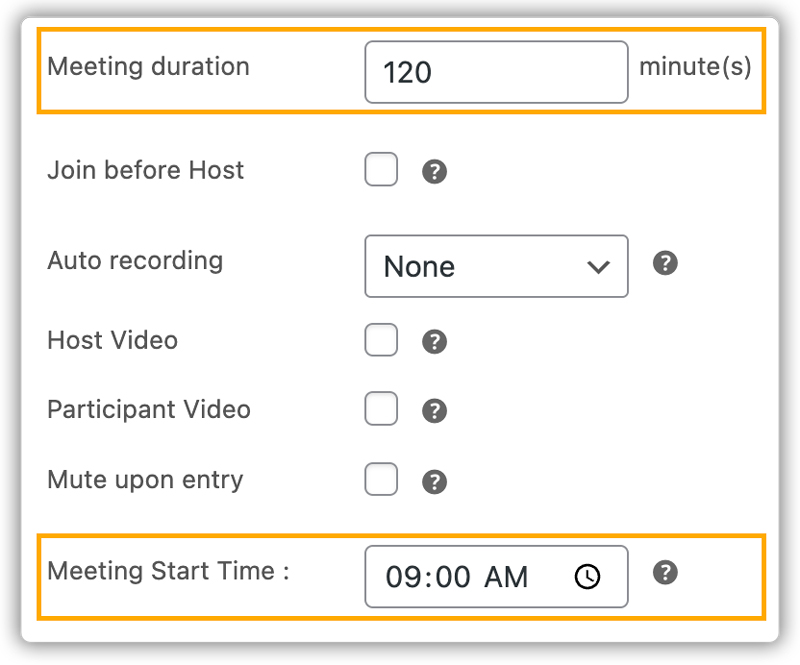
Adjust other settings as needed to override the global defaults, such as autorecording, host and participant video, and mute upon entry.
Once saved, these settings will apply only to this product, ensuring it follows its own meeting rules. Whenever a customer books this product, a Zoom meeting will be created automatically based on these product-specific configurations.
8. Customer Booking Workflow
Once your WooCommerce-Zoom integration is set up, here’s what the process looks like for your customers:
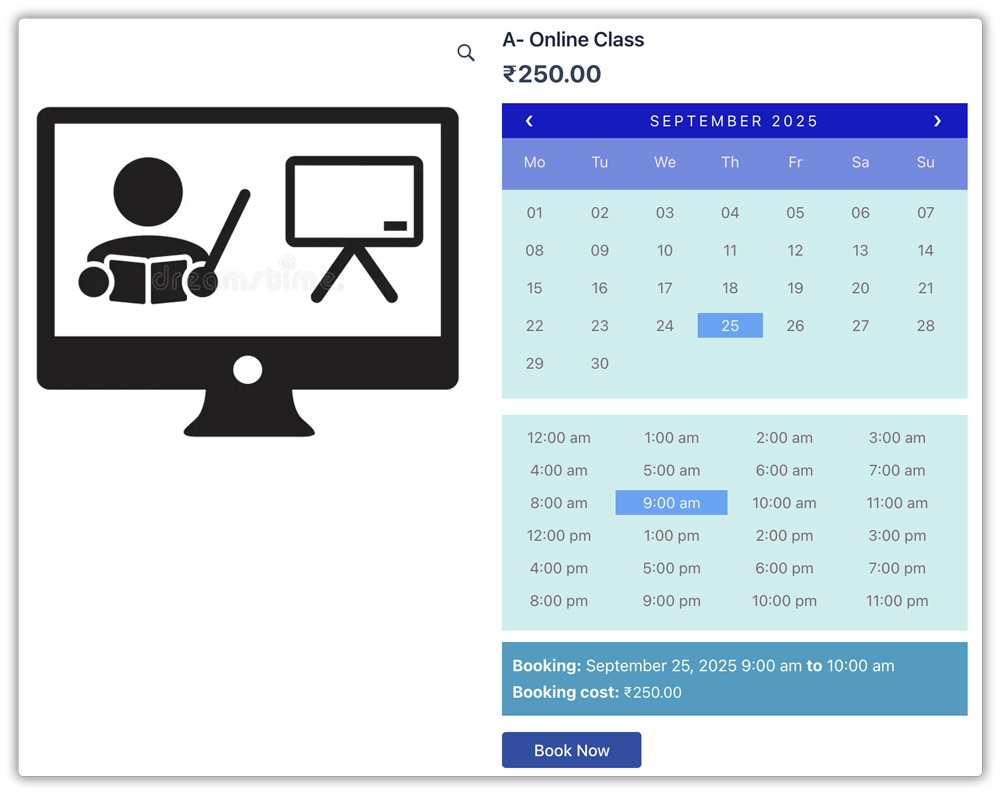
The customer books a product by selecting the desired date and time (if applicable), adding it to the cart, and completing checkout.
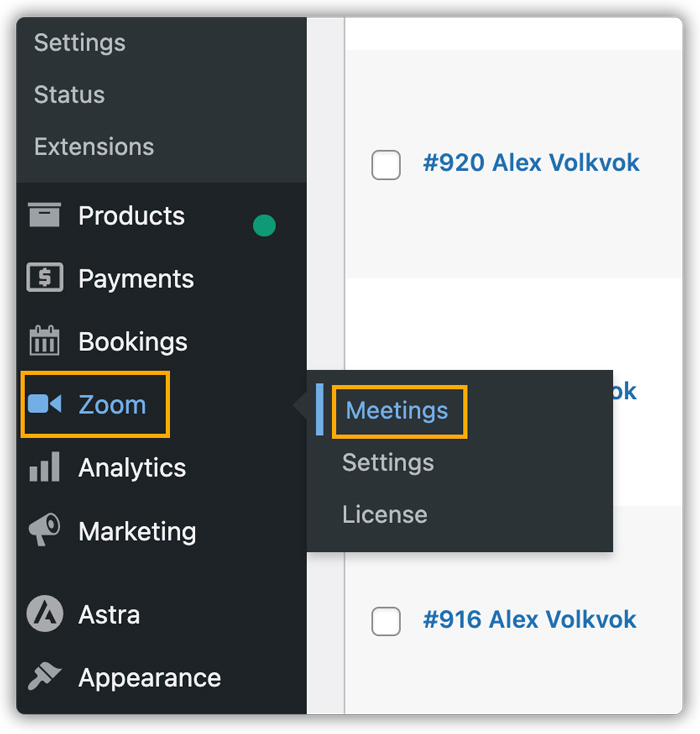
Upon booking confirmation, the Zoom Integration with Bookings and Appointments for WooCommerce automatically creates a Zoom meeting based on your configuration. You can view all scheduled meetings in Zoom → Meetings in your WordPress dashboard.
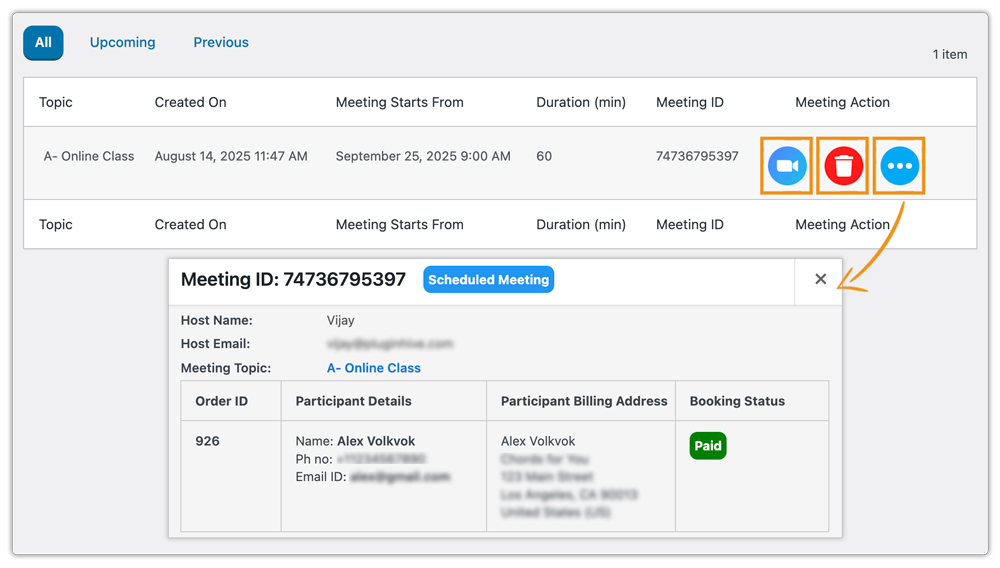
Use the Video Icon to start, Trash Icon to delete a meeting, and click the Three-dots Icon to see the details, including complete meeting information, including the topic, start time, duration, and Meeting ID.
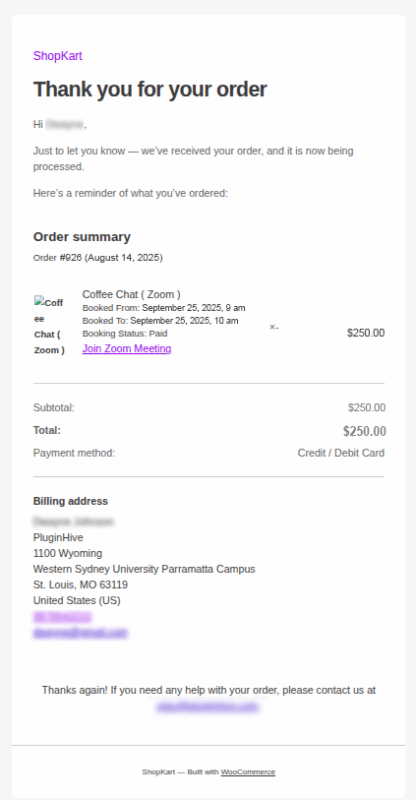
The customer receives a confirmation email containing the booking details and the Zoom meeting link with access credentials.
If booking or meeting reminders are configured, the customer will receive automated reminder emails before the session, helping reduce no-shows. Refer to this guide to learn more: WooCommerce Booking Email Notifications & Reminders.
At the scheduled time, the customer simply clicks the Zoom link from the confirmation email to join the meeting.
9. Final Thoughts…
The Zoom Integration with Bookings and Appointments for WooCommerce makes running virtual events effortless. Once set up, every booking is instantly paired with a Zoom meeting, saving you time and ensuring customers receive all meeting details automatically.