For Canadian Shopify merchants, choosing the right carrier isn’t a question; Canada Post is already woven into the fabric of domestic commerce. Its extensive delivery network, trusted brand, and flexible service range make it the first choice for Canada Post parcel shipping.
But understanding how to make Canada Post Parcel shipping work efficiently inside Shopify, displaying accurate rates, generating labels, and giving customers real-time tracking is where many merchants get stuck. This guide covers all three pillars from the ground up, using official Canada Post information and practical tools to help you build a shipping setup that scales with your business.
In This Article:
- Canada Post Parcel Shipping Services: What Shopify Merchants Need to Know
- Displaying Canada Post Parcel Shipping Rates at Shopify Checkout
- Printing Canada Post Shipping Labels in Shopify
- Canada Post Shipment Tracking in Shopify
- How PH Multi-Carrier Shipping Label App Ties It All Together in Shopify
- Best Practices for Canada Post Shipping in Shopify
- Conclusion
- FAQs
Canada Post Parcel Shipping Services: What Shopify Merchants Need to Know
Before setting up your store, it helps to understand which Canada Post services are available and when to use them. Canada Post offers a full range of domestic parcel services: Priority, Xpresspost, Expedited Parcel, and Regular Parcel, each suited to different delivery speeds and business needs.
- Priority is Canada Post’s fastest domestic shipping option for time-sensitive items, with a guaranteed next-business-day delivery standard between major urban centres.
- Xpresspost offers next-day and 2-day shipping within Canada. The service tracks all items, guarantees delivery times, and allows customers to check delivery status online. It also includes automatic liability coverage up to $100 per package.
- Expedited Parcel is fast, cost-effective ground shipping within Canada. All items can be tracked and have on-time guarantees. This service is preferred by e-commerce businesses and is ideal for large-volume shipping.
- Regular Parcel is a budget-friendly option for non-urgent shipments. The service includes tracking, but delivery takes longer and does not come with an on-time guarantee.
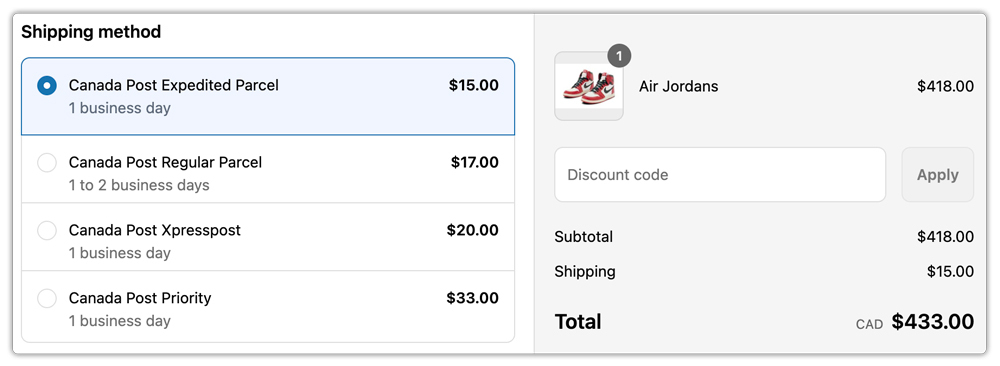
Displaying Canada Post Parcel Shipping Rates at Shopify Checkout
Transparent shipping rates at checkout reduce cart abandonment and build customer trust. When buyers see accurate costs pulled directly from Canada Post, they’re confident they’re paying a fair price for delivery.
What You Need to Show Live Rates
To display real-time Canada Post Parcel shipping rates in your Shopify store, you’ll need:
- A Canada Post business account: This gives you your API credentials (username, password, and customer number), which are required for Shopify to fetch live rates. For an account, you can sign up through the Canada Post Solutions for Small Business program.
- Shopify includes the Carrier-Calculated Shipping (CCS) feature with the Advanced and Plus plans. If you’re on the Grow plan, you can enable it by upgrading to an annual subscription or contacting Shopify Support.
Customizing What Customers See
Once live rates are connected, you don’t have to display every available service. A good setup lets you:
- Show only the Canada Post services relevant to your products (e.g., Expedited Parcel and Xpresspost for most e-commerce stores)
- Add handling fees to cover packaging costs
- Apply rate adjustments or promotional discounts
- Restrict certain services based on package weight, dimensions, or delivery zone
Printing Canada Post Shipping Labels in Shopify
Label generation is where many merchants feel the most friction. Switching between Shopify and an external system to create carrier labels slows down fulfillment and increases the risk of errors, such as wrong address, wrong service, or wrong weight.
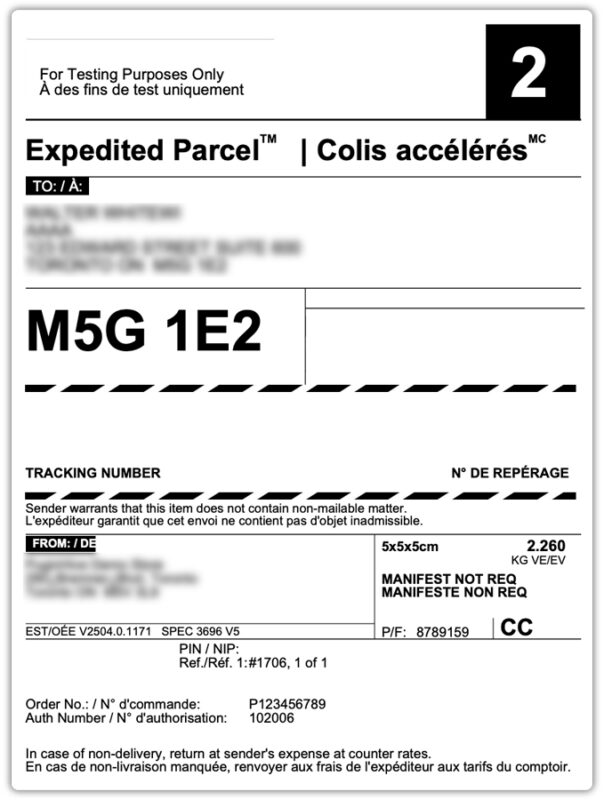
What a Canada Post Shipping Label Includes
A standard Canada Post Parcel shipping label contains:
- Sender and recipient name and address
- A unique barcode and tracking number are assigned at the time of label creation
- The selected service type (e.g., Expedited Parcel, Xpresspost)
- Package weight and dimensions
- Any special options, such as a signature required or additional liability
What to Check Before Printing Labels
Most label errors happen not because of carrier issues but because the order data is incomplete. Before generating labels, make sure:
- Ensure that product weights and dimensions are accurately entered in Shopify.
- The ship-from address in your settings matches your actual pickup or drop-off location
- The selected service is available for the destination (Priority, for example, is not available to or from Air Stage offices)
- Ensure that you correctly connect your Canada Post account credentials.
Canada Post Shipment Tracking in Shopify
Once you create a label and hand over the package, the customer experience depends entirely on tracking updates. How well you handle this phase directly affects support volume, trust, and repeat purchases.
How Canada Post Tracking Works
Canada Post’s advanced tracking technology allows you and your customers to know the status of barcoded items, regardless of their destination. You can choose to receive delivery status updates automatically by email and have these updates sent to your customers, or your customers can request to receive text message updates through the Canada Post tracking tool. Canada Post logs each item-tracking event and displays it through its online tracking system for one year.
- Tracking events show key shipment milestones such as label creation, pickup from your location, sorting at a major Canada Post facility, out for delivery status, successful delivery, and failed delivery attempts where Canada Post leaves a Delivery Notice Card.
- Each package receives a unique tracking number that allows you to monitor its movement between destinations. You can find it on your receipt or directly on the package itself.
Why Tracking Visibility Matters for Your Shopify Store
Proactively displaying Canada Post Parcel shipping tracking status in your store reduces “Where is my order?” (WISMO) inquiries significantly. Customers who can check their own shipment status at any time are less likely to contact your support team, and more likely to complete future purchases with confidence.
Benefits of making tracking visible in your store include:
- Fewer repetitive support tickets
- Greater post-purchase customer satisfaction
- Documentation in the event of disputes or delivery claims
- A more professional store experience overall
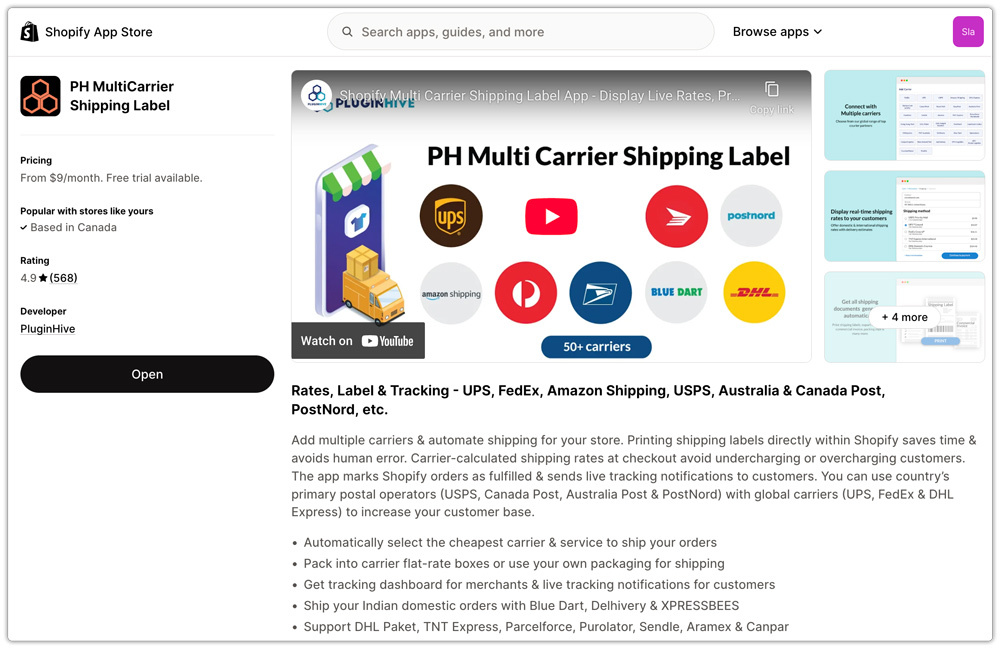
How PH Multi-Carrier Shipping Label App Ties It All Together in Shopify
For merchants who want rates, labels, and tracking managed from a single place inside Shopify, the PH Multi-Carrier Shipping Label app is built specifically for that purpose. It connects your Canada Post account via API and handles each part of the shipping workflow without you leaving your Shopify admin.
Rates
The app fetches live Canada Post shipping rates at checkout based on your Canada Post credentials, letting you display accurate service options to customers.
You can show or hide specific services, apply handling fees or discounts, and set rules based on weight, destination, or shipping zone.
Labels
- Single-label printing: Open any order, click Generate Label, and the Canada Post label is created instantly with the tracking number tied to the order.
- Bulk printing: Select multiple orders, generate all labels at once, ideal for high-volume shipping days and promotional periods.
- Manifest generation: Canada Post requires a manifest (scan sheet) when handing over multiple parcels. The app automatically groups the day’s shipments and generates the manifest, allowing drop-offs or pickups to be processed with a single scan instead of scanning each parcel individually.

Tracking
Once you generate a label and mark the order as fulfilled, the system automatically emails the tracking details to the customer. The tracking number and real-time shipment status are also visible inside the app’s tracking tab. For merchants who want a dedicated tracking page on their storefront, the Shipment Tracking & Notify app (also by PluginHive) makes that easy to set up.
Best Practices for Canada Post Shipping in Shopify
Getting the technical setup right is only half the job. Following a few operational habits keeps your Canada Post shipping workflow running smoothly day to day.
- Keep product weights and dimensions accurate: Rates and labels both depend on this. Inaccurate data leads to incorrect charges at checkout and potential label errors at the post office.
- Offer multiple delivery speeds: Giving customers the choice between a budget-friendly option like Expedited Parcel and a faster option like Xpresspost caters to different urgency levels without overcomplicating checkout.
- Use tracked services: All domestic parcel services include tracking. Always choose a trackable service so you and your customers have full shipment visibility.
- Set clear delivery expectations by displaying estimated delivery dates at checkout and informing customers that they will receive a tracking link after shipping.
- Monitor shipments proactively by contacting customers when tracking shows a delay or failed delivery before they reach out to you. This significantly improves how customers perceive the situation.
Conclusion
You can manage Canada Post shipping in Shopify efficiently once you properly set up and connect rates, labels, and tracking. For small or early-stage stores, Shopify’s built-in Canada Post tools cover the basics. For growing businesses that need contract rates, bulk label generation, and automated tracking updates, a dedicated app like the PH Multi-Carrier Shipping Label app provides the flexibility to scale without increasing manual work.
The goal is a fulfillment workflow where order data flows cleanly from checkout to label to customer notification, without you manually re-entering anything or switching between systems. With the right setup, Canada Post shipping becomes one of the most reliable and low-maintenance parts of running your Shopify store.
FAQs
Q. Which Canada Post service is best for Shopify ecommerce?
Expedited Parcel is ideal for high-volume e-commerce shipping because it balances speed and cost while including tracking and an on-time delivery guarantee.
Q. Is tracking free with Canada Post?
Automatic tracking is available for free in your Canada Post account. All domestic parcel services include a tracking number at no additional charge.
Q. What is a Canada Post manifest, and do I need one?
A manifest is a scan sheet that lists all the packages you hand over in a single batch. Canada Post scans the manifest once to accept all parcels, rather than scanning each package individually. You need it for drop-offs and pickups when shipping multiple orders. The PH Multi-Carrier Shipping Label app generates manifests automatically once you’ve printed the day’s labels.