This article will help you in setting up a WooCommerce-based Doctor’s Appointment Booking System using the WooCommerce Bookings and Appointment plugin – a free-of-cost WordPress plugin.
An Overview
It is quite uneasy for hospital admins to book a doctor’s appointment using traditional methods like phone, email, or any other type of paper-based booking. Practicing these manual booking processes can lead to confusion and sometimes, clashes between two or more appointments. The magnitude of the problem escalates when one of your patients cancels their appointment or doesn’t pay their booking fee on time. These sorts of incidents might distort your booking arrangements and might lead to a messy situation, which ideally should be avoided at all times. Thankfully, many eCommerce platforms have been developing various booking and reservation solutions for their users that can make their work life a breeze. WooCommerce, for example, has a lot of supporting plugins that allow users to set up a booking system on their website. Some of these feature-rich plugins can even help you build a full-fledged booking management system for a huge medical center. As you might know, doctors’ appointment is one of the most demanding sectors where you need a robust appointment booking system. This system will decrease the workload from the admins and allow them to focus on other important tasks. The WooCommerce Bookings And Appointments Plugin is an excellent solution for all booking and reservation-related needs. It has a dynamic system that allows patients to book appointments without any clash between other patients’ appointments. You can define a new bookable product, set up the price per unit of time and even define your own custom booking period.

The free version of the plugin is enough to create your own appointment booking online system. You can further pair up with a payment plugin to form an end-to-end booking solution. In this article, we will help you set up a robust doctors’ appointment scheduling booking system for your WooCommerce website. We will also cover some tips and tricks that will prove to be useful for your booking system. So, let us begin setting up the booking system.
Categorize and create bookable products
Once you have installed the plugin on your WooCommerce website, you have to now define bookable products. These products will represent the bookings and yes, the process is quite simple. You just need to have the right appointment details with you. You can refer to the following steps to create a bookable product using the WooCommerce Bookings And Appointments plugin.
- Define the booking name: Go to WordPress > Dashboard > Products > Add New and then write the name of the bookable product. If you are running a multi-specialty hospital that incorporates various departments like Cardiology, Nephrology and has many doctors then you would have to create a lot of products. In the following image, you can see a sample bookable product for a Urology specialist doctor. You can mention the relevant details in the description section of the product page just like shown in the image below.

Set the booking cost and time
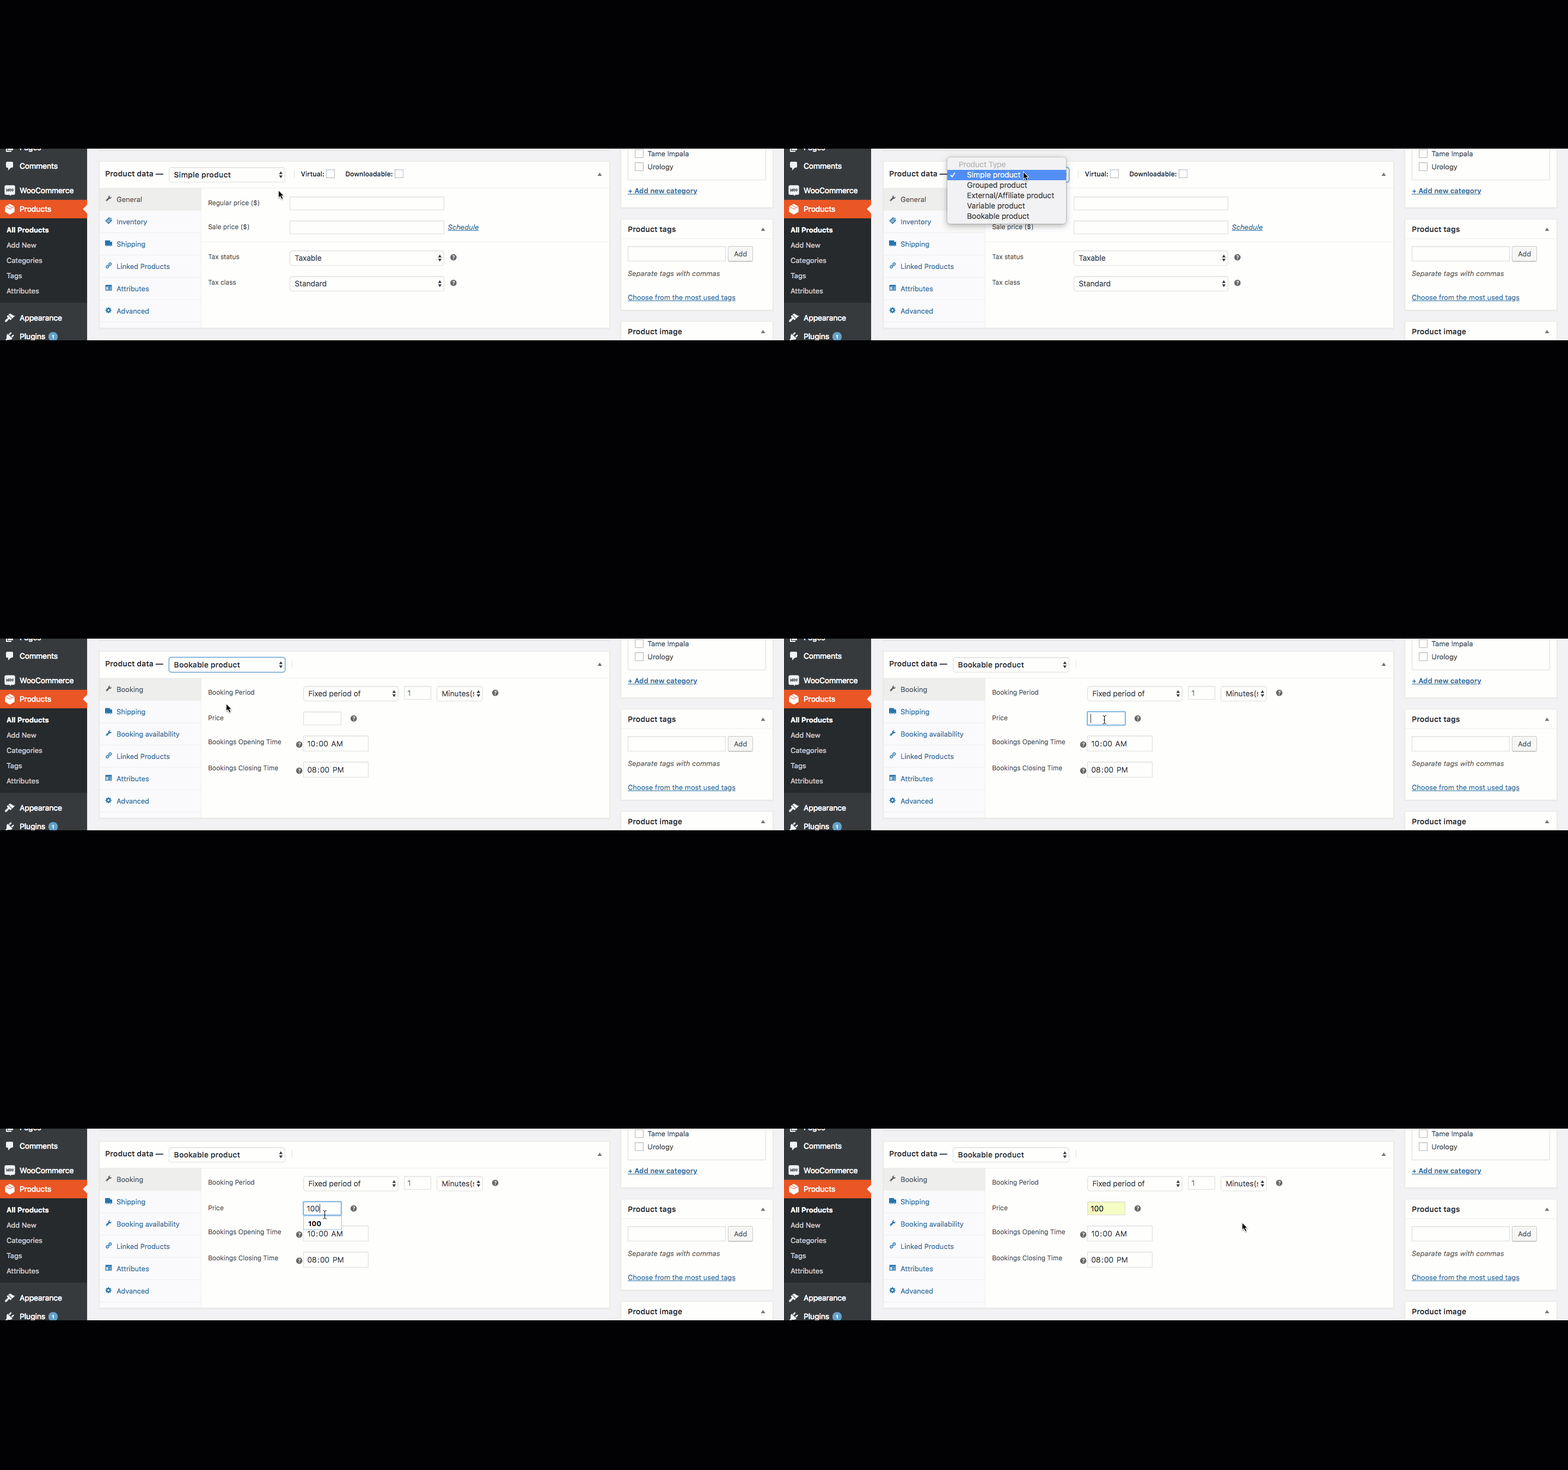
Once you have defined the product as a bookable product, it is time to configure further details. You have to mention the booking cost on the Product Edit page. Refer to the following image shown below:

As you can see in the image above, you have the option to fill in the booking cost. Please note that this price will be applied per unit of time. So, if you have mentioned the booking price as $10 per minute and a customer books a period of 10 minutes, then the total cost will come up to be $100(10×10). Depending on the desired time duration for the appointment, you can either choose the time unit as minutes or hours. There are other options as well, Days and Months, but these time units usually do not apply in the doctors’ appointment sector. Doctors usually see their patients for a few minutes or hours in some cases. Whatever may be the case, you can select the Fixed period of time as shown in the image above and then set the price.
Defining booking duration
The plugin also has a section to allow users to choose the Bookings Opening and Closing Time. This feature will determine the time at which the bookings will start and the time when the window closes. This is a very nifty feature that can reduce hassle when dealing with a number of patients. This way you can easily prepare a list of patients visiting a particular doctor on that day. Once you have done that, you can go to the product page and check for yourself. It might look something like shown in the image below:
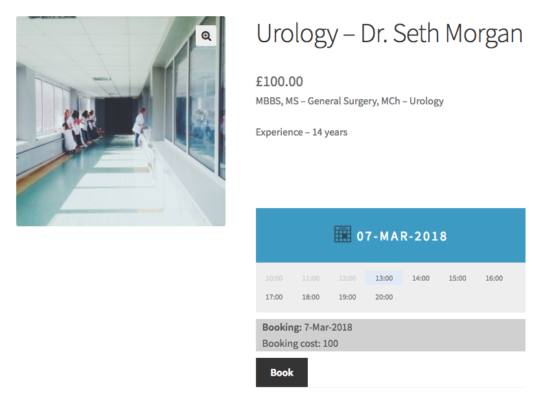
So, if a Urology doctor can take appointments for an hour then this solution can prove to be great for him or her. The patients can choose the desired available time to see the doctor and pay the booking price, here £100. Now, if there have been bookings previously then the plugin will block those timings and will only show the available time. You can refer to the following image for the same.
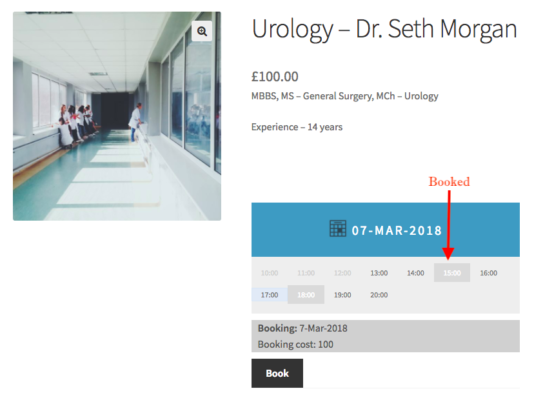
In the above example, the customer cannot book from 10:00 to 12:00, 15:00, and 18:00 hours. This is because the timings from 10:00 to 12:00 are over in real-time so there are no bookings available for those two hours. The timings 15:00 and 18:00 have been already booked by other patients and so, they are not available for the current customer. This is a very important feature to have and it can save a lot of confusion while booking an appointment.
Set custom time duration, if required
Another small but important feature is to set a custom booking time duration. Say, one of your doctors has special equipment to perform a detailed analysis of the patient’s issue. The complete procedure requires a time span of say two hours and thus, you would need to increase the appointment duration of this doctor from one hour to two hours. Then, all you need is to go to that bookable product and then define the time duration as two hours. You can check out the last section of the following video where we have shown how the custom time duration is set.
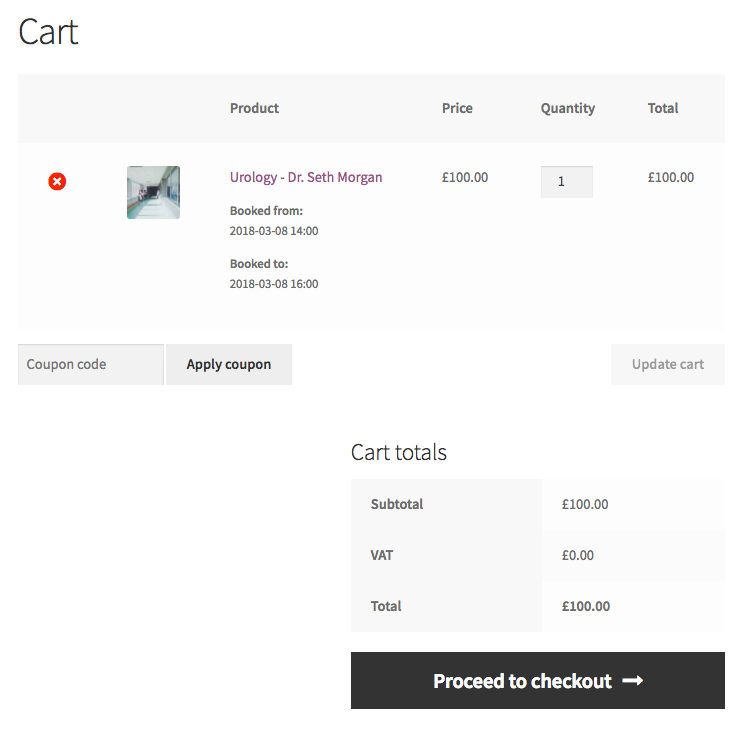
Once the booking is done by the customer, he or she can go to the cart page and pay for the bookings. In the following image, you can see that the booking is from 14:00 to 16:00 hours. This is a really useful feature that can help you in some demanding situations.
Conclusions
This article is an approach to show you how to set up a doctor’s appointment scheduling booking system using the free version of the WooCommerce Bookings And Appointments plugin. You can make use of the Premium version of the plugin to incorporate more features into your WooCommerce. This plugin is quite easy to use and configure your business case. If you need any help or find any difficulty regarding any of the features in the plugin then kindly comment down below. We would be more than happy to help you out. The premium version of our plugin offers quite a lot of features.
Check out its amazing review at CollectiveRay – 7 Best WooCommerce Bookings Plugins for Appointments Scheduling (2018).

