
In this guide, we will see how to get the SMTP credentials from SendGrid and configure these credentials for PluginHive Shopify apps. SendGrid is a cloud-based SMTP provider that allows you to send emails without having to maintain email servers.
You can use the following solutions to configure SendGrid credentials for Shopify.
Shopify Shipment Tracking & Notify App
So, let’s see the step by step process to get the SMTP credentials from SendGrid.
Sign up for an account with SendGrid
The first step is to signup for an account with Sendgrid. If you already have an account, sign in.

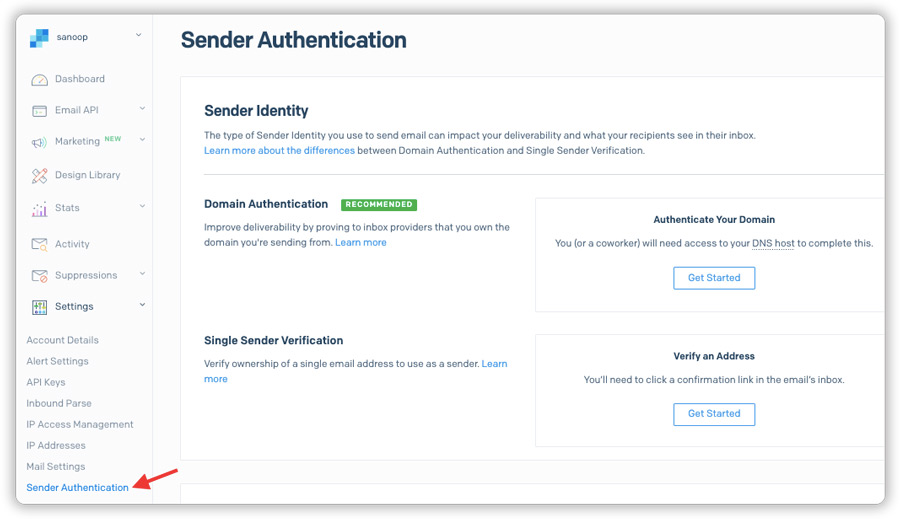
Confirm your email address and verify the sender
Once you create the account or sign in, verify the email address. After the email address is verified, you need to verify the sender. To do this, head to Settings --> Sender verification. The verification can be done in two ways; Domain authentication or Single Sender verification, in case you do not wish to enter domain details.
For Single sender verification, enter the details and save the sender as shown below.

This will send an email to the entered Email address for verification. Once verified you can start sending emails from this email address.
Note:
For any clarifications regarding the single sender verification, visit the single sender verification guide.
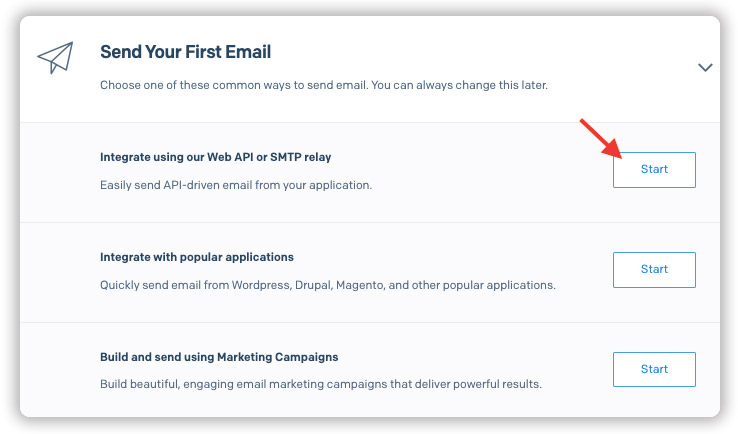
Create API Keys
After the sender verification is complete, you need to create API keys. You can find that option under “Send Your First Email”. Choose “Integrate using our Web API or SMTP relay” and click on “Start” as shown below.
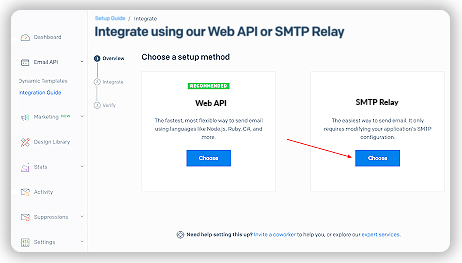
Now, select the SMTP relay as shown below.
You can then provide a Name and click on “Create Key“.
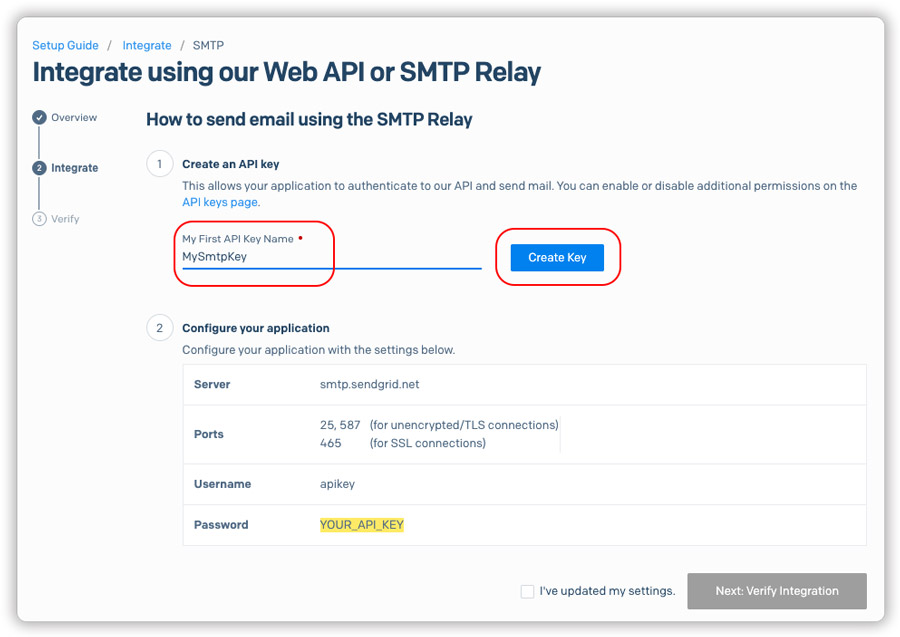
This will generate the keys and the credentials required for configuring the apps.
Note:
To do the domain validation you can follow this guide on how to set up domain authentication.
Configuring the SendGrid SMTP credentials for Shopify Shipment Tracking & Notify App
In order to configure the SMTP credentials for the Shopify Shipment Tracking & Notify app, head to App Settings --> Enable Real Time Email Notifications --> SMTP. Provide all the details and save. You can then start sending tracking notifications from your email address.
Configuring the SendGrid SMTP credentials for Shopify Multi Carrier Shipping Label App
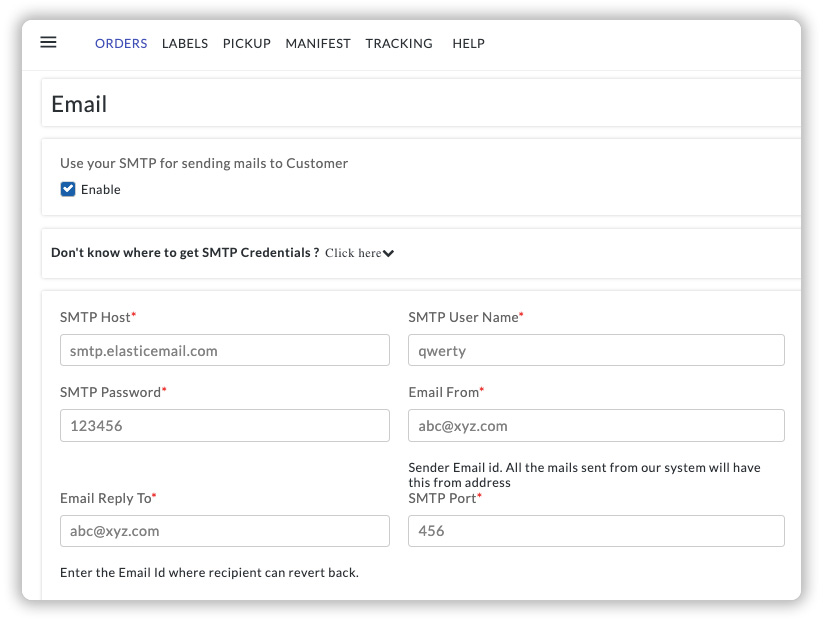
To configure the SMTP credentials for Shopify Multi Carrier Shipping Label app, head to App Settings --> General Settings --> Email --> Enable “Use your SMTP for sending mails to Customer“. You will be able to add the SMTP details and the tracking emails will go from your own email address configured.
Configuring the SendGrid SMTP credentials for Shopify FedEx App
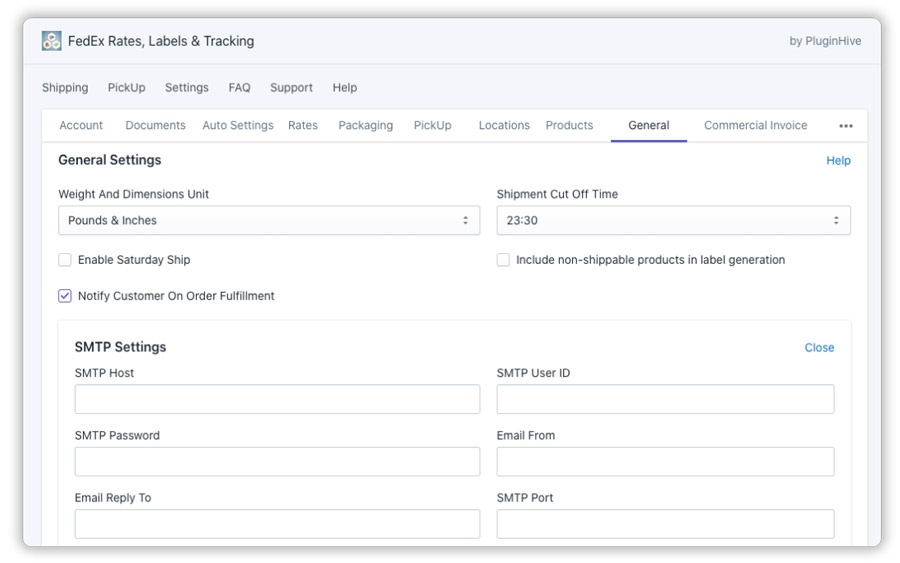
You can configure the SMTP credentials for Shopify FedEx app under App Settings --> General Settings --> Configure SMTP Settings.
If you have any queries regarding SMTP credentials with SendGrid and configuration with different Shopify apps, do contact PluginHive support.