The USA apparel and accessories market is the largest in the world. Many Shopify online stores from various countries look at selling their products to the USA. However, Canada to US shipping with minimal cost and getting the products to the customer in the shortest possible time is one of the major challenges.
In this article, we will help you understand the various factors you need to consider while shipping your products from Canada to US and how you could save time and money while doing so.
Let’s take the case of Alice who owns an online store in Canada. Her store sells apparel and accessories for women and gets regular orders from the USA.
For shipping, Alice compared all the popular shipping carriers and FedEx turned out to be an easy choice. FedEx has a presence in 220+ countries, it has an excellent serviceable area coverage in the USA, and a tie-up with USPS for services like FedEx SmartPost to reach out to every part of the USA. These are the same reasons why FedEx is popular amongst online merchants shipping to the USA.
While Alice was happy that she was able to ship her products effectively, as the number of orders increased and her business grew, she found herself spending a lot of time in shipping tasks like filling recipient addresses, choosing the right services, printing shipping labels, scheduling the pickups, etc. Making the orders ready for pick up took her between 24 to 48 hours. She knew she had to automate this process in order to stay competitive in the growing apparel and accessories market.
The Shopify FedEx App helped her completely automate the order fulfillment tasks reducing the time taken to less than an hour. This meant that her customers could receive the products nearly 2 days earlier. Isn’t that amazing?
Now, let us deep dive and see how Alice configured the Shopify FedEx App to achieve this result.
On this page
Configuring the Products
The first step in automating the order fulfillment process with the Shopify FedEx app is to configure the products.
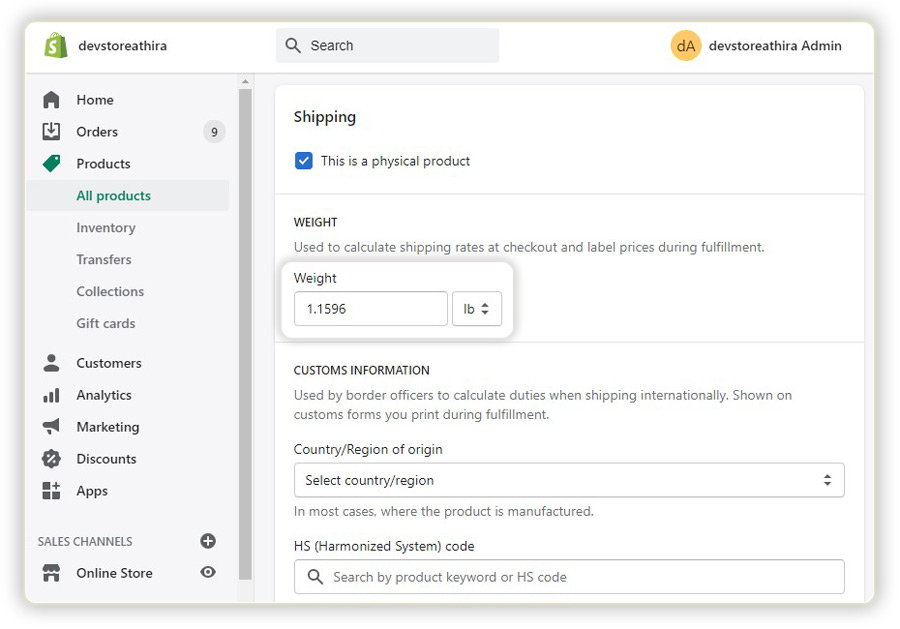
The key products of Alice’s store are accessories, clothes, handbags, etc. So, as the initial step, these products need to be configured by adding their weights under the Shopify “Products” section.
Adding products’ weights is mandatory for the app to display accurate shipping rates. When all the products are identical in weight it is possible to provide a common weight in one place that applies to all the products. However, when the products are not identical in weight, it is required that the weights are configured individually for each of the products to get accurate results.
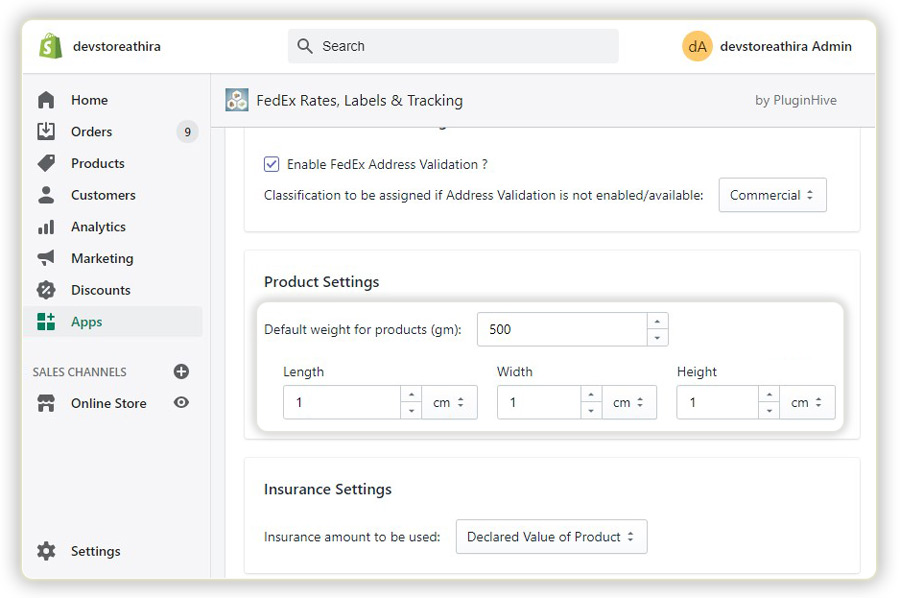
The next step is to add the dimensions of the products. Although adding dimensions of products is not mandatory to get the shipping rates, in the case of some products, where the actual weight and the size of the product are not proportional, it is required to configure the dimensions.
For eg: In the case of handbags, the total weight might not exceed 0.5 Kg but based on the size of the handbag FedEx may charge more than 1Kg. This happens because the dimensional weight exceeds the actual weight and FedEx considers whichever is higher. Therefore, adding the dimensions in the app in such cases becomes important.
Adding FedEx services and Customizing the shipping rates
Once the products are configured along with the weight & dimensions, the next step is to choose the required FedEx services to display at the Shopify checkout and calculate the shipping cost.
It is not necessary to choose all the services provided by FedEx. According to business needs, the required FedEx services can be enabled or disabled.
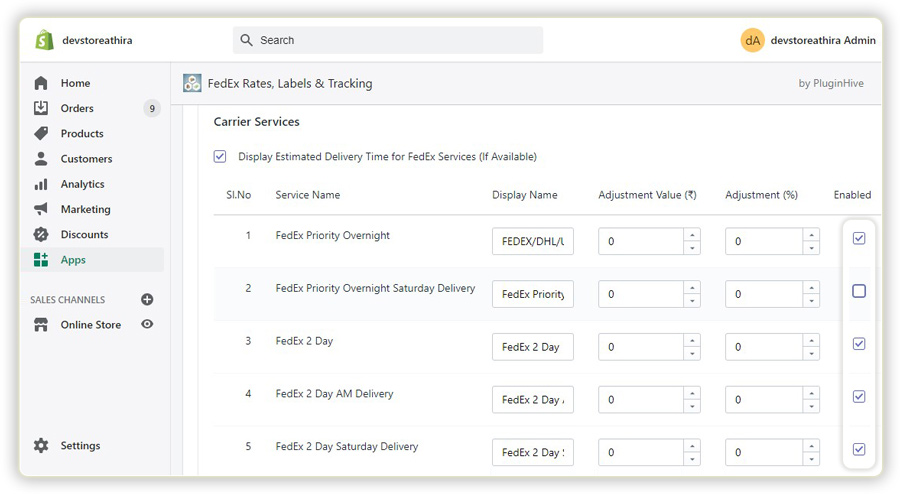
The display name of the services can also be changed to gain more flexibility. For example, if a store owner wants to display the service FedEx priority overnight as DHL/UPS/FedEx, then the display name can be renamed, and this would be displayed at the Shopify checkout.
It provides flexibility in choosing the carrier based on the shipping cost or availability, and you can choose the cheapest from the available options.
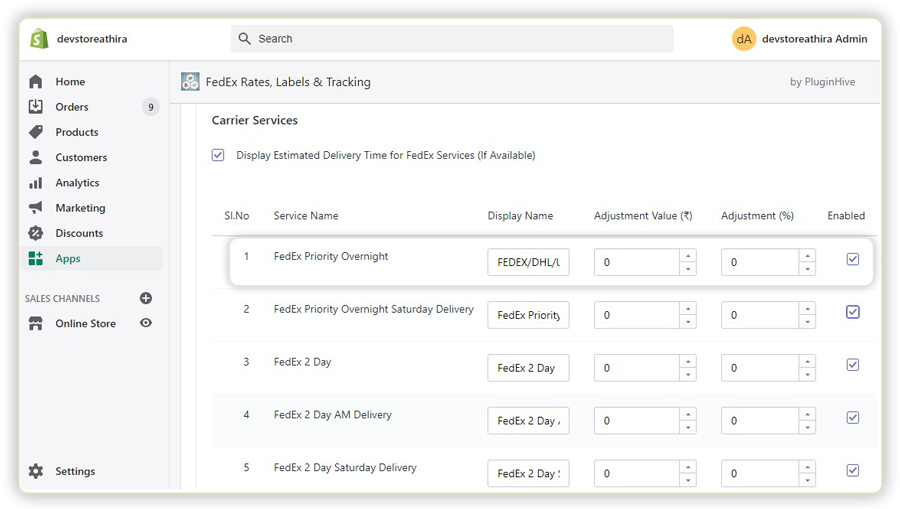
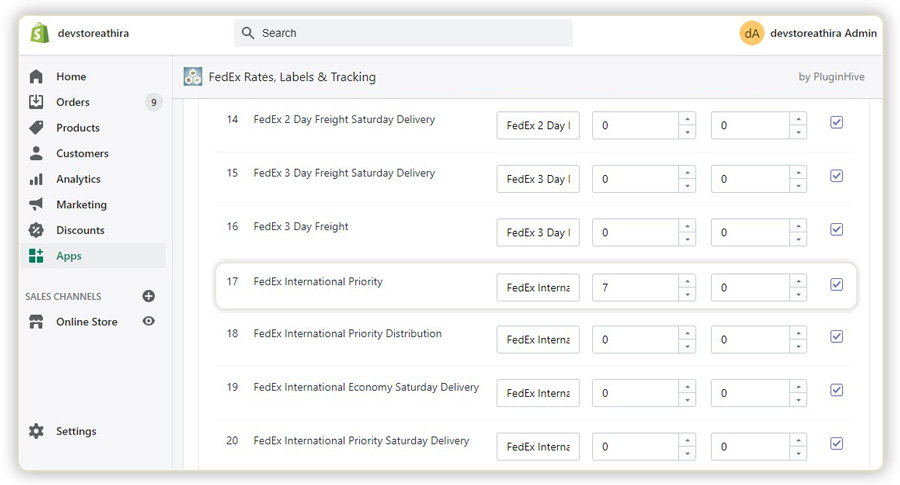
Not just that! A store owner can easily add additional charges to specific services if required. In Alice’s case, she could add additional charges to FedEx international priority to adjust the cost of the special packing that she used for her products.
If additional charges are added, the total cost for shipping will then be displayed as the sum of standard FedEx rates and additional charges. For example, if the FedEx international priority rate is $10, the total cost displayed will be $17 ($10+$7).
Choosing the packaging option
After deciding on the required FedEx services, the next step for order fulfillment is packing the products. The Shopify FedEx App offers three methods for packing the products; Weight-based packing, Box packing, and Individual packing method.
Out of the three methods, Box packing can be used for automating the packaging process. This packing method allows products with different weights & dimensions to be easily packed.
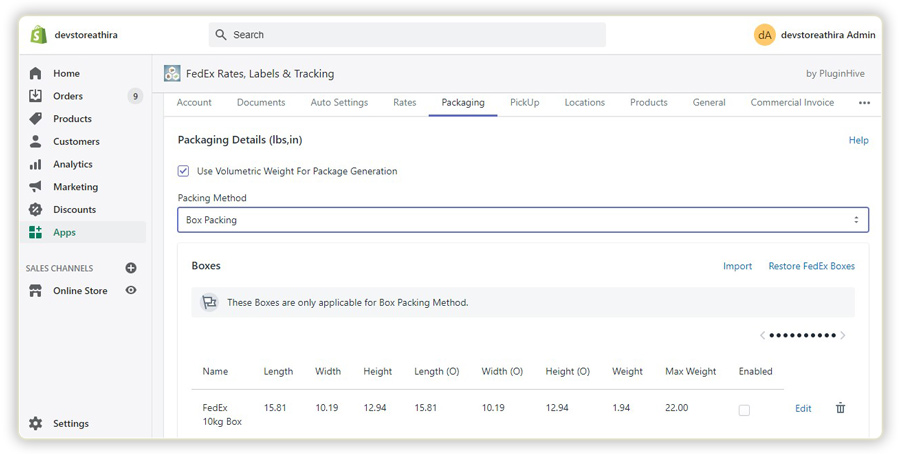
A merchant can either enable all the boxes provided by FedEx or choose any of the desired boxes based on the requirement. The Box packing method also allows merchants to add a custom box totally based on their product weight & dimensions.
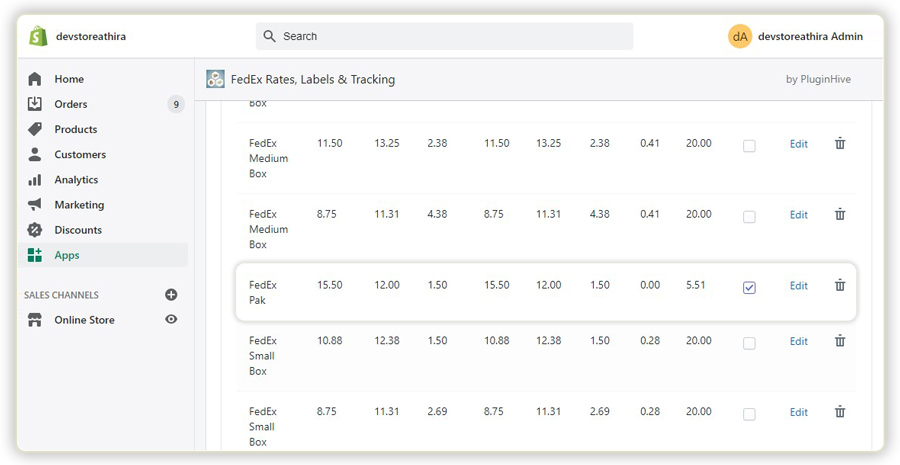
With the Box packing method, packing the products will not be a strenuous task even when the store receives many products in a single order. Consider the example in which only FedEx Pak is enabled, an order will be packed as explained below.
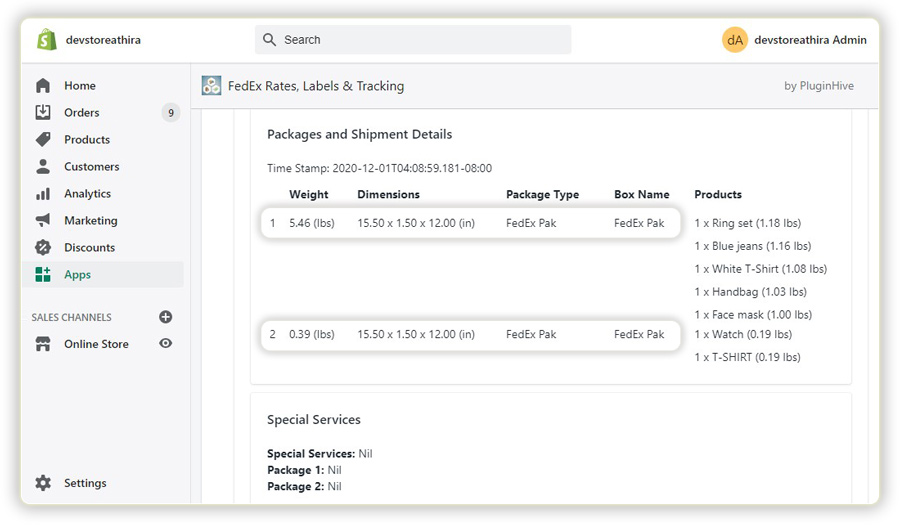
The products are packed into boxes based on the dimensions of the product, the maximum weight of the box, and the volume of the products. If all three factors are found right, a product is packed into a box. The Maximum weight a FedEx Pak can accommodate is 2.5kg.
Here, the total weight of the 7 products is 2.84kg.
This means that two boxes are needed to pack the products. To choose the products to be packed in the first box, the products are sorted in descending order of the weights. The products with higher weights are chosen first and will be packed into a box until the box is completely filled or a minimum volume is left vacant.
The remaining products to be packed are Watch and a T-Shirt which have a volume greater than the vacant volume, so it goes into the next box. Two labels for each package will be generated. Similarly, Alice could seamlessly handle packaging for complex orders as well.
To know more about the Box packing process, check out the guide on understanding the Box packing method.
Address validation process
The Address validation process is a major criterion in providing accurate rates and valid shipping services.
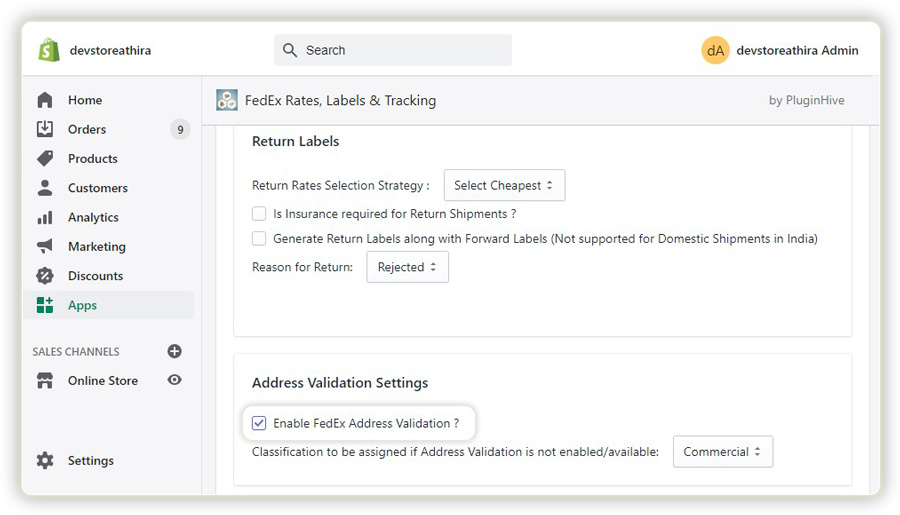
With this enabled in the account, the customer is only allowed to enter a valid shipping address at checkout. Customers would not be allowed to see the FedEx shipping rates unless they enter the correct address.
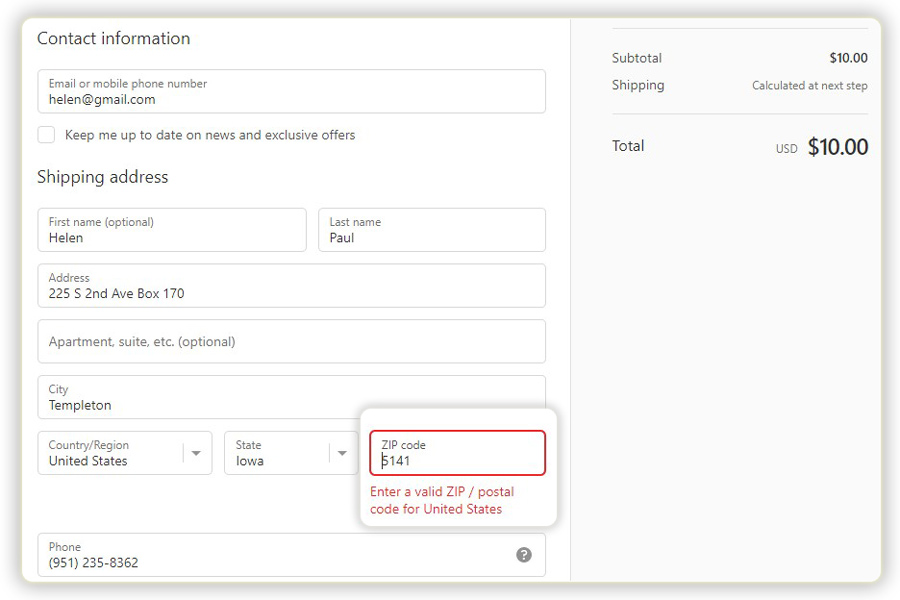
The Address Validation process also helps you classify each of the addresses as Commercial or residential addresses for every order you receive. The app automatically handles the address validation process and the shipping cost is determined based on this process.
Printing FedEx Shipping Label
The most laborious task while doing business using a Shopify store is to manually print FedEx labels. It will be a set of tasks like adding shipper and recipient addresses, product weight & dimensions, and pickup by a FedEx agent, he then weighs the order and again manually enters the address and prints the actual FedEx label.
This process has to be repeated for each order which is really tiring and time-consuming.
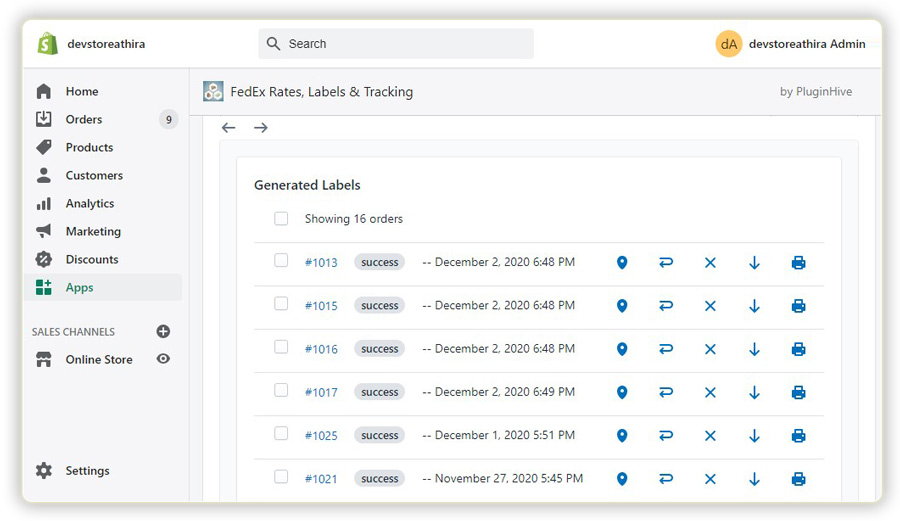
The Shopify FedEx App helps merchants like Alice to complete all these steps in a single click. Once the orders are received, the app helps you generate FedEx labels in bulk for all orders or for each order individually.
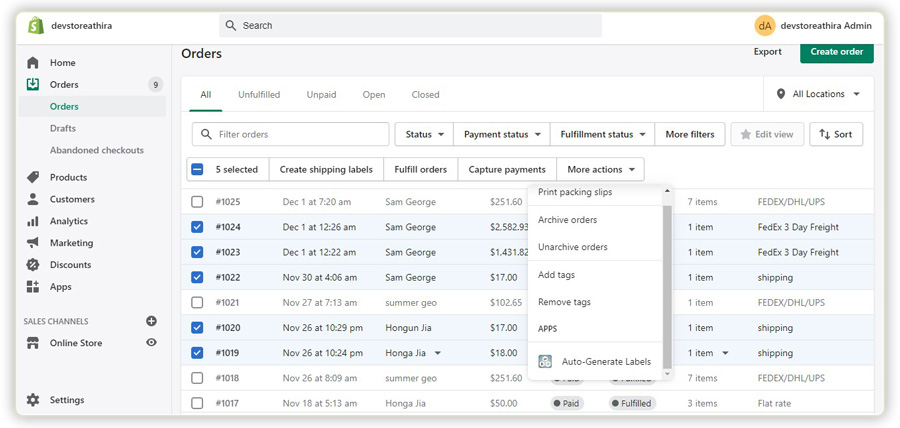
Once the FedEx label is generated, the orders will be listed from where they could track the order, create FedEx return label if required, cancel the label, download and print the FedEx Label.
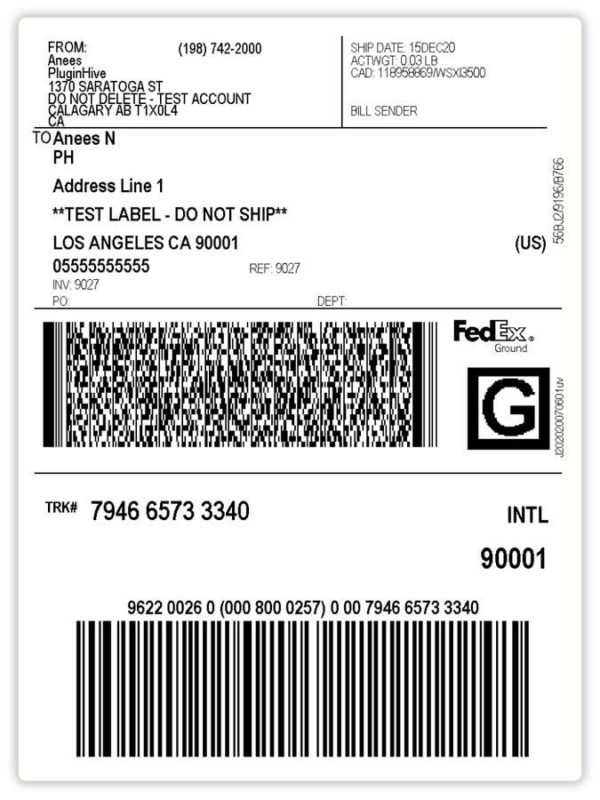
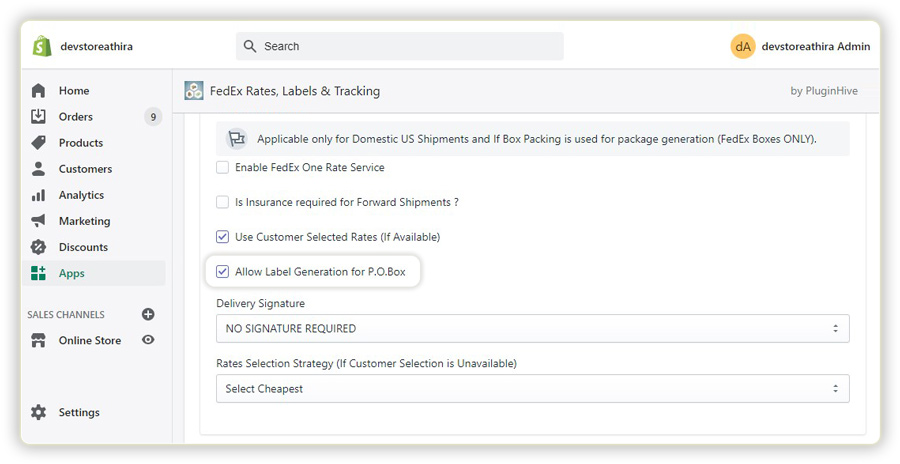
The app also helps you generate FedEx labels for P.O Box addresses. Once this feature is enabled, the merchant can fulfill the order with the delivery address as a P.O box. The owner will be able to generate FedEx labels and deliver the order to the P.O box.
Requesting FedEx Pickup
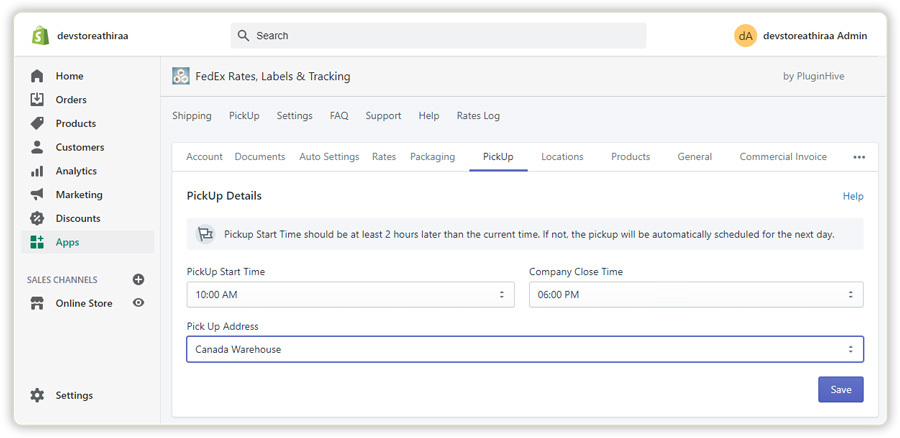
After label printing, the final step is to initiate pickup. The pickup time and company close time can be specified in the app and the FedEx agent will pick up the package between this time interval. Domestic orders will be shipped once the FedEx agent picks up the package.
Generating Commercial Invoice and Enabling Electronic Trade Documents
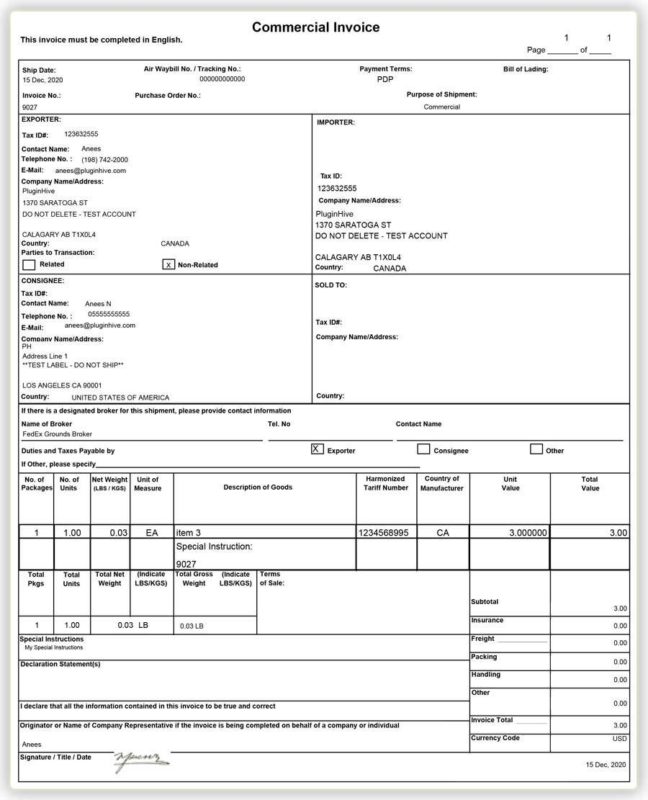
While shipping an international order, the commercial invoice is a crucial document. It is essential for the clearance process used by customs officers as it helps them classify the packages. Commercial invoices also help them assess the necessary Duties and Taxes.
An owner can gain trust of a lot of International customers by paying the duty fee. Not all customers will know the exact amount to be paid as the Custom Duty fee. So, if the merchant manages to inform the customers that the duty and taxes are being paid, the customers will gradually build trust in the brand, which will make them come back to the same store and shop again leading to an increase in sales & profit and brand value.
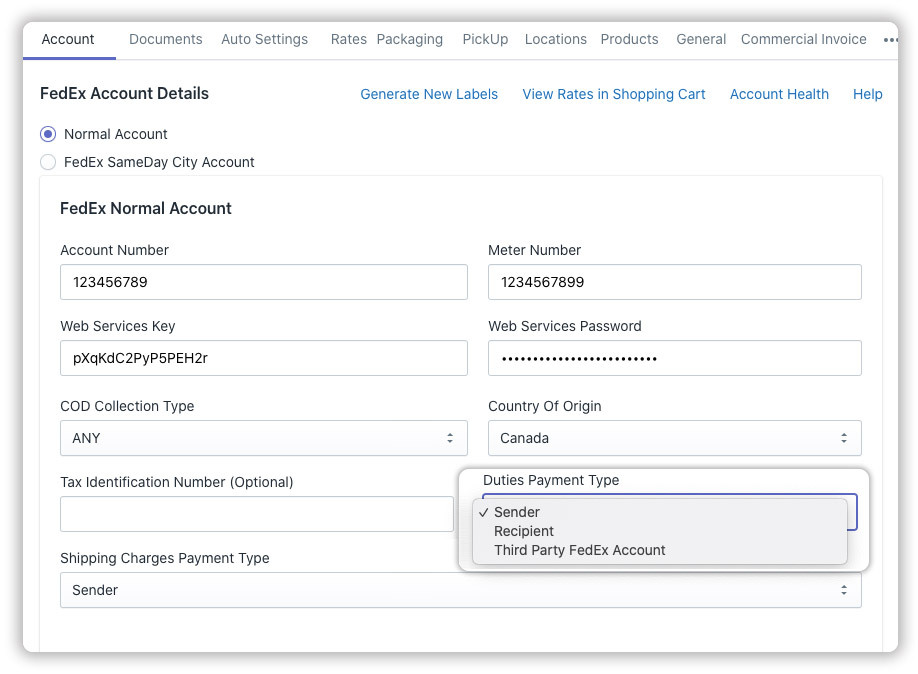
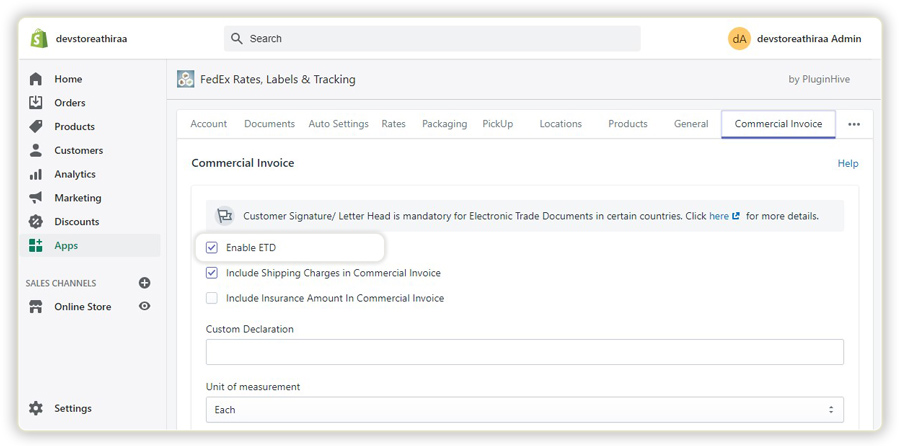
Appointing someone or rather visiting the customs office with hard copies of the trade document will be hectic. If ETD is enabled, the required documents will be digitally submitted which makes international shipping a cakewalk experience for every Shopify merchant.
Final Thoughts
So, in this article, we discussed how Alice, a Shopify USA store owner with 100+ orders a day could easily streamline her shipping process and delight her customers by sending the orders 2 days earlier than she did before by using the Shopify FedEx app.
The Shopify FedEx App provides a complete end-to-end solution starting from displaying FedEx rates at checkout, printing FedEx labels for all the orders, and also handling the pickup for domestic and international orders. If you have any queries regarding the app or its features, do contact PluginHive support.

