eCommerce has soared in sales, thanks to the prevalent pandemic. As such, it is not surprising that many sellers turn to set up online stores. Choosing your eCommerce platform to facilitate your e-store can be overwhelming; this is on top of other costs such as securing a domain name, web hosting provider, and others to support your eCommerce store.
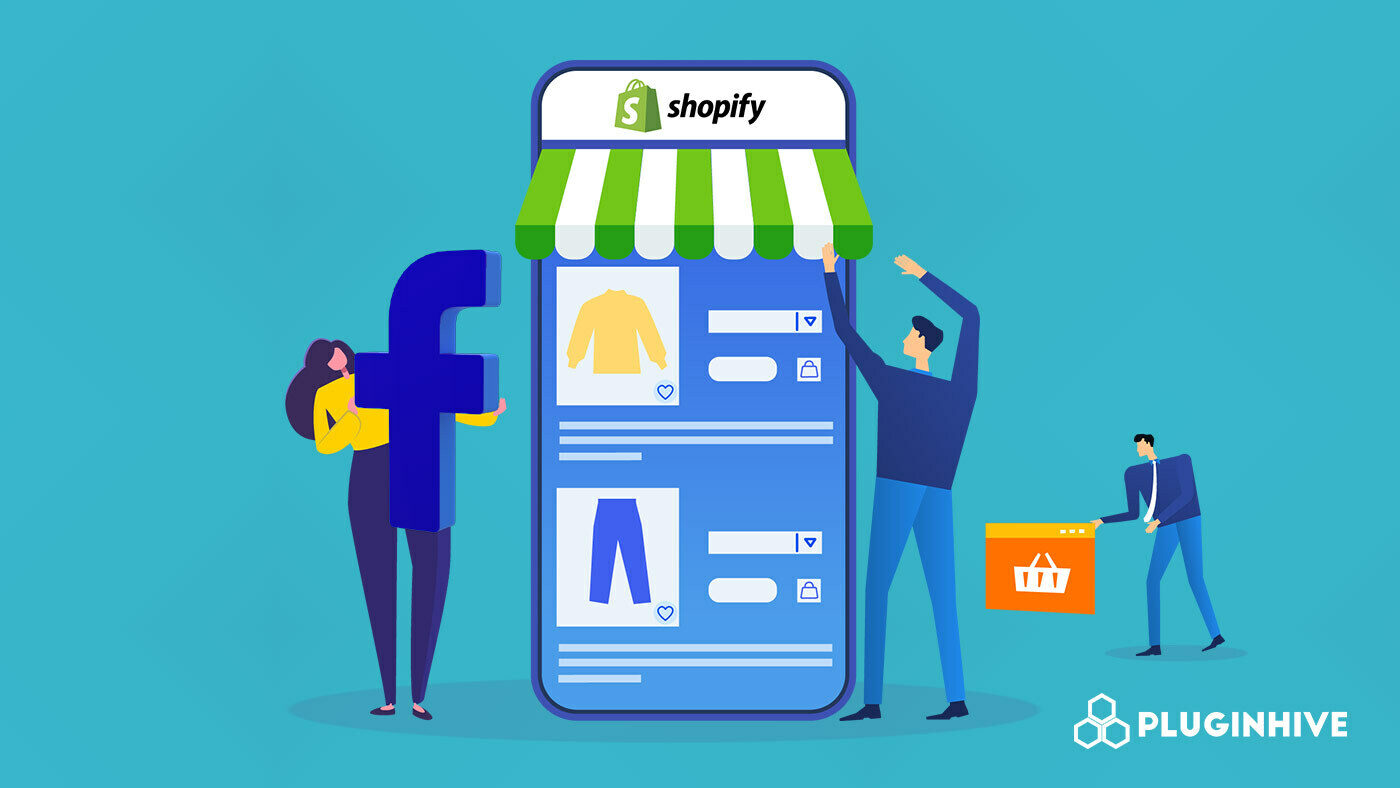
Why not make it simple by setting up a Shopify Facebook store? What does this mean? You run your e-store on Facebook, powered by Shopify. If you already have a following on Facebook, setting up a Shopify Facebook store is a no-brainer. After all, many sellers benefited from a Shopify Facebook store.
To set up your Shopify Facebook store, you must be on the Basic Shopify plan or higher, have a Facebook Business Manager account connected to your business’s Facebook page, and an ad account with an admin role for the Business Manager. The steps are pretty straightforward, so let’s take a look at the five simple steps to set up your Shopify Facebook Store:
On this page
- Prepare Your Facebook
- Get Shopify
- Create a Shopify Facebook Channel
- Connect Shopify to Facebook
- Add Products
1. Prepare Your Facebook
Create a Facebook Business Page
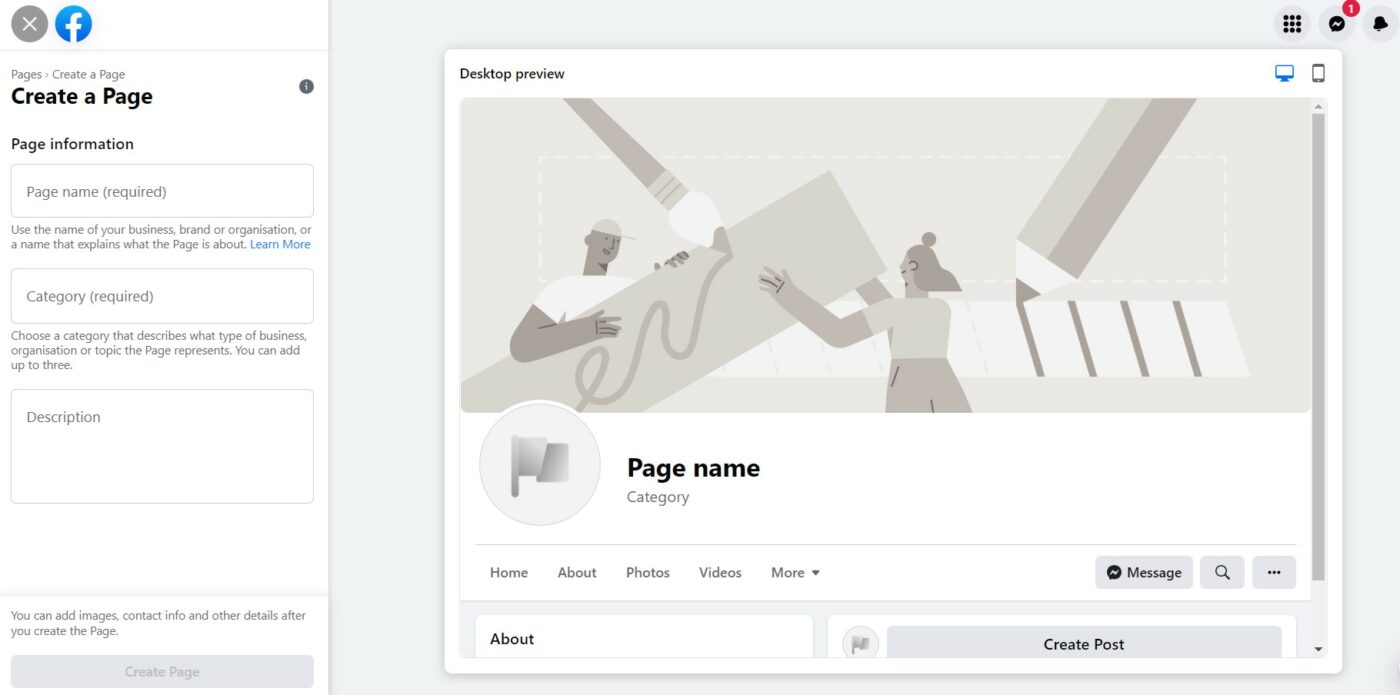
A Facebook business page is a public social media profile for commerce purposes. Many businesses use these business pages to make connections online and promote their products/services via links, latest updates, quality images, and videos.
- Go to the top right of your Facebook and click the ‘many dots’ icon.
- Go to the ‘Create’ section, and scroll down, click ‘Page’.
- Fill in the necessary page information.
- Click ‘Create Page’.
- Your business page is ready.
Create a Facebook Business Manager Account
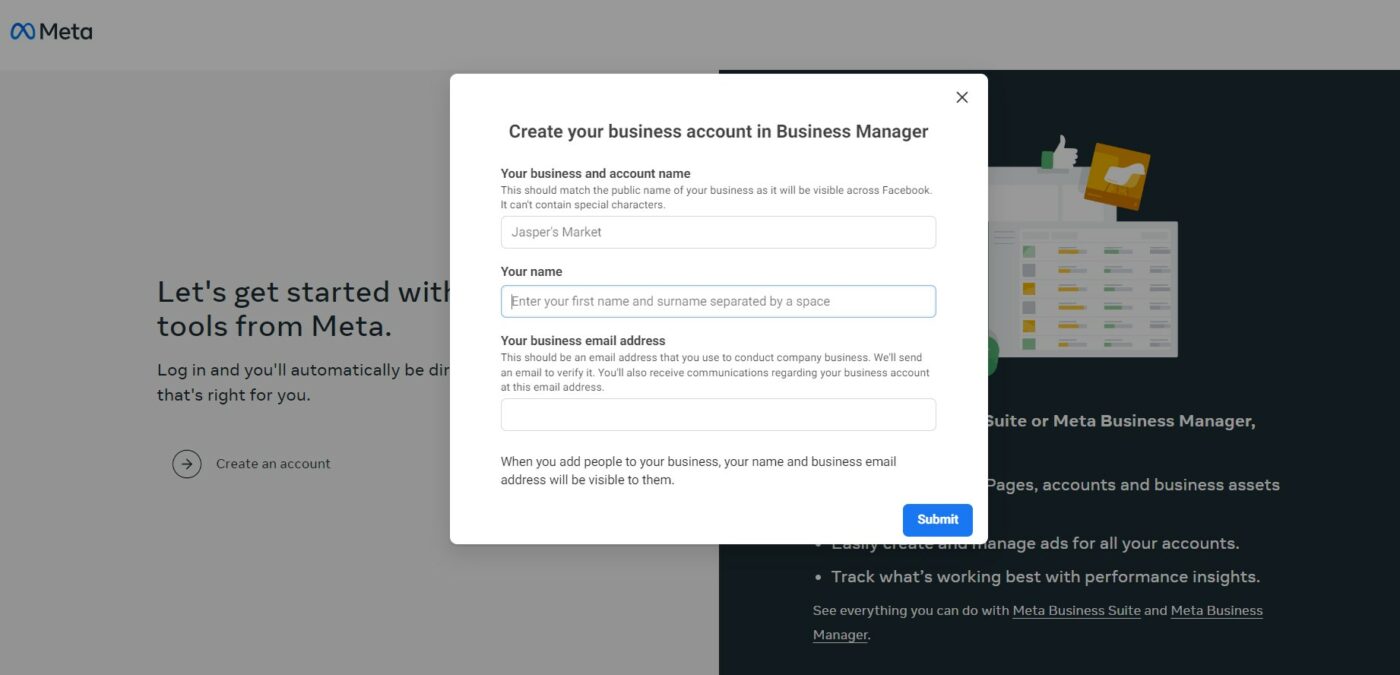
A Facebook Business Manager account is a tool that helps manage your business. You will need a Facebook profile to create this account. Once you join Business Manager, others cannot see your personal Facebook profile unless you accept them as friends. You still sign in to Business Manager via your Facebook username and password. Take note that you can only create two Business Manager accounts.
- Go to the Business Facebook page.
- Click ‘Create an account’.
- Enter your business details and click ‘Submit’.
- Your account is created.
- Verify your account by clicking a link in the email sent by Facebook to your provided email.
Add an Ad Account to Your Business Manager
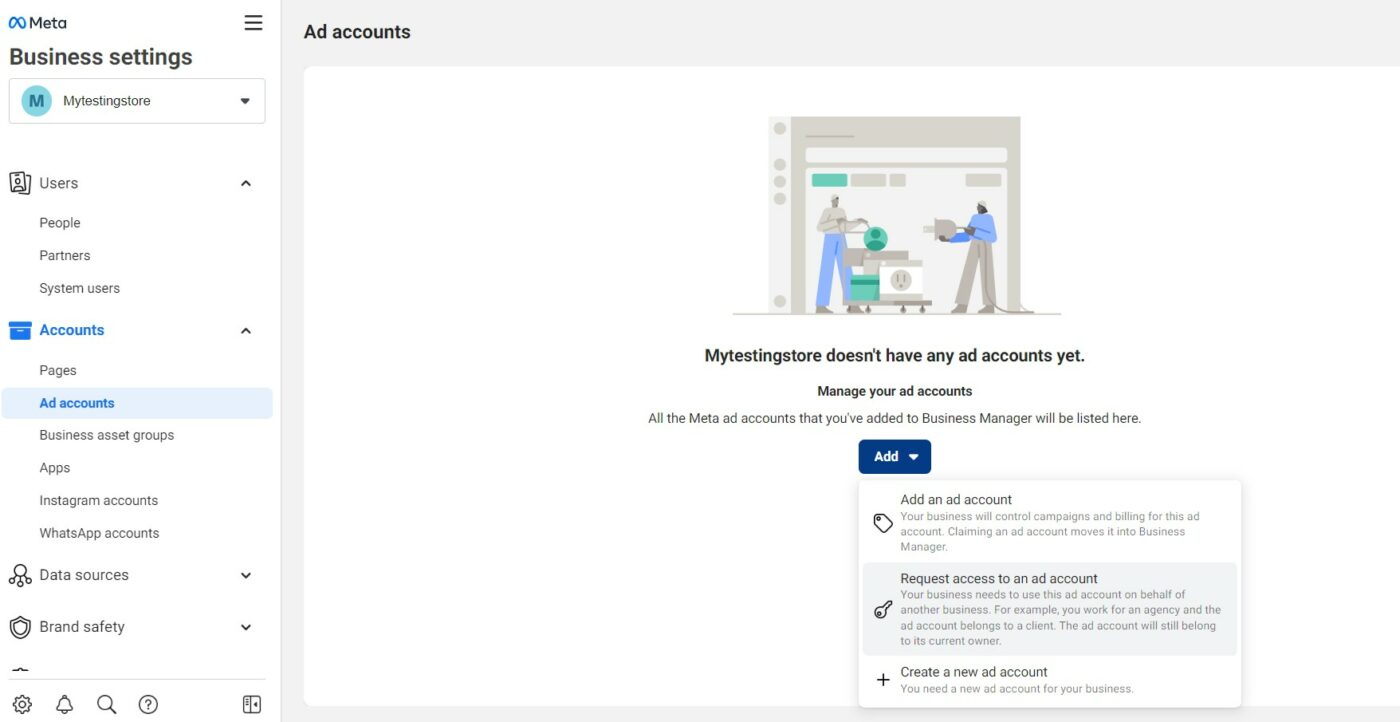
Your Facebook ad account contains all information about your ads, and you manage them on Facebook via this account.
- You have an ad account when you sign up for Facebook by default.
- So, now you will need to add your ad account to your Business Manager account.
- Go to your Business Manager dashboard.
- Click ‘More business settings’.
- Click ‘Ad accounts’ on the left side panel.
- Click the ‘Add’ drop-down menu.
- There are three options:
- Add an ad account – you need to be the ad account owner and also the admin in Business Manager to do this. This step is irreversible as your ad account is moved permanently into Business Manager.
- Request access to an ad account – the admin of that Business Manager account must grant you permission for this.
- Create a new ad account – this is a permanent action that belongs to that Business Manager account.
- The first two options require you to input the ad account ID.
- Follow through the steps to completion.
2. Get Shopify
- Go to Shopify and purchase one of their paid plans, or you can first try out their 14-day free trial with no credit card.
- Once you have received your login details, log in to Shopify.
- Once you are in the dashboard, clicking on Online Store will display several options below on the left panel. You will see a theme library that can help make your online store more attractive.
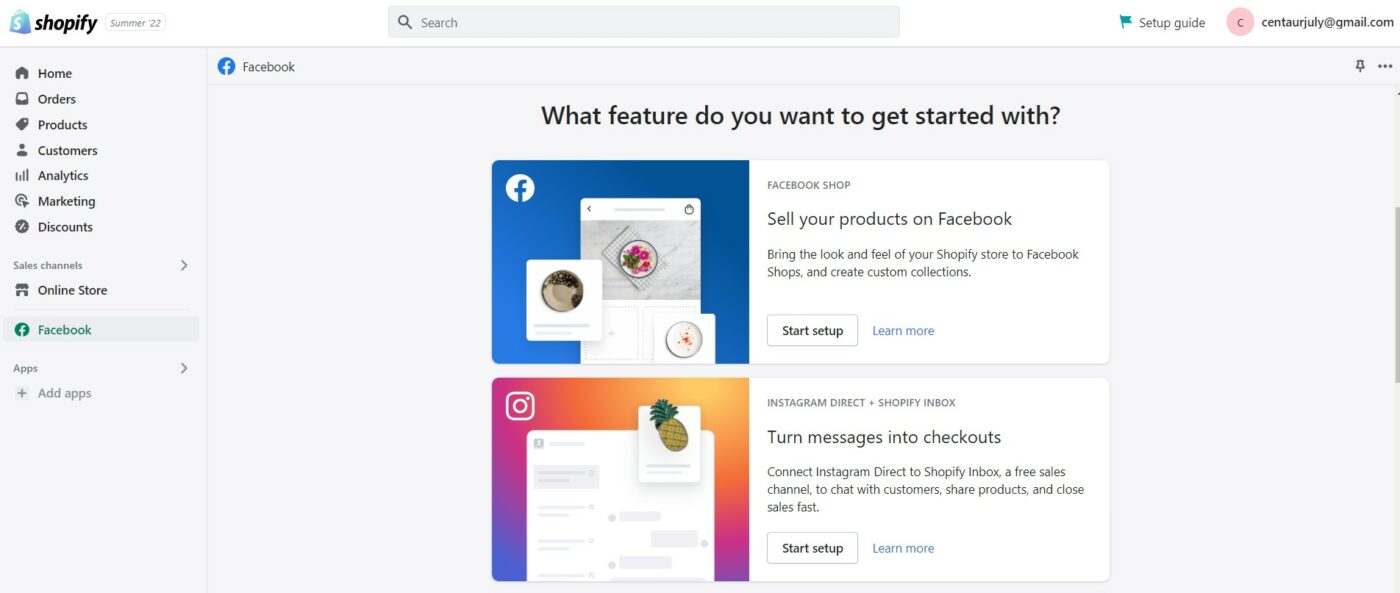
3. Create a Shopify Facebook Channel
Before selling on Facebook, you must have a Shopify Facebook channel. The products in your Facebook channel will appear across Facebook Marketing, Instagram Shopping, and Facebook shop. Your Facebook shop is attached to this Facebook channel that you’re about to set up.
To create a Shopify Facebook channel, you must have a Facebook account and an online store. And as mentioned, both a Facebook Business Manager and your business’s Facebook page must be ready.
Take note that a Facebook business page is owned by only one Facebook Business Manager account. That said, you can administrate multiple Facebook pages via a single Facebook Business Manager account. Also, you will need a new ad account inside Business Manager before you can create Facebook ad campaigns.
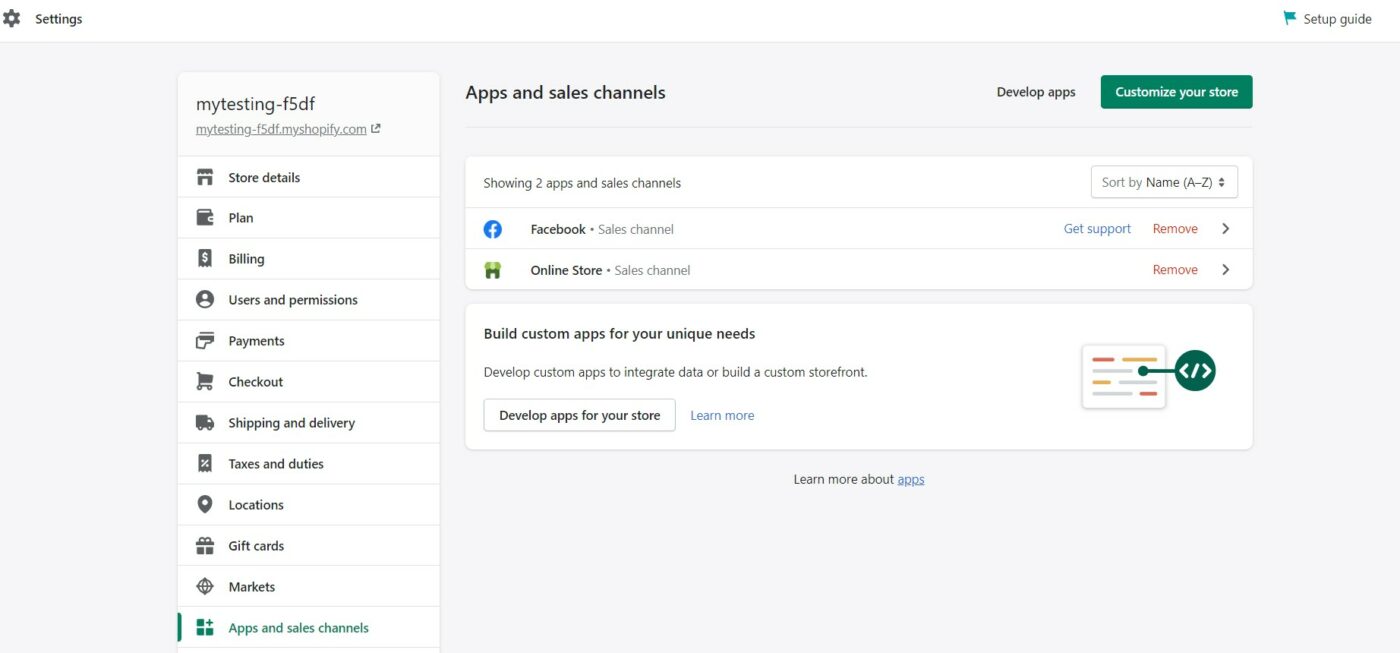
At your Shopify dashboard, click ‘Settings’. Then navigate to and click ‘Apps and sales channels’ on the left panel. You will see the Facebook sales channel already created.
4. Connect Shopify to Facebook
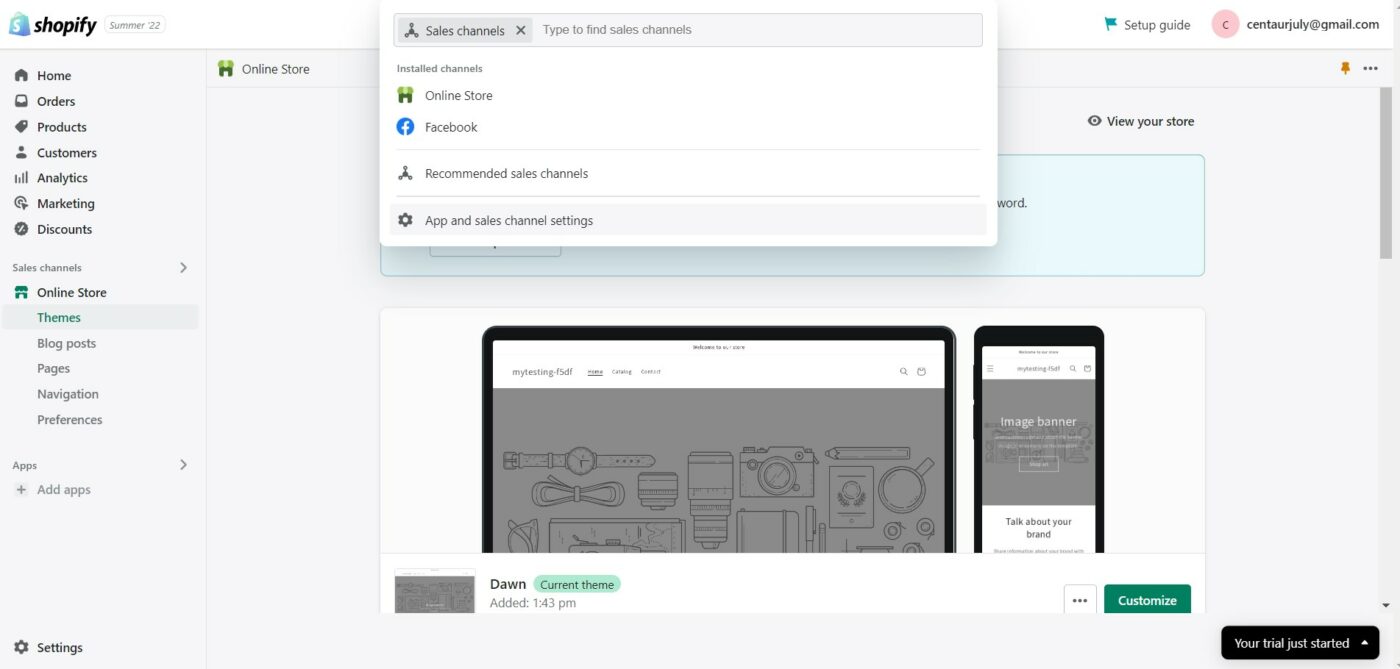
- On Shopify’s dashboard, click ‘Sales channels’.
- You will see the available sales channels that include Facebook.
- Select ‘Facebook’.
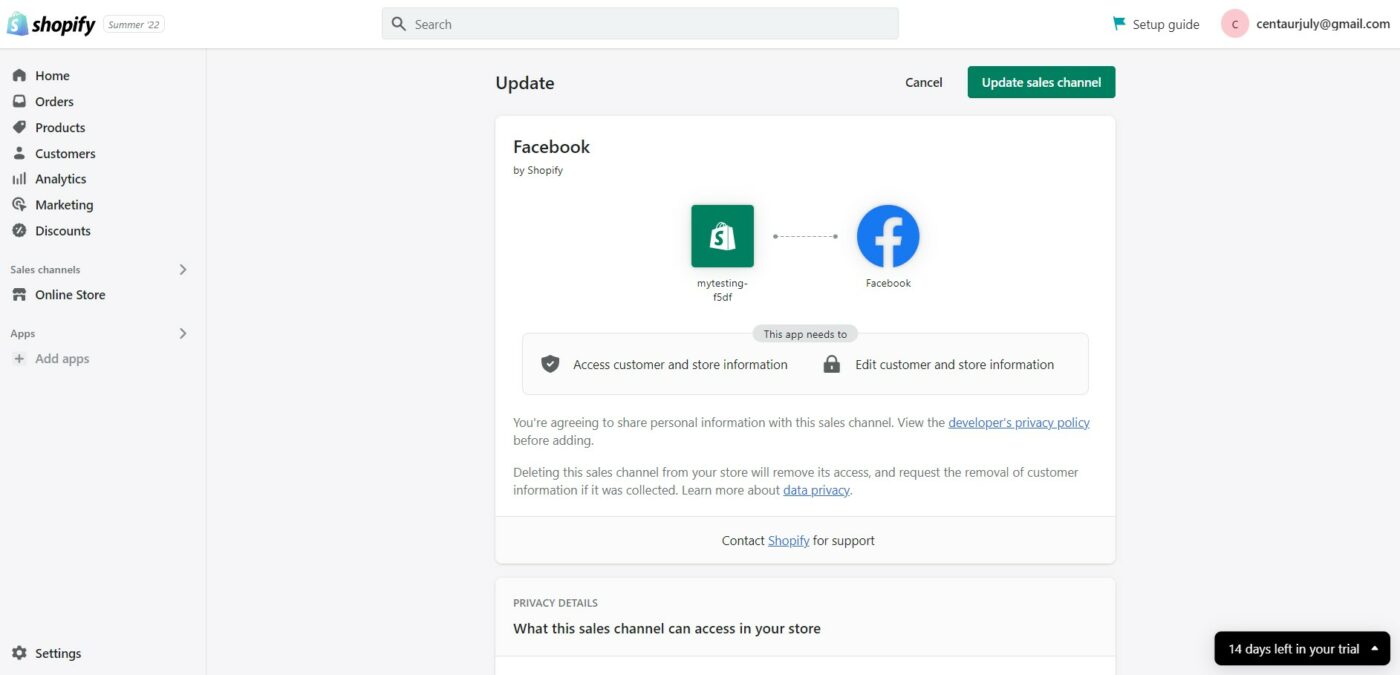
- Click ‘Update sales channel’.
- At your Shopify dashboard, click ‘Start setup’.
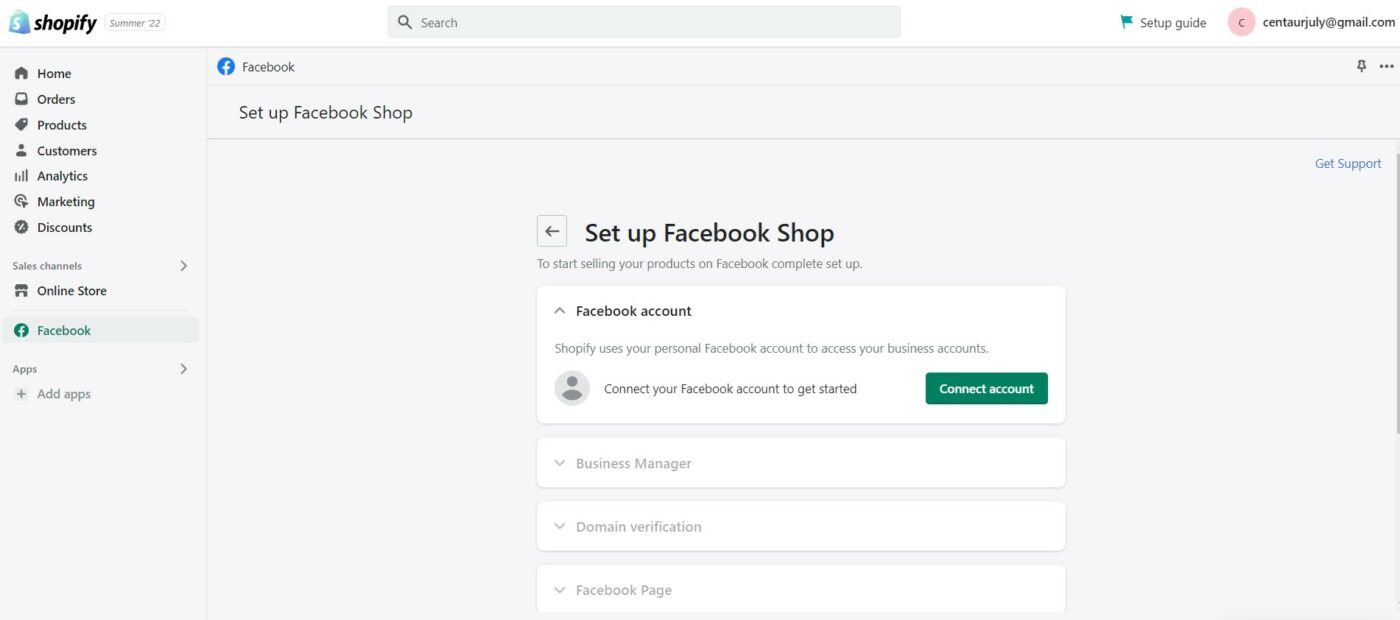
- Click ‘Connect account’.
- Follow through with the next steps to confirm allowing Shopify full access to your Facebook profile.
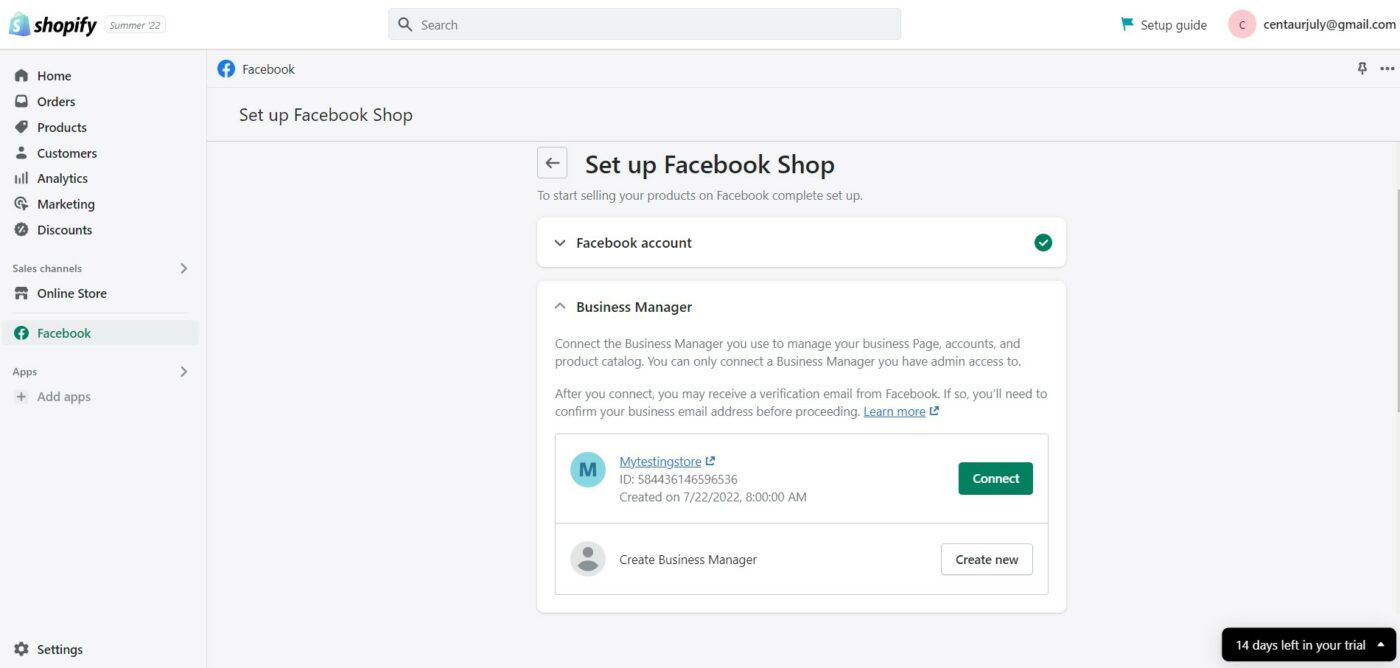
- Click ‘Connect’ to establish the connection of your store.
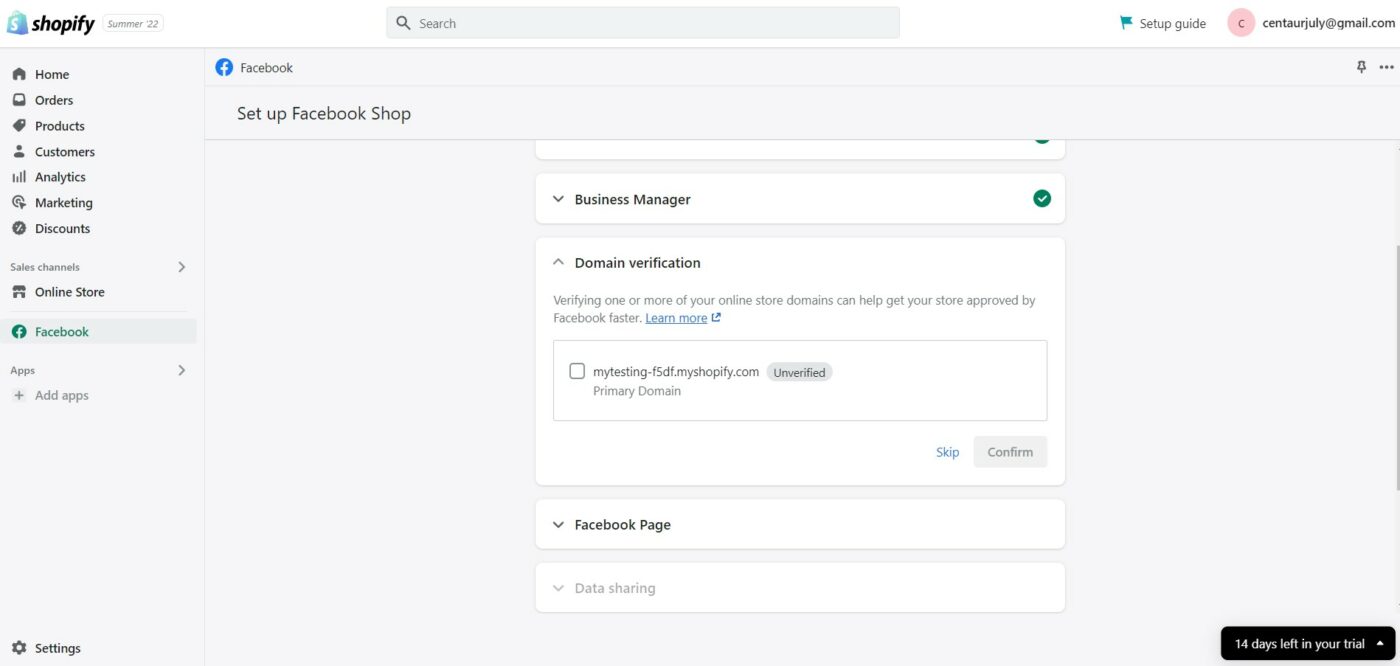
- You can verify your domain later. However, if you do so now, your approval will be faster. The listed domains in your Shopify account will appear here.
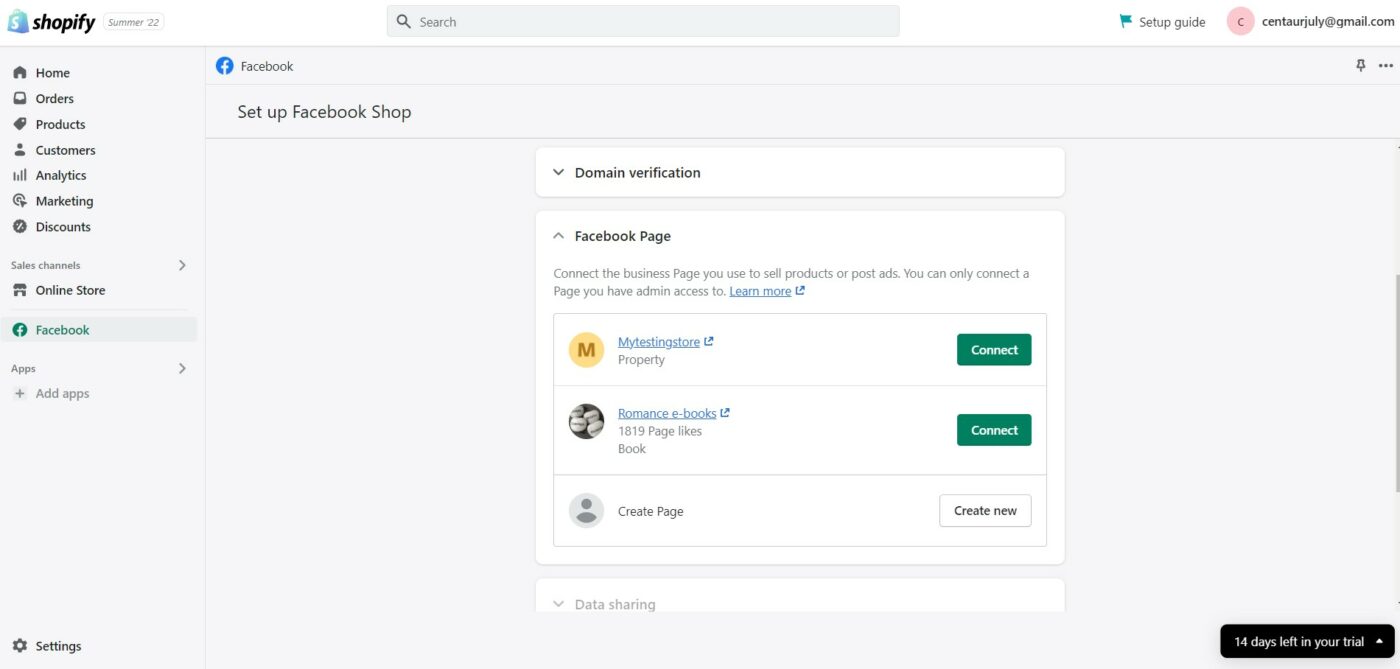
- Select your Facebook business page for the connection.
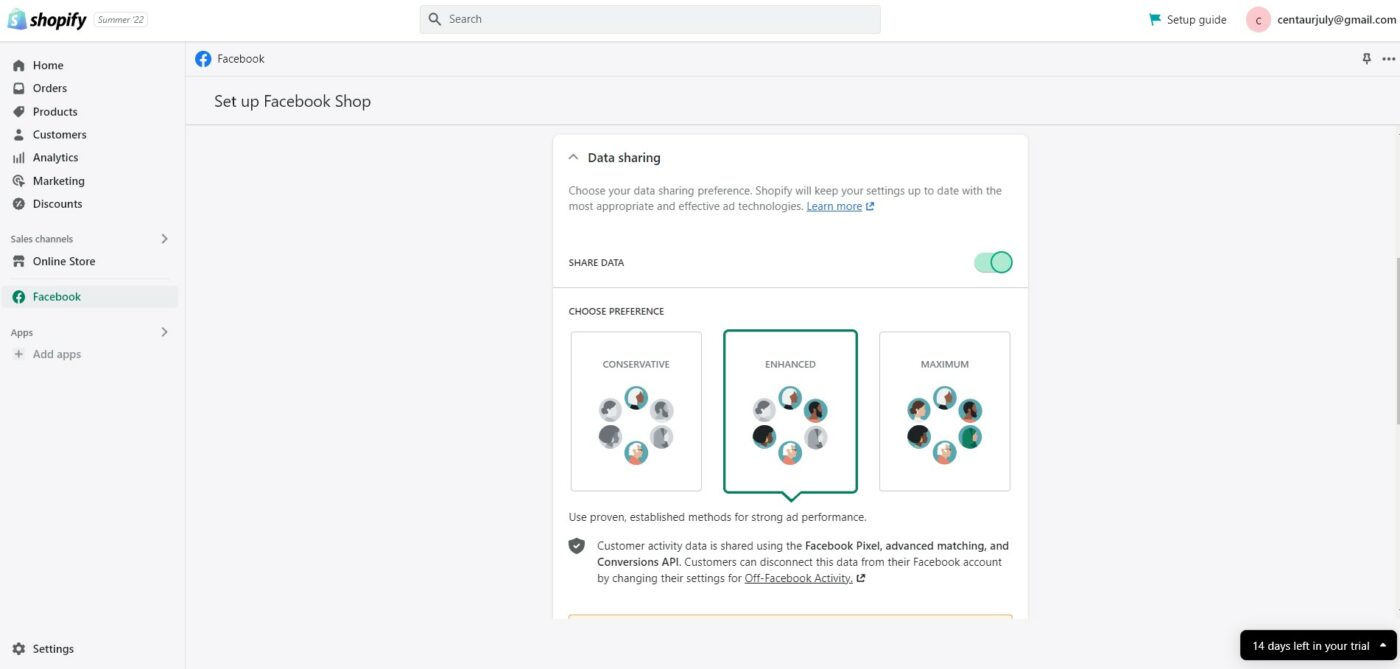
- This Data sharing option allows you to decide how you want to collect customers’ data and browsing behavior in your online store.
- Although this is optional, the collected data helps in your marketing analysis. However, be mindful that not everyone is comfortable with having their data shared. Please ensure you update your privacy policy accordingly.
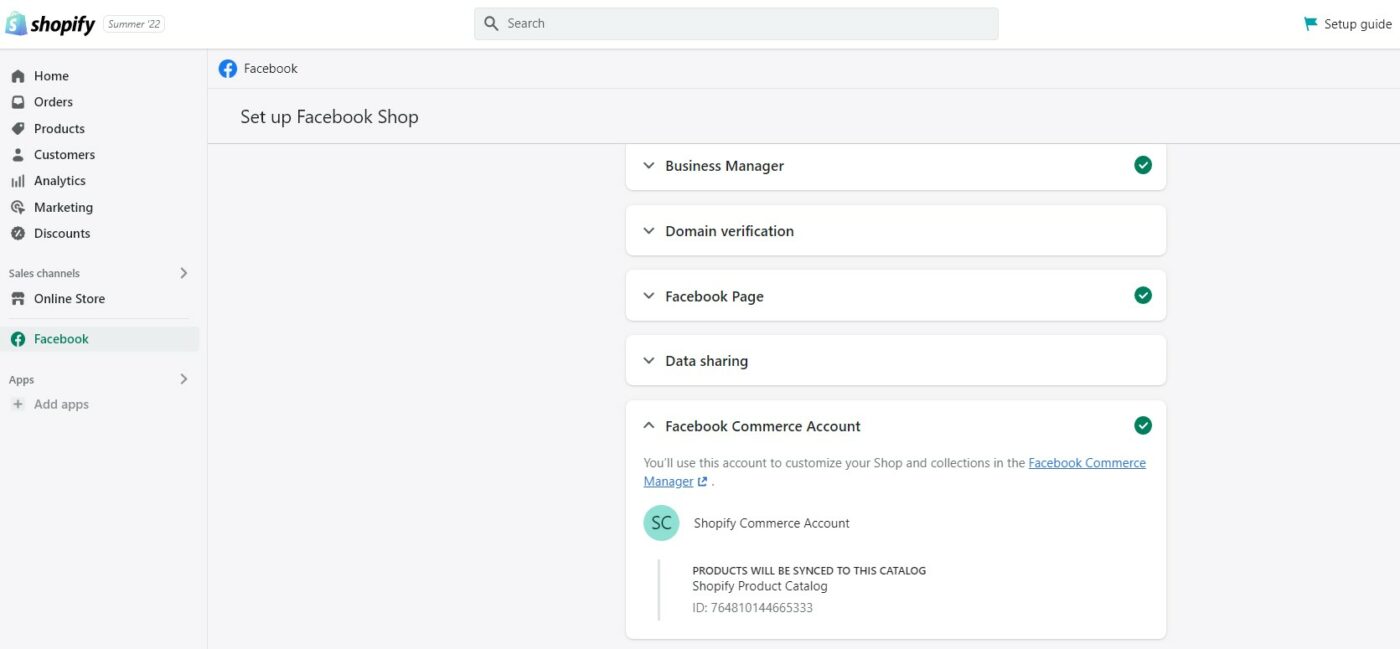
- Click ‘Create new’. By doing so, Facebook automatically creates a catalog of your products. You will add products from within Shopify. Your Shopify product listing automatically syncs with Facebook.
- Finally, click ‘Accept terms’ to complete the setup.
- Wait for approval from Facebook.
5. Add Products
Once your Facebook shop is approved, you can proceed to add products to sell.
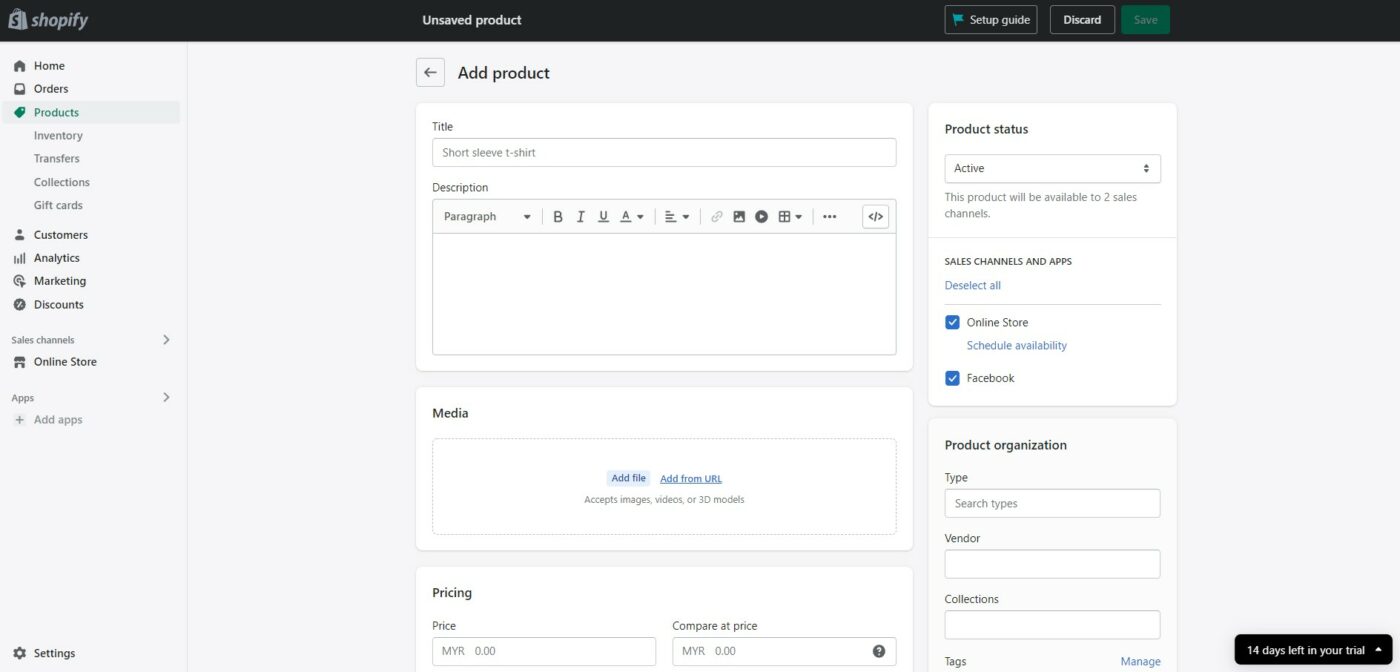
- At the Shopify dashboard, go to ‘Products’, then ‘Add Product’.
- Input your product name, description, pricing, images, and others. When confirming the pricing, pay attention to any taxable shipping fees for eCommerce.
- Once your product is ready to go live, select Facebook under ‘Sales Channel’ and save the product.
Time to Optimize Your Shopify Facebook Store
Your Shopify Facebook store is up and live! Although you have connected your powerful Shopify eCommerce platform to Facebook, the journey is far from over, as the next step is crucial to determining the success of your business: market your Shopify Facebook store. Like any other business, design a suitable marketing strategy to ensure your Shopify Facebook store enjoys high visibility. Even better, build organic followers alongside ads to keep your reach growing long-term.
Identifying your targeted audience and understanding their purchasing behavior and pain points are the first steps you need to undertake. Also, consider running Facebook ads and a referral program. Run promotional campaigns along with free shipping offers. Giveaways certainly help to go viral. Incorporating vertical video content into your ads can significantly boost engagement, especially on mobile. Continuously track and tweak along the way to fine-tune your marketing strategy for optimum results. Additionally, to help you with your Facebook Video Ads campaigns, you can also explore the Facebook Ads Library to get inspiration for your ad content and targeting strategy
Conclusion
Shopify is a solid self-hosting eCommerce platform. So, if you have chosen Shopify, it only makes sense to extend your reach by setting up a Shopify Facebook store. Leverage the power of Facebook to go viral via your followers’ ‘likes’ and their friends’ favorable comments.
Setting up a Shopify Facebook store means having Facebook create a ‘shop’ on your Facebook page for you that sells your Shopify products. By following through the five simple steps listed above, you will enjoy the combined benefits of both the powerful marketing potential of social media and the extensive eCommerce features that Shopify provides.