A WooCommerce Shipping Class is a label you assign to a group of products so WooCommerce can apply different shipping costs to them at checkout. If your store sells both lightweight accessories and heavy machinery, a single flat rate will either overcharge some customers or eat into your margins on others. Shipping classes solve this by automatically charging the right amount for each product type.
On This Page
- How to Create a WooCommerce Shipping Class
- How to Add Products to a WooCommerce Shipping Class
- How to Set WooCommerce Shipping Rates by Shipping Class
- Advanced WooCommerce Shipping Class Applications
- Conclusion
- FAQs
How to Create a WooCommerce Shipping Class
Navigate to WooCommerce → Settings → Shipping → Shipping Classes and click Add Shipping Class.

Fill in the following fields:
- Shipping Class Name – A descriptive label visible only to admins, such as “Heavy Items”, “Fragile Products”, or “Oversized Packages”.
- Slug – Optional. WooCommerce auto-generates this if left blank.
- Description – A short internal note to help you identify the class when managing multiple ones.

Click Create to confirm.
You can create as many classes as your store needs. Common examples include:
- Bulky Items – Large or oversized products requiring freight-level shipping
- Fragile Items – Glassware, ceramics, or anything needing special handling
- Lightweight Items – Envelopes, accessories, or small parts qualifying for cheaper postage
- Hazardous Goods – Products with carrier restrictions, such as batteries or chemicals
New to WooCommerce shipping overall? Before diving into classes, it helps to understand the full picture. Check out the Complete WooCommerce Shipping Guide to get familiar with all shipping methods, zones, and terminology.
How to Add Products to a WooCommerce Shipping Class
WooCommerce gives you two ways to assign products to a shipping class: individually or in bulk.
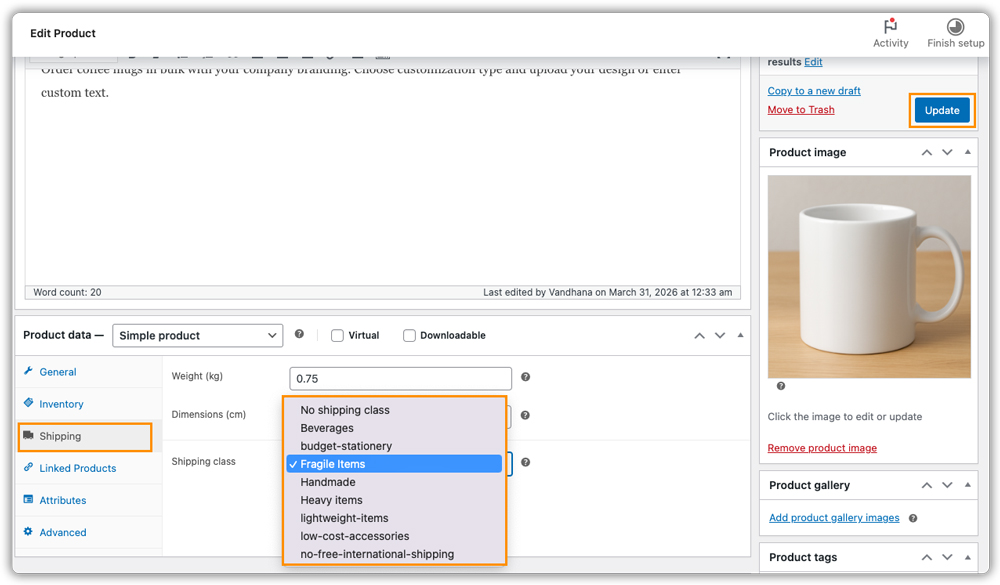
For a single product: Open the product, go to Product Data → Shipping, select the class from the Shipping Class dropdown, and click Update.
For multiple products at once: On the Products page, select all the relevant products, choose Edit under Bulk Actions, and click Apply.

In the bulk edit panel, select the desired class from the Shipping Class field and click Update.
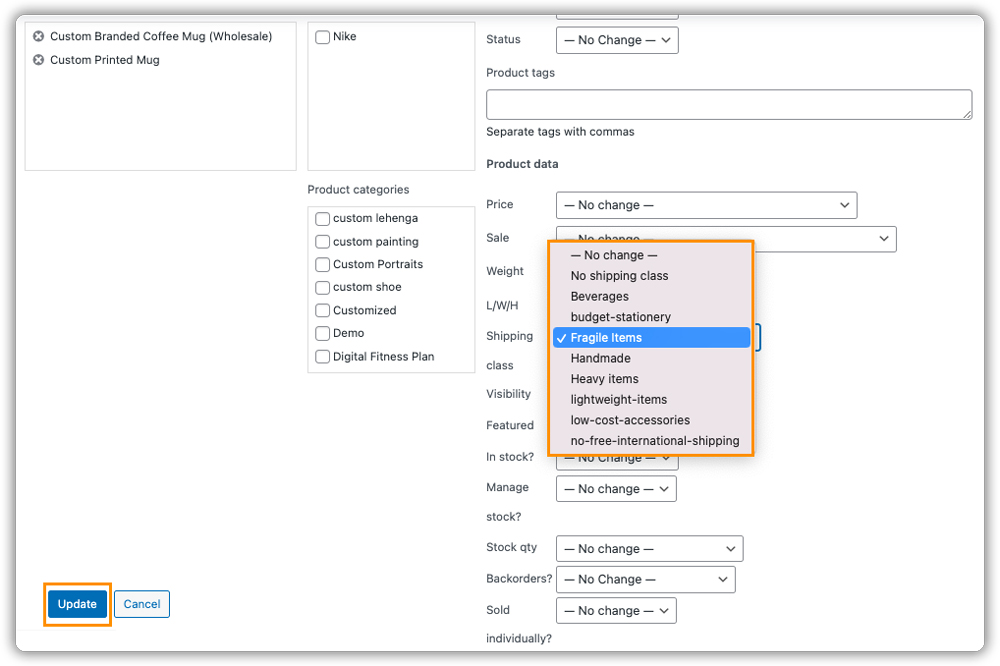
The bulk method saves significant time when you have a large catalog and need to assign classes across many products at once.
How to Set WooCommerce Shipping Rates by Shipping Class
Assigning a shipping class to a product does not automatically apply a shipping cost. You need to configure the rate for each class inside a shipping method within your shipping zone.
Go to WooCommerce → Settings → Shipping → Shipping Zones, open your zone, and click Edit next to the Flat Rate method.

Scroll down to the Shipping Class Costs section – a cost field appears automatically for every shipping class you have created.
Enter the rate you want to charge for each class. For instance, you might charge $5.00 for Standard Products, $20.00 for Heavy Items, and $15.00 for Fragile Items. The No Shipping Class Cost field acts as a fallback rate for any product that has not been assigned a class – it is good practice to always fill this in to avoid $0 shipping showing up unexpectedly at checkout.
Once done, click Save.

WooCommerce Shipping Class Calculation Type: Per Class vs Per Order
After setting the rates, the Calculation Type dropdown, also inside the Flat Rate settings, controls how WooCommerce totals the shipping cost when a cart contains products from more than one shipping class.
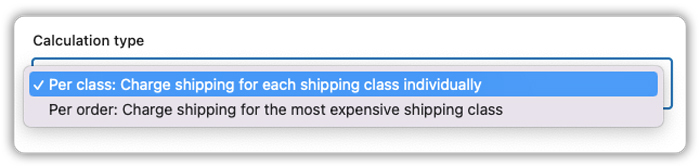
Selecting Per Class means WooCommerce calculates the cost for each shipping class in the cart separately and adds them together.
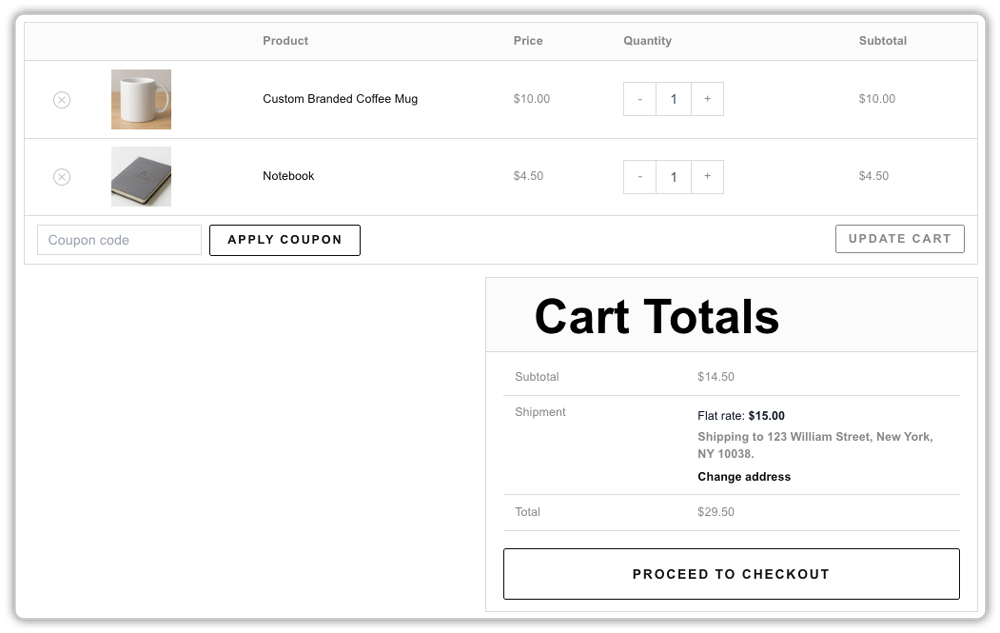
So a cart with one lightweight item ($3.00) and one Fragile Item ($15.00) would be charged a total of $18.00.

Selecting Per Order means WooCommerce charges based only on the most expensive shipping class in the cart; the same cart would be charged $15.00 only.
Use Per Order if you want to keep shipping costs reasonable for customers placing mixed-product orders. Use Per Class if your shipping costs are high enough that you need to recover the full amount for every product type in the order.
Advanced WooCommerce Shipping Class Applications
WooCommerce’s default settings only let you assign a fixed cost to each shipping class within the Flat Rate method. If your shipping requirements go beyond that, such as calculating costs based on weight or destination, or controlling which shipping methods appear at checkout, you will need a plugin to handle it. The sections below cover the two most common scenarios and the PluginHive plugins that solve them.
Flexible Shipping Rates by WooCommerce Shipping Class
When your store sells products that require different shipping costs based on more than just product type, say, a combination of weight, destination, and quantity, flat rate pricing alone is not enough. The PH Table Rate Shipping Pro Plugin for WooCommerce by PluginHive is built for exactly this.
The plugin works on a rule-based system. You build a rate matrix where each rule defines a set of conditions, and when a customer’s cart matches those conditions, the corresponding shipping cost is applied automatically at checkout. You can combine conditions like shipping class, destination country, order weight, cart total, and product quantity all within a single rule.
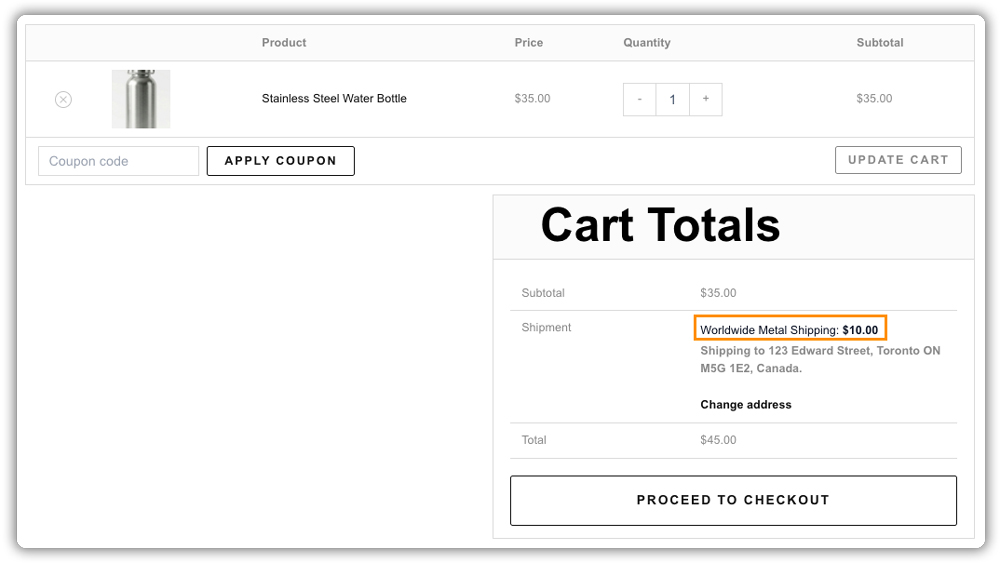
Example: Suppose your store ships liquid goods only to the United States and metal goods to all other countries. You would set up two rules, one for liquids restricted to the United States at $15, and one for metals open to all countries at $10. WooCommerce reads the cart and displays the correct rate at checkout without any manual intervention.

For stores with large or frequently changing rate structures, the plugin supports bulk import and export of rules via CSV, which makes managing hundreds of rules significantly faster.
Common use cases for Table Rate Shipping with classes:
- Set up shipping by State and Shipping Class – useful when you need to combine geographic and product-type conditions in one rule.
- Set up weight-based shipping using shipping classes – ideal if your shipping classes map to product weight categories like envelopes vs. parcels.
- Set up shipping rates by product categories – if you prefer to organise products by WooCommerce categories rather than shipping classes.
To understand how to set up the plugin and configure shipping rules, refer to the PH Table Rate Shipping Pro Plugin for WooCommerce setup guide.
Control WooCommerce Shipping Methods by Shipping Class
A common issue arises when multiple shipping methods are configured without conditions. For example, if your store offers both Standard Shipping and Freight Shipping, WooCommerce may display both methods at checkout even when only one is relevant to the items in the cart. This can create confusion and lead customers to choose an incorrect shipping option.
The PH Hide Shipping Methods & Rate Adjustment for WooCommerce solves this by letting you create rules that control which shipping methods are shown or hidden based on the shipping classes present in the cart.
Example: Your store offers free shipping on standard products. However, for products assigned to the Freight Products shipping class, you create a rule to automatically hide the Free Shipping method. When a freight item is added to the cart, only the applicable paid shipping
methods (like Freight Shipping) are shown. This ensures customers cannot select free shipping for high-cost deliveries.


Beyond shipping class, the plugin also lets you show or hide methods based on cart total, product quantity, customer location, user role, and coupon usage. You can also use it to adjust the displayed shipping rate up or down, for instance, adding a handling surcharge for a specific class or offering a discounted rate for a particular user role.
To understand how to configure the rules, refer to the PH Hide Shipping Methods & Rate Adjustment for WooCommerce setup guide.
Conclusion
WooCommerce Shipping Classes take the guesswork out of charging the right shipping rate for different product types. Once your classes are created, products are assigned, and rates are configured within your shipping zones, WooCommerce handles the rest automatically at checkout.
For stores with more complex requirements, PluginHive’s PH Table Rate Shipping Pro Plugin for WooCommerce lets you build rule-based rates that factor in weight, destination, quantity, and shipping class. The PH Hide Shipping Methods & Rate Adjustment for WooCommerce ensures customers only see the shipping methods relevant to their cart, reducing confusion at checkout. If you need help setting this up on your WooCommerce store, feel free to contact PluginHive Support.
FAQs
Q. What is a WooCommerce Shipping Class used for?
It groups products with similar shipping needs so you can manage rates at the class level rather than editing each product individually.
Q. Do WooCommerce Shipping Classes replace shipping zones?
No. Zones define where you ship. Classes define what you are shipping and how much it costs. They work together; class rates are configured inside a zone’s shipping method settings.
Q. What happens if a product has no WooCommerce Shipping Class assigned? WooCommerce uses the No Shipping Class Cost field in the Flat Rate settings as a fallback. If this is left empty, WooCommerce may display $0 or no shipping method, depending on your zone setup.