Displaying accurate shipping rates at checkout is essential for any online store. When you want to ship with UPS and accurate rates don’t appear in your WooCommerce store, it can lead to confusion, abandoned carts, and lost sales, as customers expect real-time costs before placing an order. This issue can occur due to several reasons, which can be fixed easily.
In some cases, the problem may be minor, while in others it could be related to deeper setup or compatibility issues. In this article, we’ll walk through the most common causes and practical fixes to help you display accurate UPS shipping rates seamlessly at checkout.
On This Page
- How UPS Shipping Rates Work in WooCommerce
- Common Reasons Why UPS Rates Don’t Show in WooCommerce
- How to Fix UPS Rates Not Showing in WooCommerce
- Best Practices for Accurate WooCommerce UPS Rates
- Conclusion
- FAQs
How UPS Shipping Rates Work in WooCommerce
In a WooCommerce store, UPS shipping rates are calculated in real time using the UPS API. When a customer enters their shipping address on the cart or checkout page, your store sends a request to UPS to fetch the latest available shipping options and costs.
To enable this, you need a UPS shipping plugin that connects your store to the UPS API using your account credentials, such as your UPS account number, Client ID, and Client Secret. Once connected, the plugin gathers key shipment details, including:
- Product weight and dimensions
- Store’s origin address
- Customer’s destination address
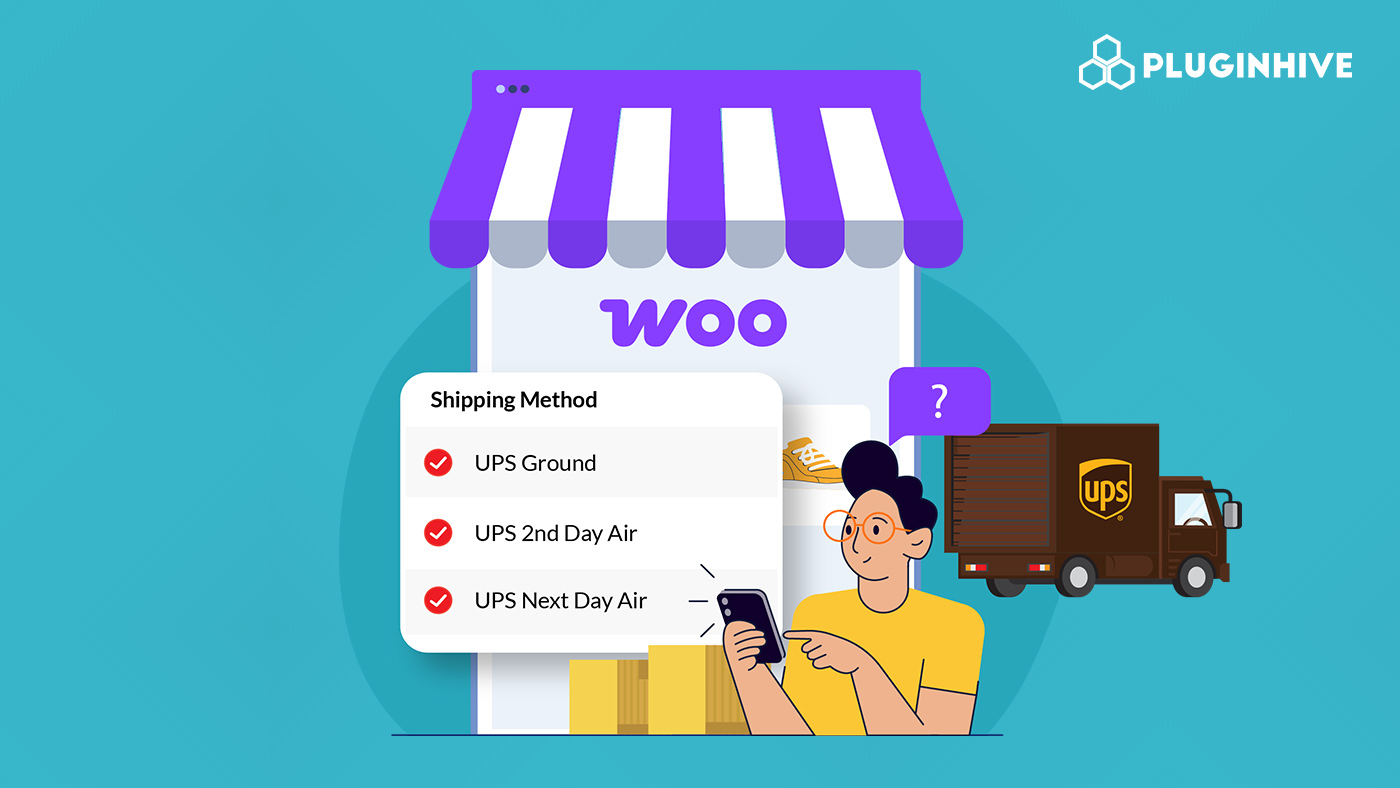
- Selected UPS services (such as UPS Ground, UPS Next Day Air, or UPS Worldwide Expedited)
Using this information, UPS calculates the shipping cost and returns a list of available services along with their real-time rates. These rates are then displayed at checkout, allowing customers to choose the option that best fits their needs.
Common Reasons Why UPS Rates Don’t Show in WooCommerce
When UPS rates don’t appear in your WooCommerce store, it’s usually due to a configuration issue or missing data. Below are the most common reasons behind this problem:
1. Using an Unsupported or Outdated Plugin
Not all plugins fully support UPS’s real-time rate APIs. Some integrations are limited in functionality, not properly maintained, or haven’t been updated to work with UPS’s current API standards, which can result in no rates being displayed, incorrect shipping costs, or failed API requests. It’s important to use a reliable and well-supported solution. The PluginHive’s WooCommerce UPS Shipping Plugin with Print Label is designed to work seamlessly with UPS APIs, helping you fetch accurate, real-time shipping rates and manage shipments efficiently.
2. Incorrect or Missing UPS API Credentials
UPS requires valid API credentials, including your account number, Client ID, and Client Secret, to return shipping rates. If any of these are incorrect, or if you’re using old Access Key-based credentials instead of the current OAuth 2.0 credentials, rates won’t be displayed.
3. Plugin Misconfiguration
Even with the right plugin, incorrect settings can prevent rates from showing. This includes:
- Real-time rates not enabled
- Required UPS services not selected
- Incorrect packaging type or weight units configured
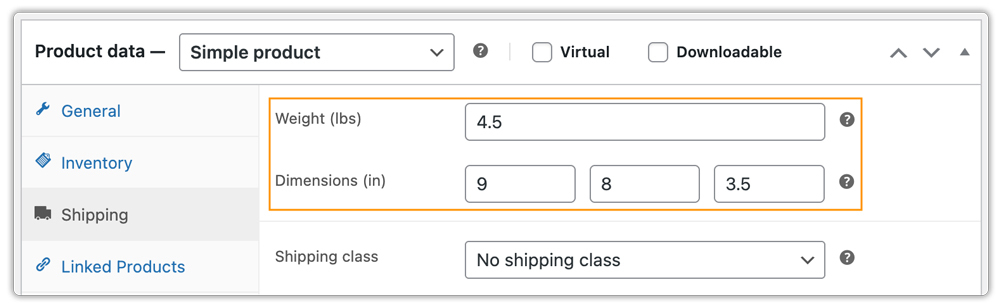
4. Missing Product Shipping Data
UPS calculates rates based on product details. If your products don’t have weight and dimensions set, the API cannot return accurate rates, resulting in no shipping options being displayed at checkout.
5. Shipping Zone & Method Issues
WooCommerce shipping zones must be configured correctly. If UPS is not added as a shipping method in the relevant zone, if the customer’s location doesn’t match any configured zone, or if the selected service is unavailable for that location, rates will not appear at checkout.
6. Address Validation Errors
UPS requires valid and complete addresses to process rate requests. Missing or incorrect details, such as postcode, city, state, or country, can cause the API request to fail, preventing rates from loading.
How to Fix UPS Rates Not Showing in WooCommerce
Fixing missing UPS rates in your WooCommerce store becomes much easier when you use a fully compatible solution like the WooCommerce UPS Shipping Plugin with Print Label. This plugin is designed to connect directly with UPS APIs and handle everything from rate fetching to label generation and tracking.
For step-by-step instructions on setting up the UPS shipping plugin, visit the PluginHive WooCommerce UPS Shipping Guide .
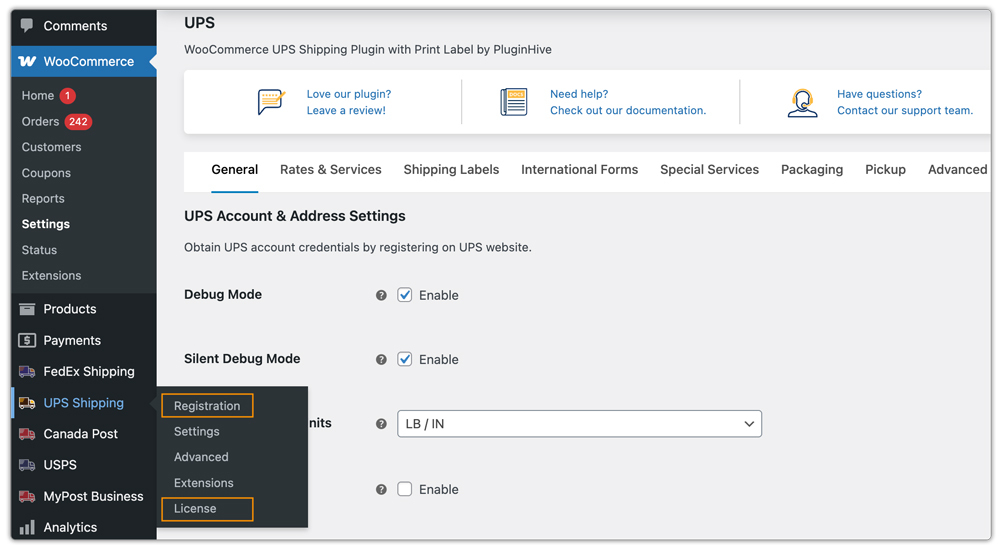
1. Enter Correct UPS API Credentials
Go to the plugin’s Registration settings and enter your UPS account number and password. Make sure you are using your current OAuth 2.0 production credentials, not the old Access Key-based ones. After activating the license, the plugin uses these details to connect with UPS and fetch live rates.
2. Set the Correct Shipping Origin Address
In the plugin settings, enter your store’s full origin address, including street, city, state, postcode, and country. UPS calculates rates based on both origin and destination, so incorrect details here can block rate results.

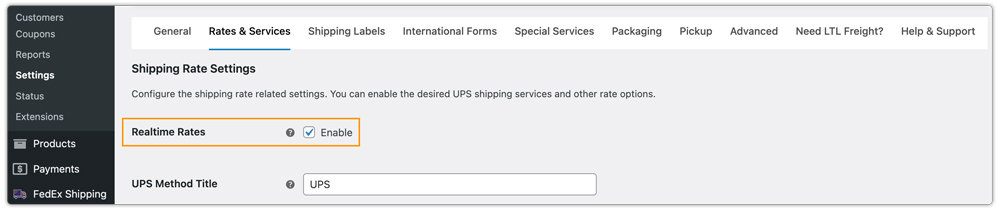
3. Enable Real-Time Rates in Plugin Settings
In the plugin configuration, enable the Real-Time Rates option. Without enabling this, rates will not appear on the cart or checkout page.
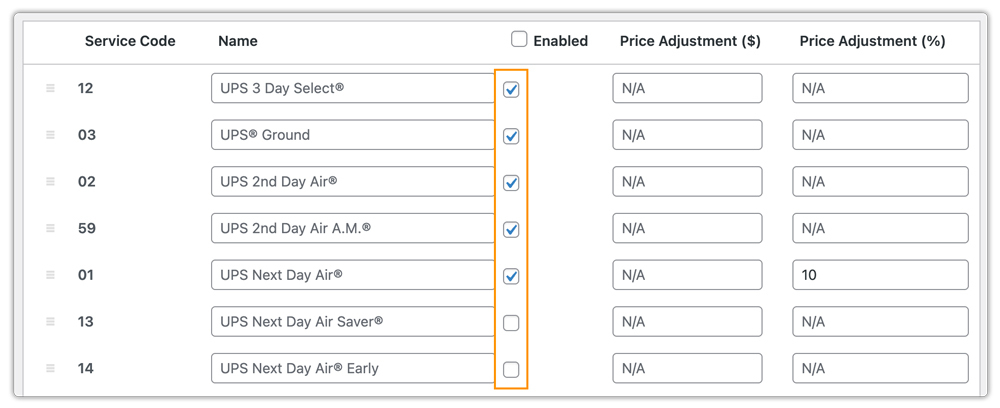
4. Configure UPS Services Properly
Under the Rates & Services section, enable the UPS services you want to offer, such as UPS Ground, UPS Next Day Air, or UPS Worldwide Expedited. The plugin will only display services that are enabled and available for the destination.
5. Add Complete Product Shipping Details
Ensure all products have weight and dimensions filled in. The plugin uses this data to calculate shipping costs accurately. Missing product data can prevent UPS from returning rates entirely.
The Final Action
Test with Valid Customer Addresses
Use complete and valid addresses when testing, including the correct postcode, city, state, and country. The plugin fetches rates dynamically based on the entered address, so invalid or incomplete test data can cause failures that don’t reflect real-world behavior.

Keep the Plugin Updated
Always use the latest version of the plugin to maintain compatibility with WooCommerce, stay aligned with UPS API updates, and avoid known bugs or rate-fetching errors.
Using a reliable UPS plugin and configuring it correctly ensures your store fetches and displays real-time shipping rates accurately at checkout. This not only fixes missing rate issues but also improves the overall shipping experience for your customers.
Best Practices for Accurate WooCommerce UPS Rates
To ensure accurate and reliable UPS rates in your WooCommerce store, follow these practical tips:
1. Combine UPS with Free or Flat Rates
Alongside UPS live rates, you can offer free shipping or flat-rate options based on conditions like cart value or location using the WooCommerce Table Rate Shipping Pro Plugin.
2. Show Estimated Delivery Dates
While delivery estimates are available in the UPS plugin, for better flexibility and customization, you can use the Estimated Delivery Date Plugin for WooCommerce.
3. Control UPS Shipping Methods Display
Hide or adjust unwanted UPS services at checkout using the PH Hide WooCommerce Shipping Methods & Rate Adjustment Plugin to keep the checkout experience clean for customers.
4. Use Multi-Carrier Shipping When Needed
If you ship with multiple carriers, the Multi-Carrier Shipping Plugin for WooCommerce helps you display rates from FedEx, USPS, DHL, and others alongside UPS and compare them effectively.
5. Regularly Test Your Checkout
Test your checkout with different locations and order scenarios to ensure UPS rates are displayed correctly at all times.
Conclusion
Missing or incorrect UPS rates in your WooCommerce store can disrupt the checkout experience and impact customer trust. Once you identify the root cause and apply the necessary fixes, your store will display accurate, real-time UPS shipping rates consistently at checkout.
If you still face issues or need assistance, you can reach out to PluginHive support here: PluginHive Support.
FAQs
Q. Do I need a UPS account to display shipping rates in WooCommerce?
Yes, you need an active UPS account along with the right credentials to fetch and display real-time UPS shipping rates in WooCommerce.
Q. What is the difference between UPS list rates and account rates?
UPS list rates follow the standard published pricing, while account rates offer contract-based discounts determined by your UPS agreement and shipping volume.
Q. Why does UPS not return rates for certain locations?
This can happen if the selected service does not support the destination, the address is incomplete, or your UPS account does not have that service activated for that region.
Q. How often are UPS shipping rates updated?
The UPS API fetches rates in real time and updates them instantly based on shipment details like weight, dimensions, destination, and service type.