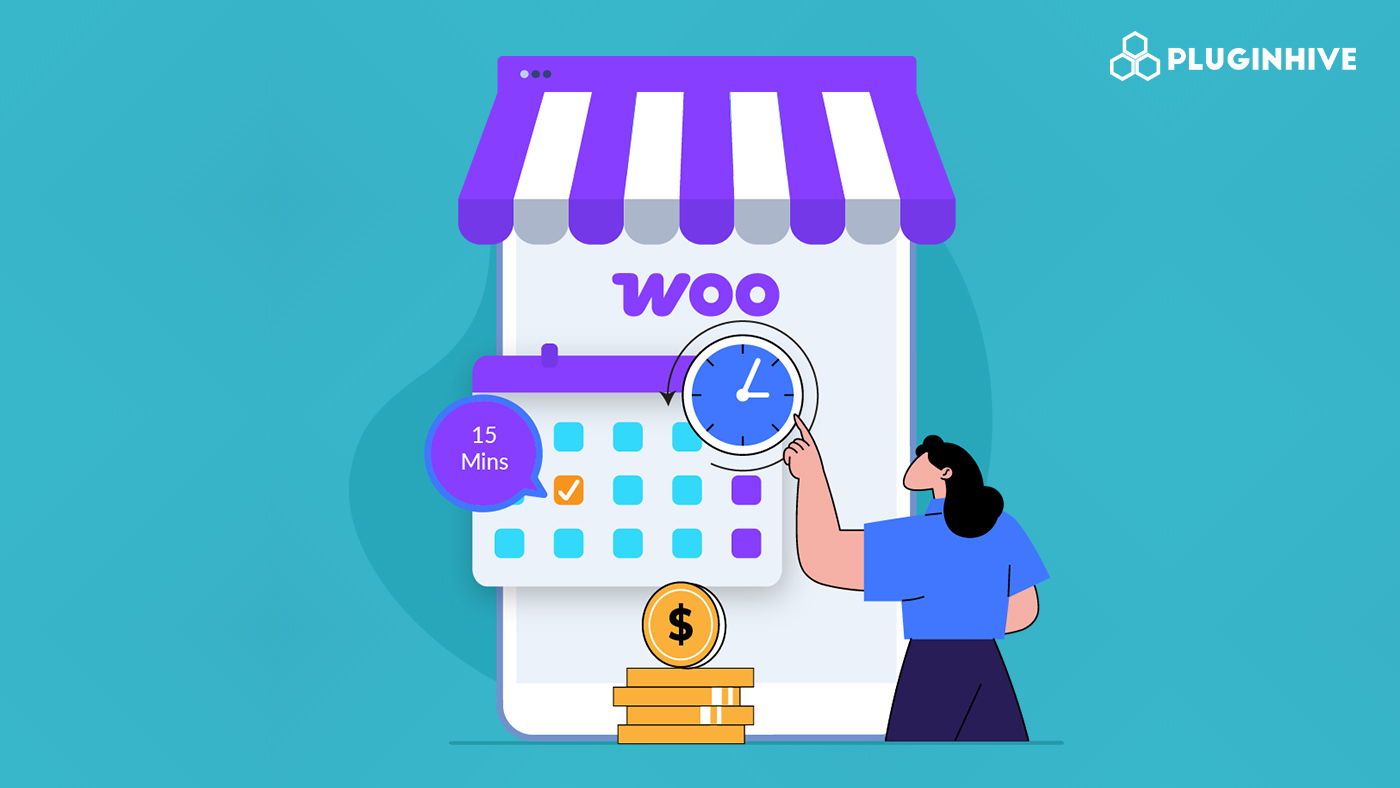
When bookings are scheduled back-to-back in your WooCommerce store, it can create unnecessary pressure for your team and affect the customer experience. Without short gaps between bookings, staff may rush, errors can happen, and service quality can drop. Buffer time, a small period before or after each booking, gives you time to prepare, clean, restock, or simply take a break, helping your store run more smoothly and keeping customers satisfied.
WooCommerce alone doesn’t provide an easy way to manage bookings and gaps like these, so using a dedicated booking plugin is key. With the Bookings and Appointments for WooCommerce plugin, you can easily add pre- and post-booking time for any service, rental, or event. In this guide, we’ll show you how to add buffer time in WooCommerce Bookings so your schedule stays organized, efficient, and stress-free.
Table of Contents
- Recommended Buffer Times for Different WooCommerce Businesses
- Adding Buffer Time to Bookings in Your WooCommerce Store
- Common Mistakes to Avoid When Setting Buffer Time in WooCommerce
- Conclusion
- FAQs
Recommended Buffer Times for Different WooCommerce Businesses
Choosing the right buffer time in WooCommerce Bookings depends on the type of service you offer. Different businesses require different preparation and wrap-up times to keep operations well-structured, maintain service quality, and prevent back-to-back bookings from causing delays. The table below provides practical recommendations for pre- and post-service buffer times across common business categories.
| Business Category | Pre-Buffer Focus | Post-Buffer Focus | Recommended Range |
|---|---|---|---|
| Salon & Spa | Set up equipment, prep products, and welcome the client | Clean tools, sanitize workspace, reset for next client | 10–30 Minutes |
| Fitness / Personal Training | Warm-up setup, check equipment, client briefing | Cool down, clean equipment, prepare space for next session | 10–30 Minutes |
| Coaching / Online Sessions | Test software, prep materials or slides | Note-taking, review session, reset for next client | 10–30 Minutes |
| Equipment Rental | Inspect equipment, prep rental items | Return check, clean/maintain equipment | 30 Minutes – 2 Hours |
| Tours & Experiences | Staff briefing, prep materials or vehicles | Reset venue, gather equipment, prep for next group | 1–4 Hours |
| Therapy / Medical Appointments | Prepare treatment room, review patient info | Clean space, dispose of used items, update records | 15–60 Minutes |
| Event / Party Planning | Decorate/setup venue, coordinate staff | Cleanup, reset venue, organize for next event | 2–12 Hours |
| Multi-Day Rentals / Stays | Prepare property, check inventory | Clean, restock, inspect for next booking | 1–2 Days |
These ranges are a starting point to help plan buffer time in WooCommerce Bookings. In the next section, we’ll show a simple guide to add buffer time to your bookings.
Adding Buffer Time to Bookings in Your WooCommerce Store
To add buffer time to your bookings, ensure that the Bookings and Appointments for WooCommerce plugin is installed, activated, and fully set up on your store. If you need help with the setup, follow this step-by-step guide: Bookings and Appointments for WooCommerce Setup Guide.
Once everything is ready, you can easily add buffer time to any product, service, or booking. Just follow these simple steps:
1. Turn On Buffer Time
Log in to WordPress and open the product or service you want to make bookable. Scroll down to the Bookings section. Find the Buffer Time option and enable it. This will let you block time around each booking so customers can’t book during that period.
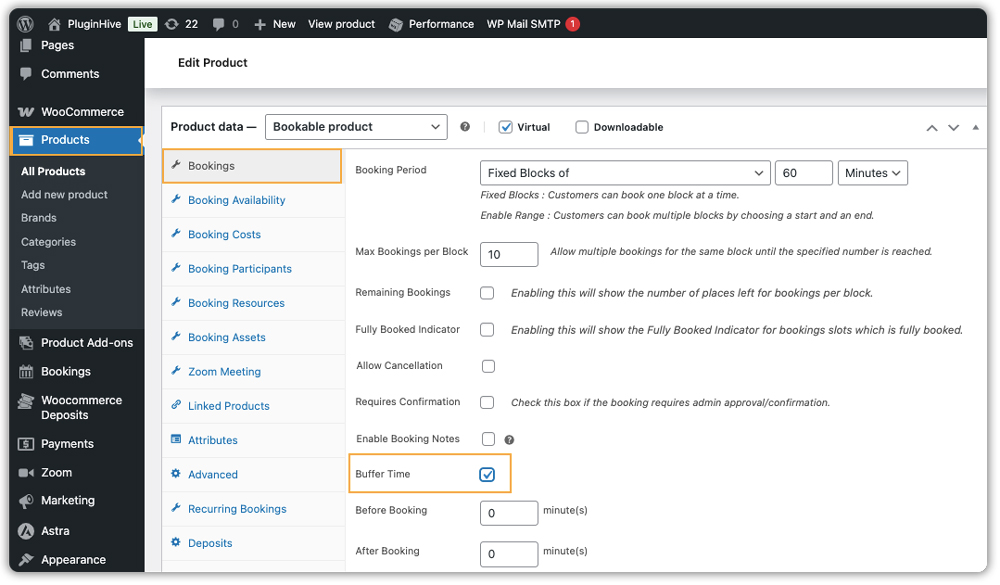
2. Set Buffer Time Before or After the Booking
- Before Booking: Enter the amount of time your staff needs to prepare before the booking starts.
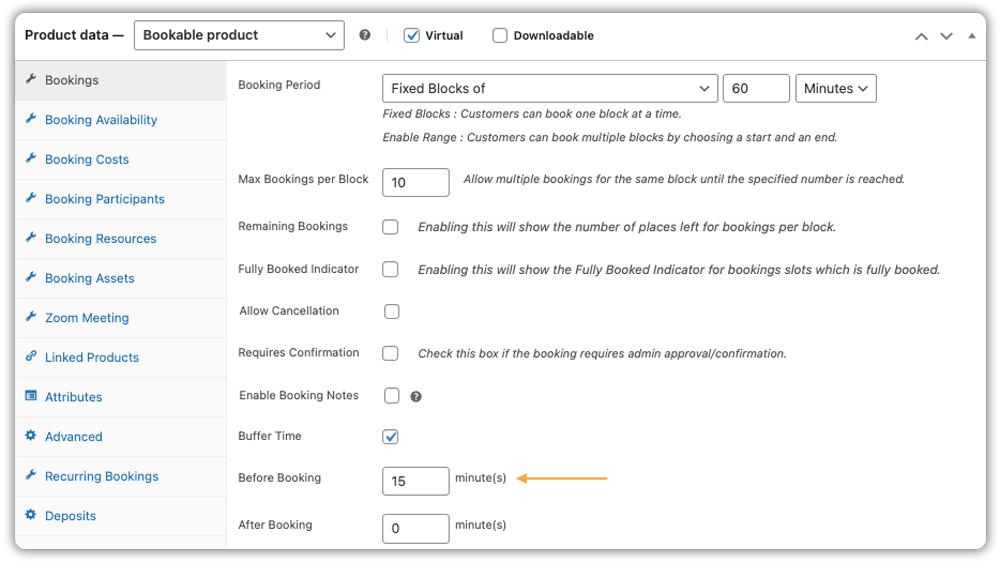
- After Booking: Enter the time needed after the booking ends. This could be for cleanup, restocking, or simply giving your team a short break.
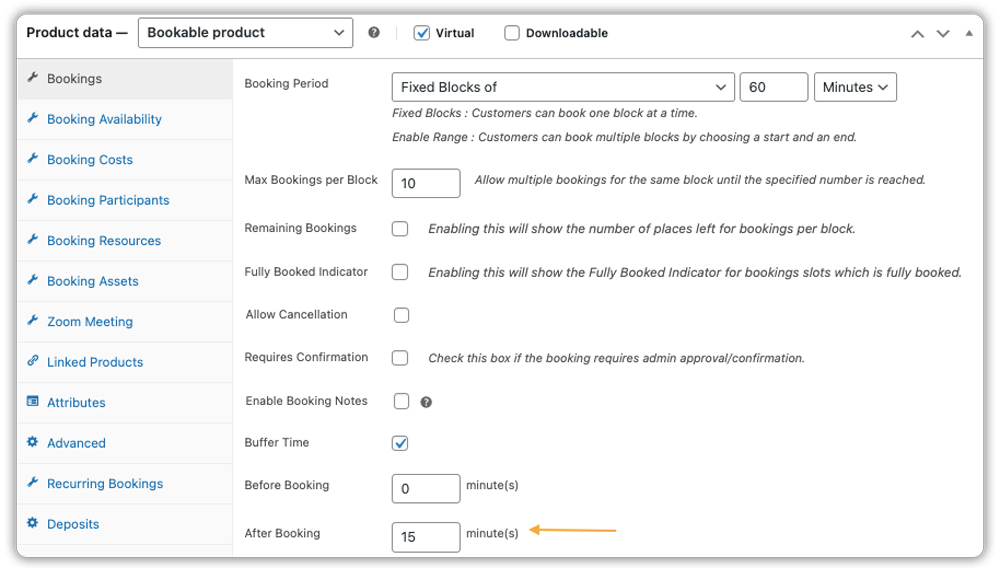
- Before and After Booking: You can combine both options if your workflow requires preparation and wrap-up time.

You can select the unit of time, minutes, hours, or days, to match your schedule.
3. Save and Check
Save your changes and view the booking calendar on your website. You’ll see that the buffer time is blocked automatically.
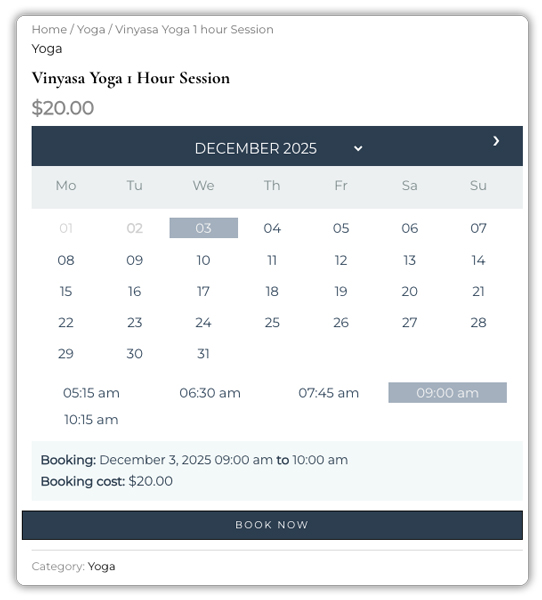
For example, if you offer a 1-hour yoga class and your instructor needs 15 minutes after the session to clean up, you can set a 15-minute post-booking buffer. So if a class is booked from 09:00–10:00 AM, the system will automatically block 10:00–10:15 AM, giving the instructor enough time to wrap up
For a more detailed walkthrough on setting buffer time in WooCommerce, you can refer to this guide: How to Set Up Buffer Time in Bookings and Appointments for WooCommerce.
With buffer time set, your WooCommerce store runs smoothly, your team stays relaxed, and customers get a better experience. The setup is quick, flexible, and doesn’t require any technical knowledge.
Common Mistakes to Avoid When Setting Buffer Time in WooCommerce
It’s easy to overlook small details when adding buffer time to your WooCommerce bookings. Here are some common mistakes store owners make and simple ways to avoid them so your schedule stays predictable and easy to manage.
- Not Adding Enough Buffer Time: If the buffer is too short, your team may still rush between appointments, which can lead to delays or reduced service quality. Choose buffer durations based on real needs like preparation, cleanup, travel time, or rest. When in doubt, add a few extra minutes to avoid stress.
- Using the Same Buffer Time for Every Service: Different services need different preparation and wrap-up times. Using the same buffer for everything often causes scheduling mismatches. Set buffer times individually for each bookable product based on what that service requires.
- Forgetting to Add Both Pre- and Post-Booking Buffers: Some services need both pre- and post-buffers. Skipping one can still create back-to-back pressure. Review your workflow and enable both if needed.
- Choosing the Wrong Time Unit (Minutes vs. Hours vs. Days): Setting a buffer in the wrong unit can block too much or too little time. Use minutes for short appointments, hours for longer sessions, and days for rentals or multi-day bookings.
Setting buffer time correctly ensures a consistent booking flow, happier staff, and a better customer experience. With a few simple checks, you can avoid these mistakes and keep your WooCommerce bookings running stress-free.
Conclusion
Adding buffer time to your WooCommerce bookings helps you stay organized and give every customer a better experience. It ensures your team has enough time to prepare, clean up, or reset between bookings, no matter what type of service or rental you offer.
With the Bookings and Appointments for WooCommerce plugin by PluginHive, setting up buffer time is quick and flexible. You can choose the exact gap you need for each product or service and keep your booking workflow well-managed. If you need help setting this up, you can reach out to PluginHive support for assistance.
Frequently Asked Questions (FAQs)
Q: What is buffer time in WooCommerce bookings, and why should I use it?
A: Buffer time is a short interval you set between two bookings so that you have time to prepare (clean, reset, restock, travel, etc.) before the next booking. It helps avoid back-to-back bookings, reduces overlaps or rush, and ensures smoother delivery of services.
Q: How do I add buffer time in WooCommerce bookings?
A: In your WooCommerce booking settings ( via a booking plugin), go to the booking settings tab, enable the “buffer time” option, and set the duration you want before and/or after each booking slot. This makes sure the calendar automatically inserts a padded gap between bookings.
Q: Can buffer time be added both before and after a booking in WooCommerce?
A: Yes. You can set a “before booking” buffer (for preparation time) and/or an “after booking” buffer (for cleanup or wrap-up), depending on your business’s needs. This ensures there’s a sufficient gap on both sides of a booking.
Q: Does adding buffer time guarantee no booking conflicts or overbookings in WooCommerce?
A: Buffer time helps significantly reduce conflict risk by enforcing a gap, but you should also combine it with proper booking slot configuration (slot size, availability rules, max bookings per slot) to avoid overlaps and overbookings.
Q: If I have multiple services or resources, do I need to set buffer time separately for each in WooCommerce?
A: Yes. Depending on how your store is structured, different services, resources, or appointment types buffer time settings may need to be configured individually per booking product or service to ensure correct behaviour.