Setting up Multi Carrier Shipping Label extension for Magento 2.0
This article gives you step-by-step instructions to set up Multi-Carrier Shipping Label extension for Magento 2.0 and automate shipping for your Magento store.
Register for the PluginHive MCSL Account for Magento
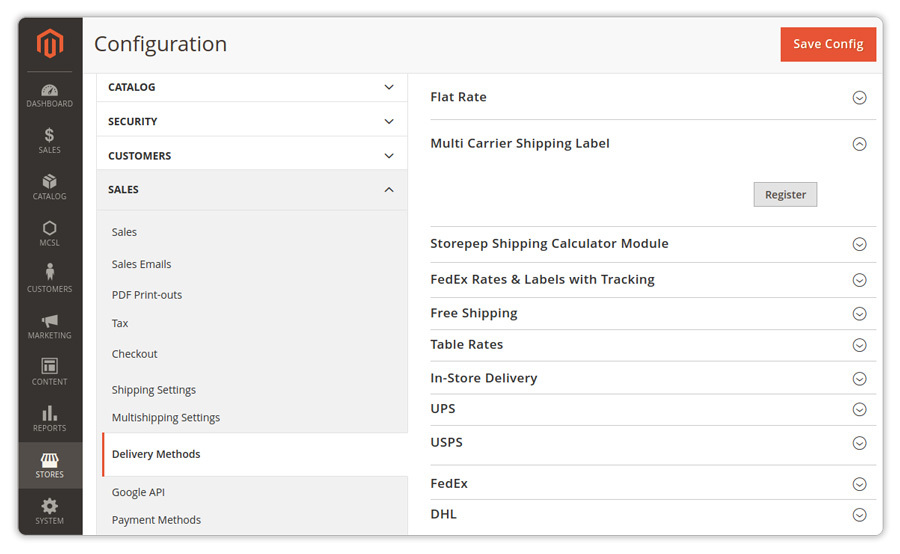
- Visit the Delivery Methods and select Multi-Carrier Shipping Label
- Click on Register. This will create a PluginHive Multi Carrier Shipping Label account for your Magento store
Import Products from your Magento Store
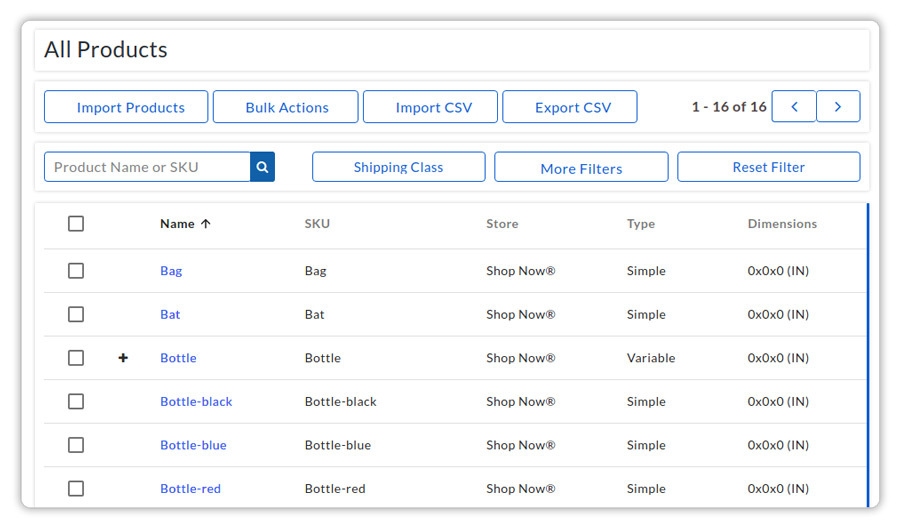
In order to start shipping with Multi Carrier Shipping Label extension, you need to make sure your products are imported within the extension. To do that visit MCSL section and click on Import Products under the Products section, as shown below.
Set up shipping carrier(s) used for order fulfillment
This extension allows you to use one or more shipping carriers simultaneously to display live rates, generate shipping labels, and track Magento orders.
- Click on your preferred shipping carrier that you will use to fulfill your Magento orders.
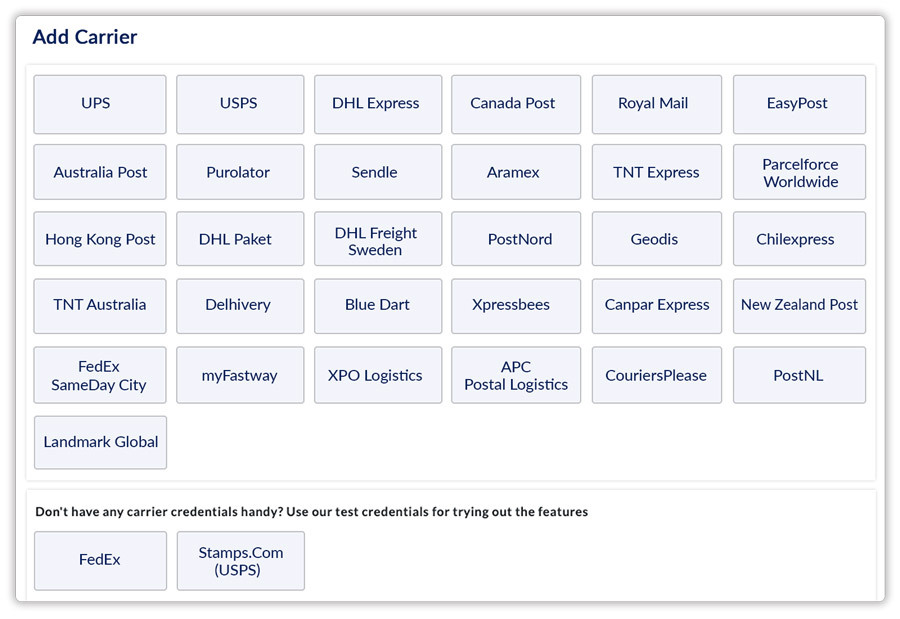
- Click on, let’s say, FedEx, and add the FedEx account credentials within the extension.
You need to get the following details from FedEx and add it to the extension.
- FedEx Account Number
- FedEx Meter Number
- Web Service Key
- Web Service Password
- Country of Origin
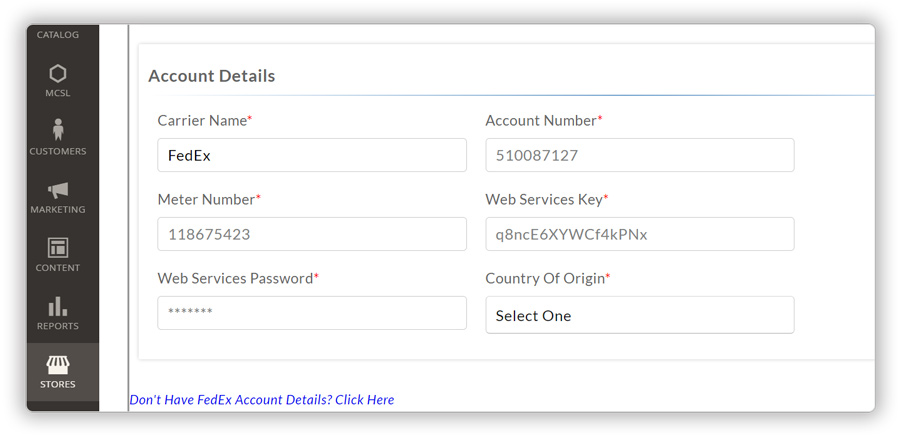
- After adding the details shown above, click on Add, and the extension will add your preferred shipping carrier successfully.
- Click on Next and now you can start fulfilling your orders by clicking on the Start Shipping button.
Display a preferred shipping service on Magento checkout
The extension automatically displays the shipping rates on the Magento cart and checkout page. By default, the extension displays shipping rates for all the available shipping services for your preferred shipping carrier. However, if you want to display shipping rates for a particular shipping service on your Magento store, you can do so without any hassle.
- Visit Settings > Shipping Rates > Rate Automation
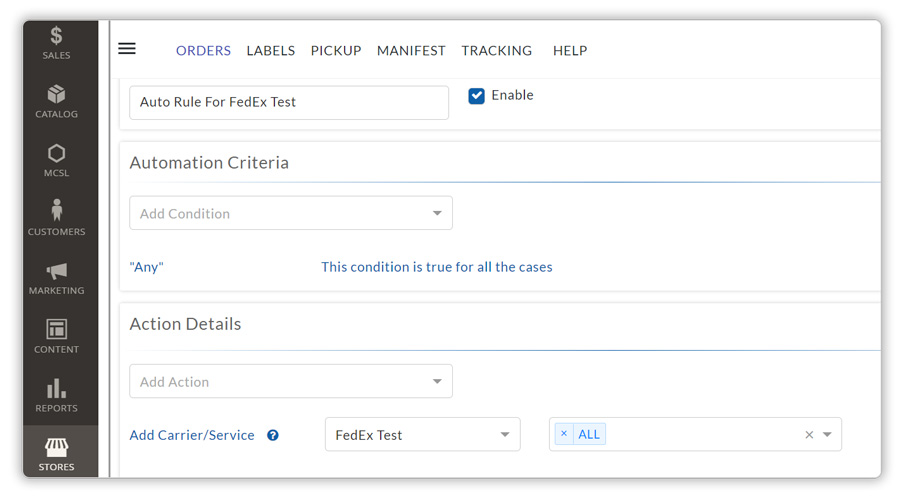
The extension automatically creates rules for the shipping carriers that you add to help you choose the services that will be displayed on the Magento store.
- Click on Edit to customize the shipping automation rules based on your preferences.
- Under the Action Details tab, select your preferred shipping service that you want to display to your customers, as shown below.
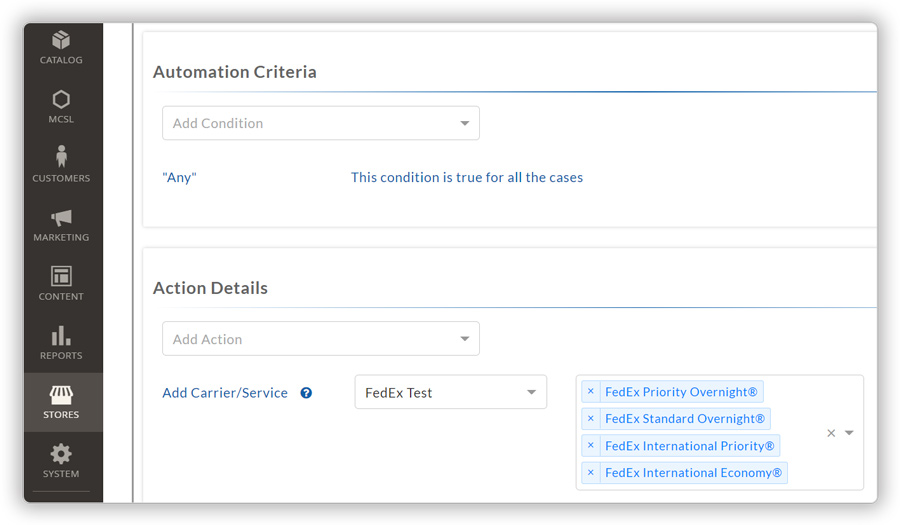
You can also choose to calculate and display shipping rates for the above-selected shipping services based on various conditions, such as,
- Product quantity in the cart
- Total weight of all the products in the cart
- Cart sub-total amount
- Time of order placement
- Total weight range
Based on your preference, you can select any of the conditions and the extension will calculate the shipping rates only if the conditions match the conditions.
- If you do not want to set any particular condition, you can select Any option.
- Click on Save once the modifications are done.
Select preferred services for order fulfillment
You can select the shipping services of a particular carrier to fulfill your orders and generate shipping labels with that service. You can also set up various shipping automation rules based on which the extension will automatically select the service for label printing.
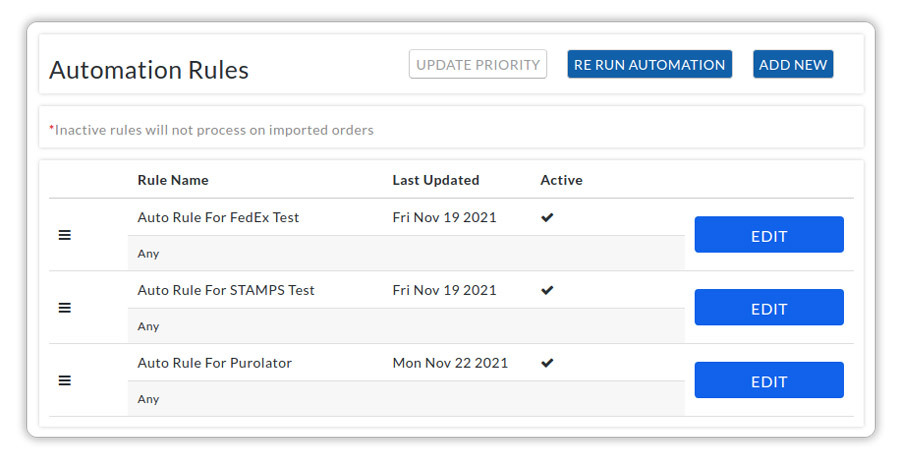
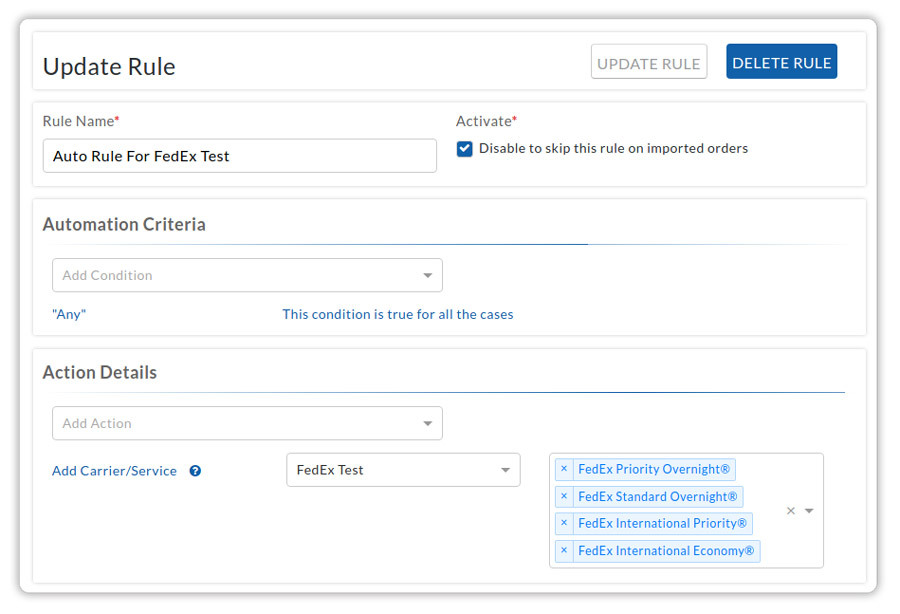
- To set up automation rules for label printing, visit Automation section and click on Setup to view all the shipping rules. The extension automatically creates an automation rule for each shipping carrier that you add within the extension, as shown below
- Click on Edit to modify the shipping automation rules. Now you can select the services from a particular shipping carrier that you want to select automatically to fulfill the orders and to ship the products.
Display shipping rates on the Magento cart & checkout page
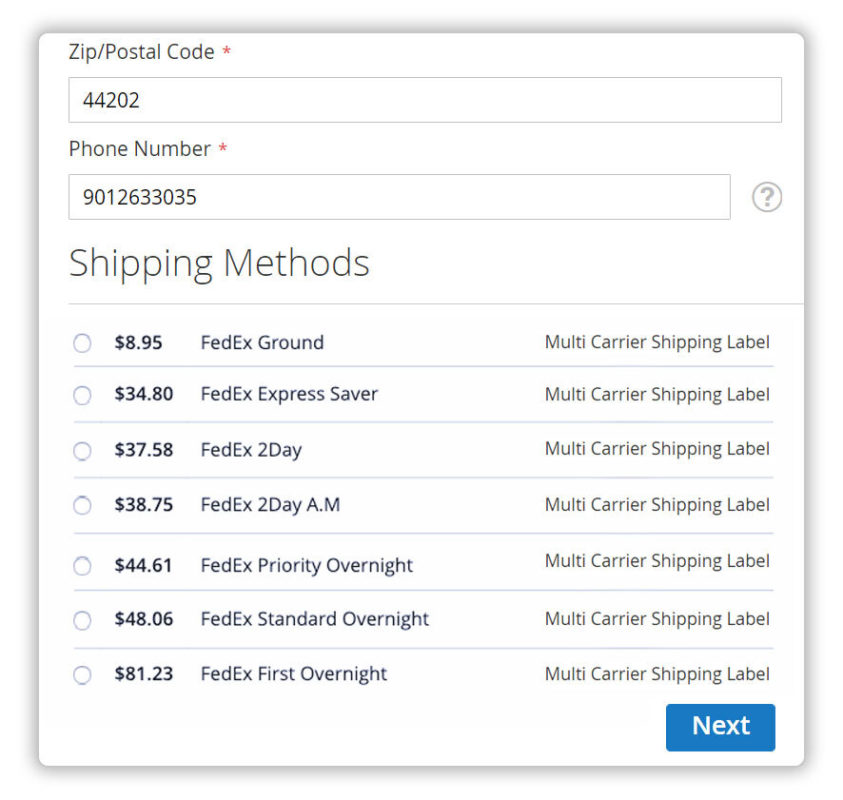
Visit the Magento shop page and add a product to the cart. Enter the shipping address and calculate the shipping cost. The extension will display the shipping cost for all the available shipping services or the shipping services that you have selected based on your preference.
Place a couple of orders choosing different shipping methods
After complete verification of the packages, shipping services as well as shipping cost, place a few orders using different shipping services with the different shipping carriers of your preference.
- Now visit the extension from your Magento Dashboard
- Under the orders section, click on Import Orders to start getting the list of Magento orders within the extension order dashboard. Make sure the Magento orders are already in the Processing state before importing.
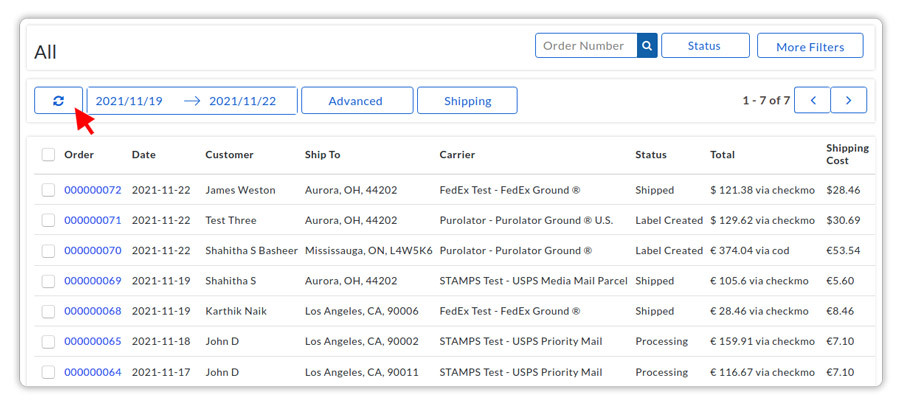
As you can see, the extension’s order view allows you to get all the details of the orders such as,

- Magento order ID
- Date of purchase
- Customer Name
- Customer’s shipping address
- Shipping carrier & shipping service
- Order status
- Order subtotal and the mode of payment
- Shipping cost
- Number of packages or boxes required for the shipment
- Shipping date
- Order summary displaying all the details like product list, total weight, all available shipping services, etc.
Review the carrier and services selected automatically for the orders
By default, the orders are assigned those shipping services which are selected by the customers while placing the orders.
However, if the order has been placed using another shipping method like Free Shipping, Flat Rate Shipping, or any third-party shipping method, the extension automatically assigns the cheapest available shipping service across all the shipping carriers that you have configured within the extension.
In the image below, you can see that FedEx is the shipping carrier and FedEx Ground is the shipping service assigned to the order.

- In order to verify the shipping carrier and the service assigned to the order, click on the (i) icon under the Order Summary for that order.
- Under the Rate Summary section, you can see the same FedEx Ground being marked as Customer Selected, and hence assigned to the order for fulfillment.
Print the shipping labels for your Magento order(s)
- Visit the Orders tab and select the order(s) for which you want to generate and print a shipping label, and click on Generate Labels.
- Select the order(s) again and click on Print Labels to get the shipping labels for your orders, as shown below.
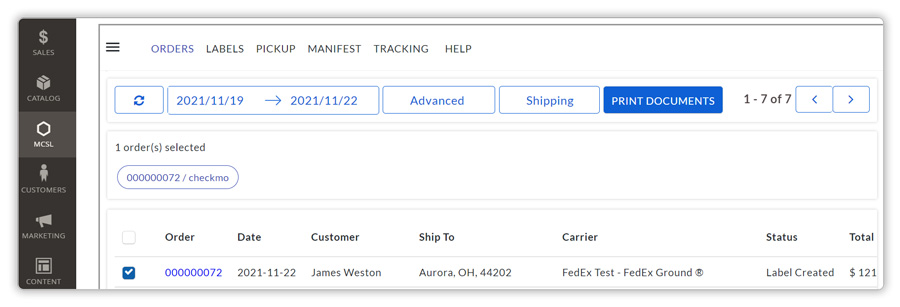
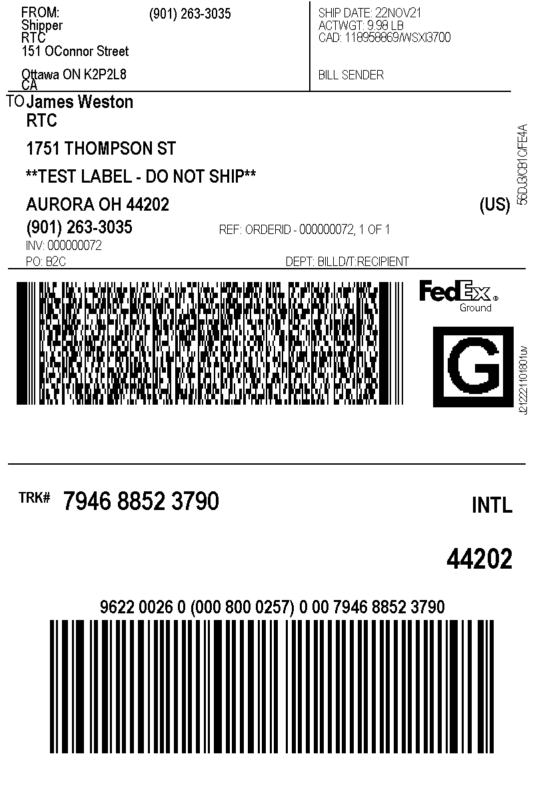
- The extension will automatically redirect you to print the shipping labels along with other documents like the tax invoice, as shown below.
Request a pickup with the shipping carrier
Once your orders are ready for shipping, This extension allows you to request the carrier pickup from within your Magento store.
- Visit the Orders tab and select all the orders for which you want to request the carrier pickup. Now click on the Request Pickup option, as shown below.
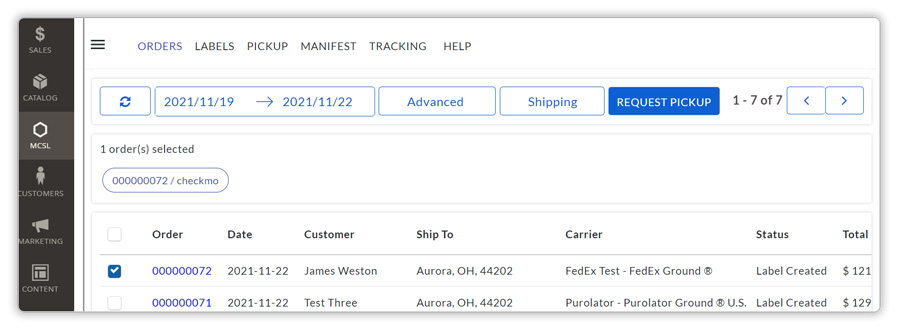
- Once the pickup is requested successfully, you can visit the Pickup tab to view the status of the pickup, as shown below.
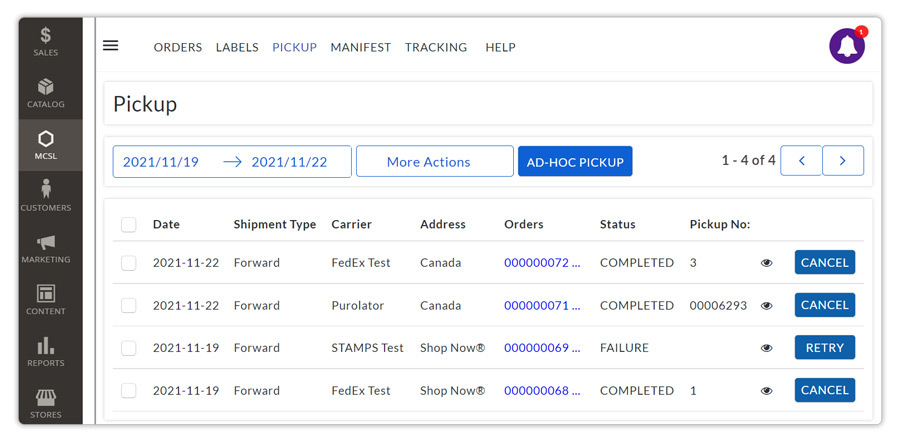
As you can see, you can view the pickup status as well as cancel the pickup based on your requirements.
Fulfill orders and send Magento Order Completion Email to customers along with the tracking details
After requesting the pickup, you can visit the Orders tab and select all the orders which are ready to be shipped, and click on Mark As Shipped to fulfill these orders.
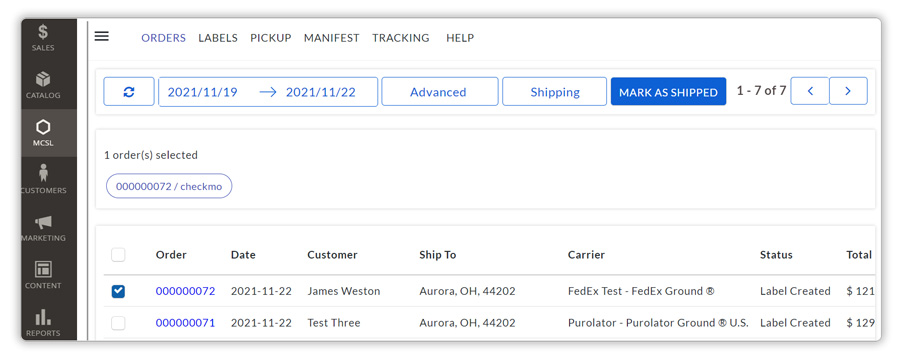
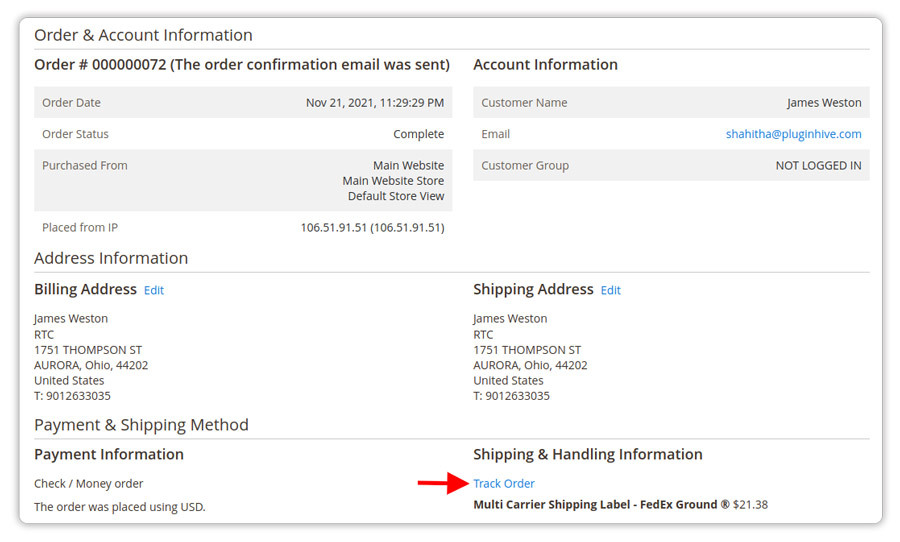
Once you mark the orders as shipped, your Magento orders will be automatically marked as Completed. Visit the Magento > Orders page to check the order status and click on the order.
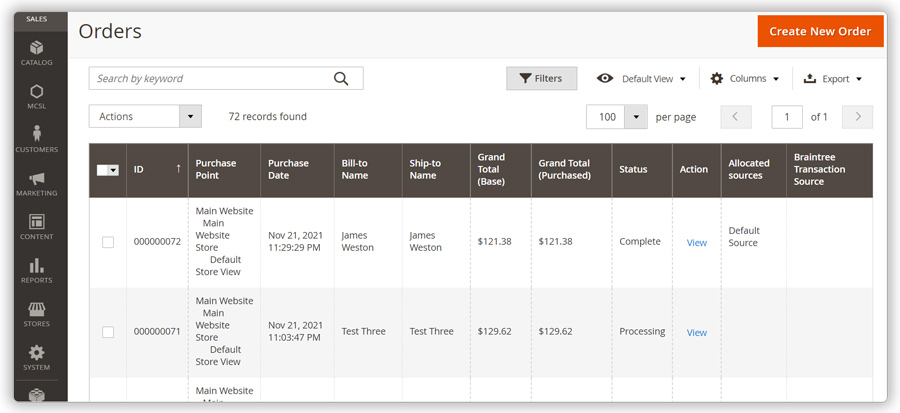
In the image above, you can see the order is automatically marked as completed. Also, the shipment tracking details are automatically updated to the Magento orders.
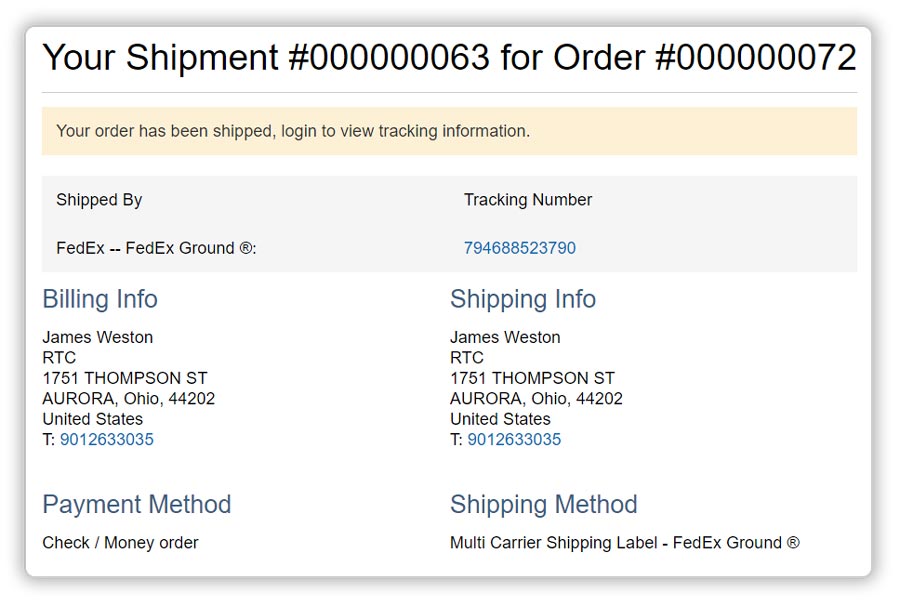
As for the customers, this extension automatically sends the tracking details to the customer via the Magento Order Completion Email, as shown in the image below.
Monitor the shipment tracking status of your orders
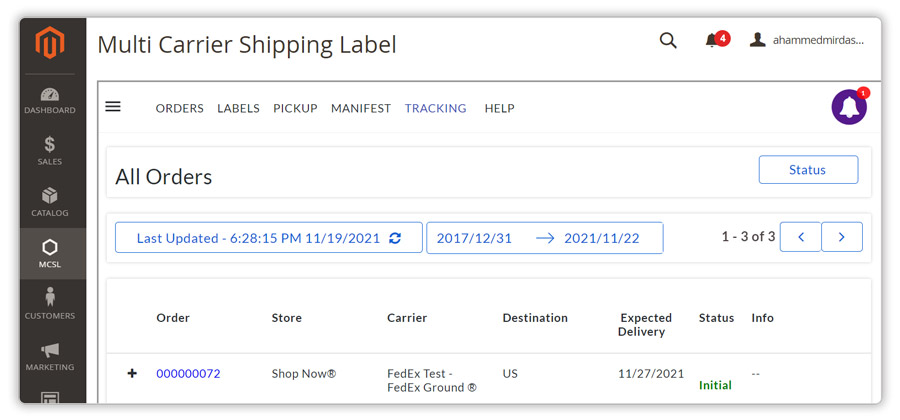
To track your orders, select the orders that are shipped and click on Track Your Shipments. Or, you can track all the orders by visiting the Tracking tab, where the extension will display the live tracking status of all the shipments, as shown below.
If you face any difficulty or issues while setting up or using the extension, please visit the PluginHive support page and raise a request. We will definitely help you out.
