Setting Up WooCommerce Shipping Services For FedEx
This guide will help you integrate your FedEx account to your WooCommerce store and automatically display accurate FedEx shipping rates, print FedEx shipping labels, and manage FedEx tracking for your WooCommerce orders, using WooCommerce Shipping Services by PluginHive.
Download, Install, and Activate the Plugin
The plugin is available for download at PluginHive’s WooCommerce Shipping Services page.
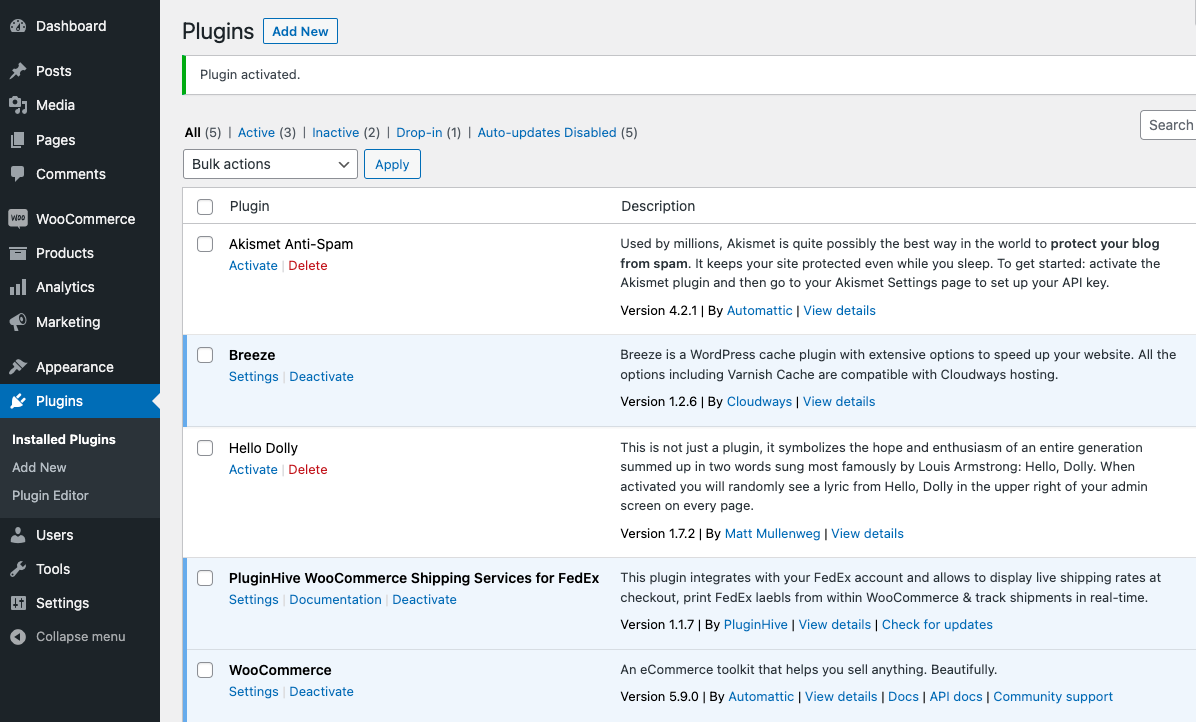
Install the plugin and activate it from the WordPress plugins page.
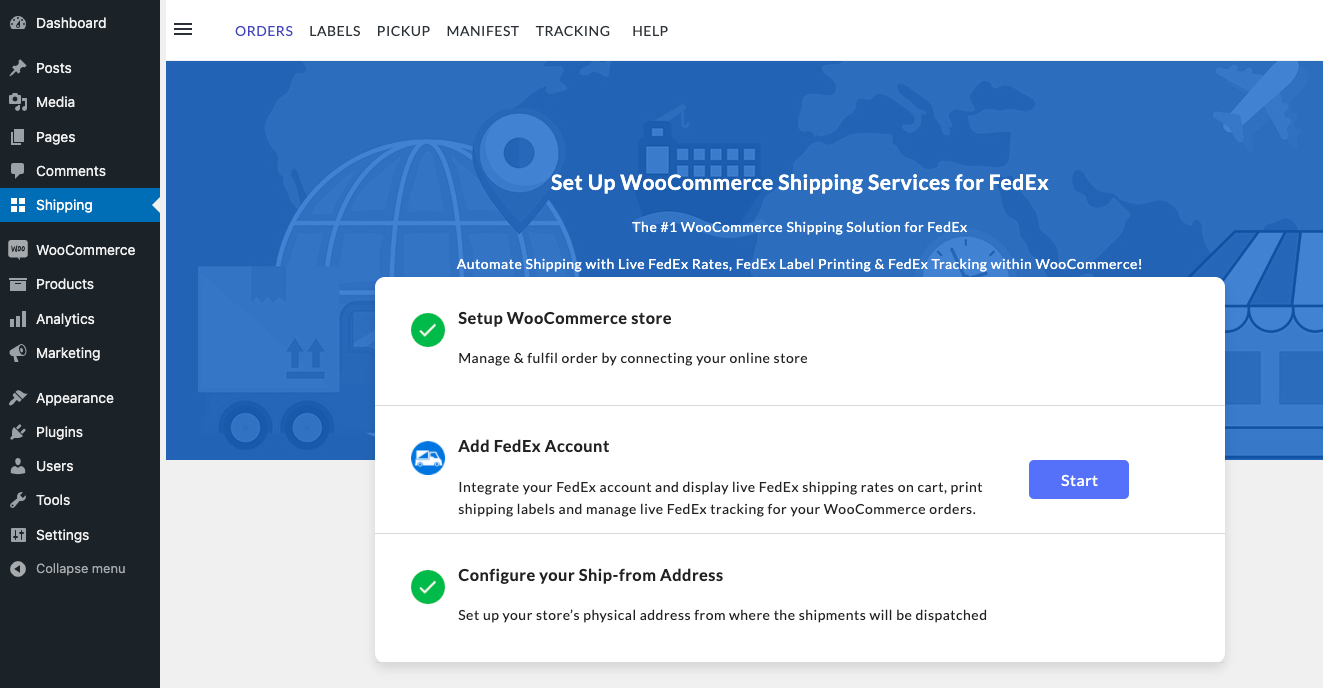
Visit the plugin settings by clicking on the Settings option, and click on Register. After the registration, click on the Let’s Start Fulfilling, to access the plugin setup wizard.
Add FedEx Account Details
WooCommerce Shiping Services allows you to use one or more FedEx accounts simultaneously to display live FedEx rates, print shipping rates, and manage FedEx tracking for your WooCommerce orders.
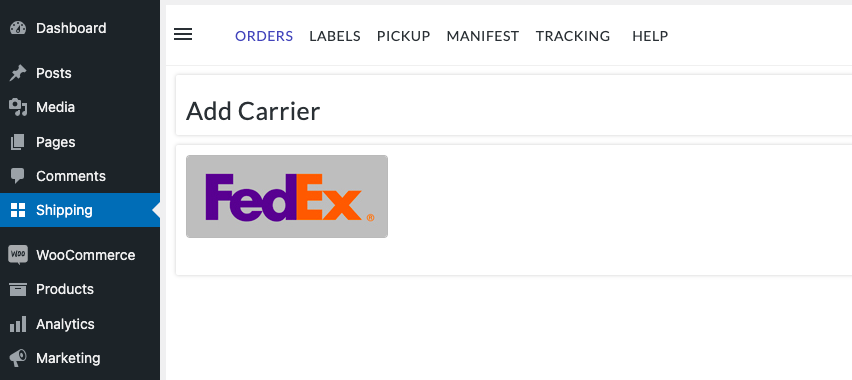
Within the setup wizard, click on Start to add the FedEx account to your WooCommerce store.
Click on FedEx, and add the FedEx account number and the address associated with the FedEx account.
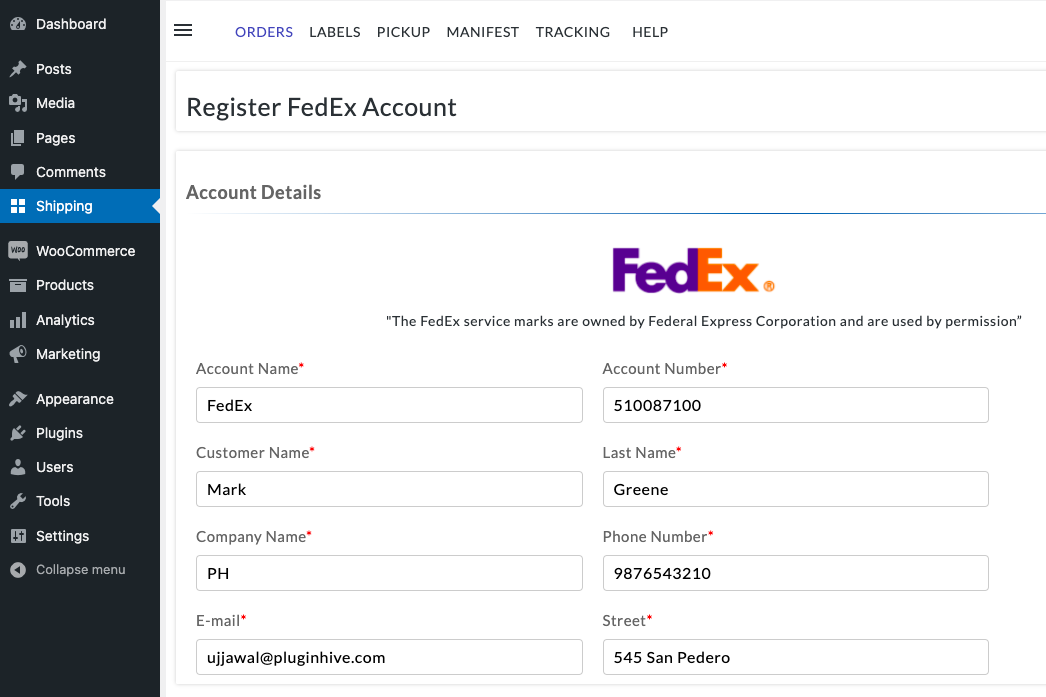
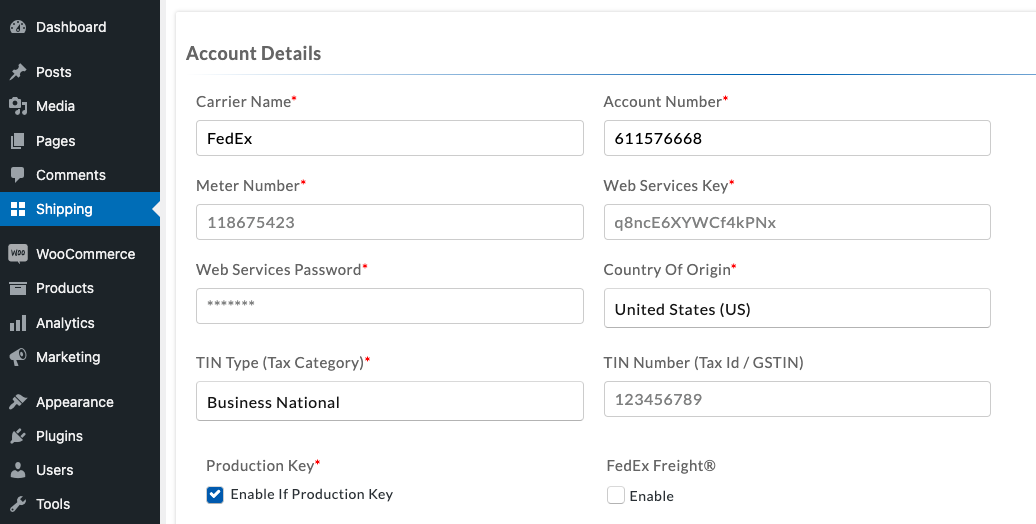
Once you click on Connect and Save, the plugin will automatically sync the following details from your FedEx account.
- FedEx Account Number
- FedEx Meter Number
- Web Service Key
- Web Service Password
- Country of Origin
Click on Next and now you can start fulfilling your orders by clicking on Start Shipping.
Verify shipper or warehouse address & telephone number
Once the FedEx account setup is complete, verify the shipper or the warehouse details. This will ensure the correct shipper address and telephone number to display FedEx shipping rates and print FedEx labels for your order.
Visit Settings > Address and the current store will be listed there.
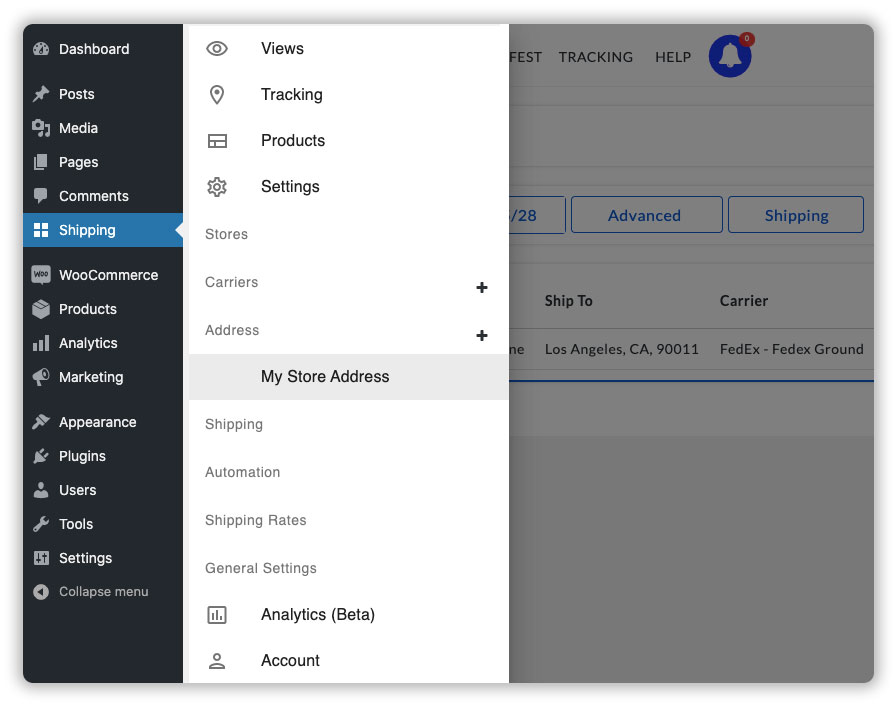
Click on the store name and you can see the shipper or warehouse address, along with the telephone number as shown below.
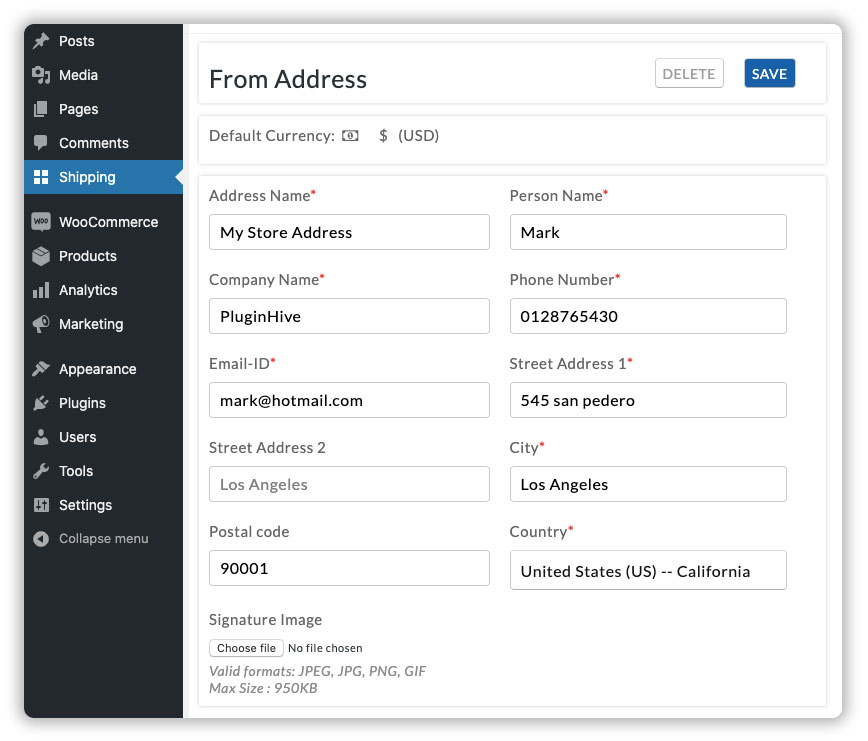
Review the shipper details and click on Save once the modifications are made.
Display a preferred FedEx shipping service on the WooCommerce cart & checkout
The plugin automatically displays the FedEx shipping rates on the WooCommerce cart and checkout page. However, if you want to display shipping rates for a particular FedEx shipping service on your WooCommerce store, you can do so without any hassle.
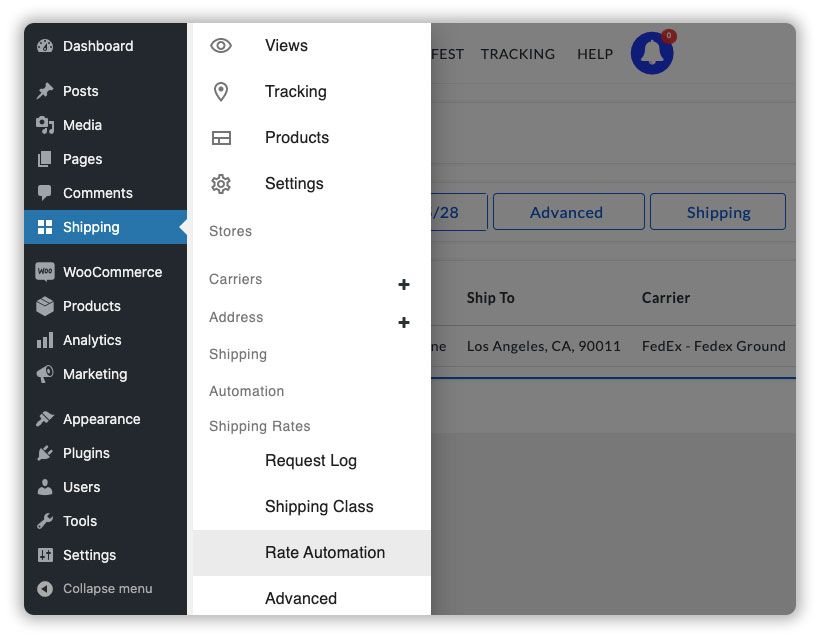
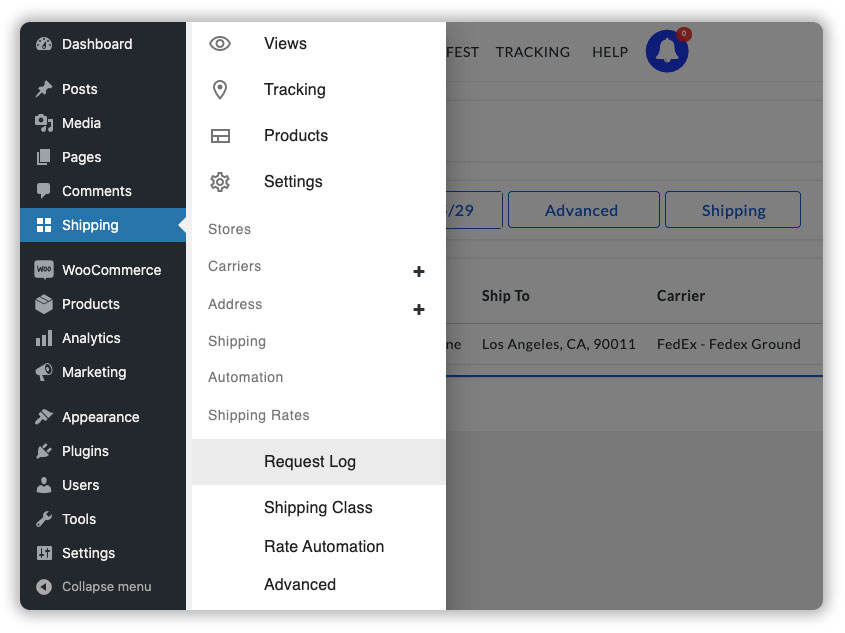
Visit Settings > Shipping Rates > Rate Automation, as shown below.
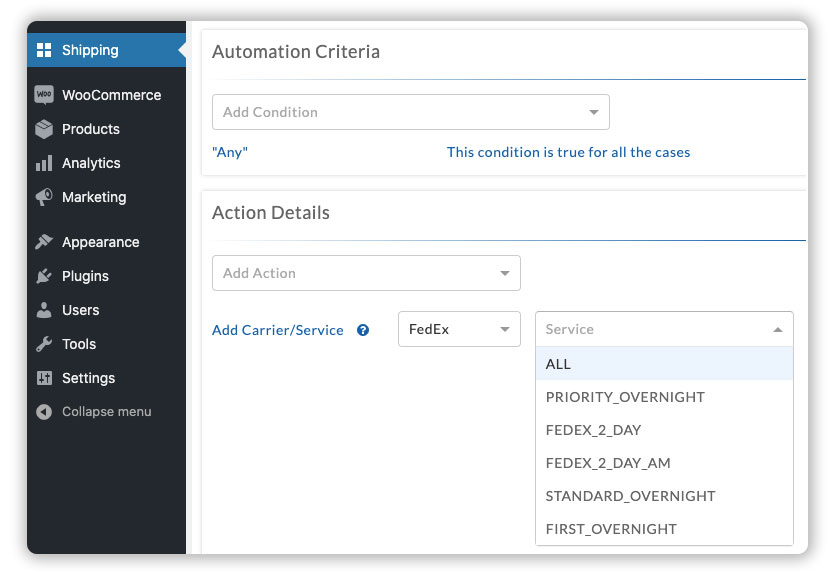
The plugin automatically creates FedEx shipping rules to help you choose the services that will be displayed on the WooCommerce store. Click on Edit to customize the shipping automation rules based on your preferences.
Under the Action Details tab, select your preferred FedEx shipping service that you want to display to your customers, as shown below.
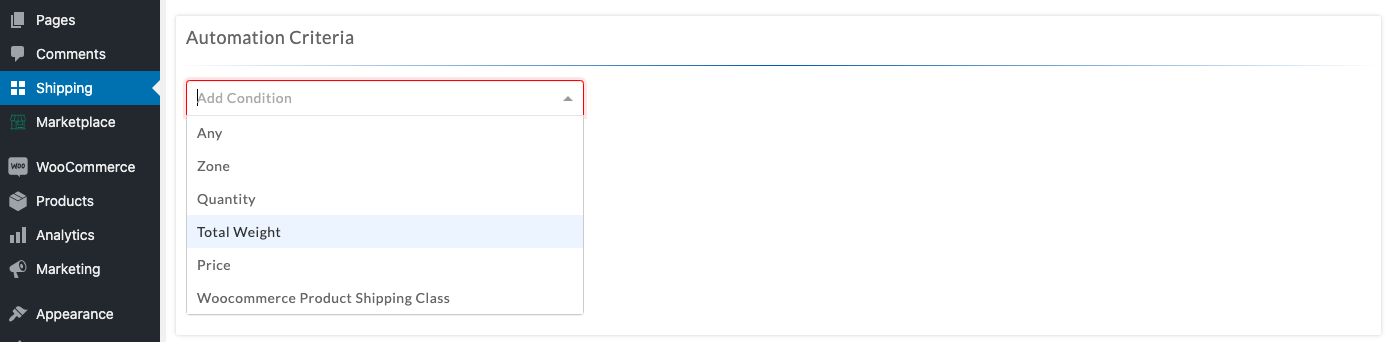
You can also choose to calculate and display shipping rates for the above-selected shipping services based on various conditions, such as,
- WooCommerce Shipping Zones
- Product quantity in the cart
- Total weight of all the products in the cart
- Cart sub-total amount
- WooCommerce Shipping Classes
- Particular vendor
- Time of order placement
- Total weight range
Based on your preference, you can select any of the conditions and the plugin will calculate the shipping rates only if the conditions match.
If you do not want to set any particular condition, you can select Any option as shown below.
Click on Save once the modifications are done.
Configure weight and dimensions for your WooCommerce Products
Now configure the weight and dimensions for the WooCommerce products. FedEx requires product weight in order to provide an accurate shipping cost. Also, if your products cover more area while packaging then you are also required to have product dimensions as well to calculate the volumetric weight for FedEx shipping cost calculation.
To set up product weight and dimensions, visit WooCommerce Dashboard > Products > All Products and click on Edit under the product name.
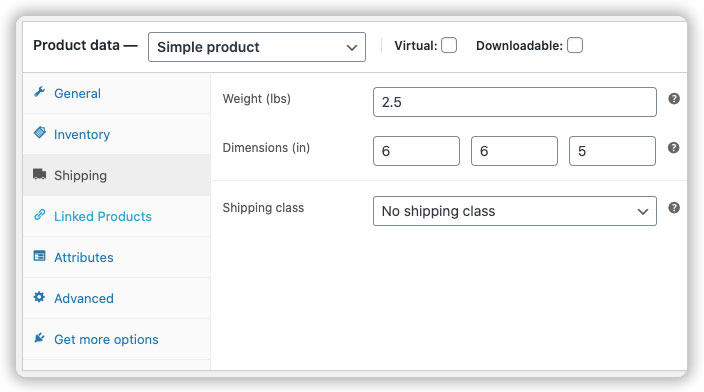
Click on the Shipping tab and enter the product weight and dimensions, as shown below, and update the product.
Follow the same steps for all your WooCommerce products and update the products once you have added the weight and dimensions.
Incase of the following scenarios, you can set up a default or minimum product weight and dimensions for all your products:
* The WooCommerce Products do not have weight and dimensions
* All the WooCommerce Products have similar weight and dimensions
Follow the steps below to set up default weight and dimensions for all WooCommerce products.
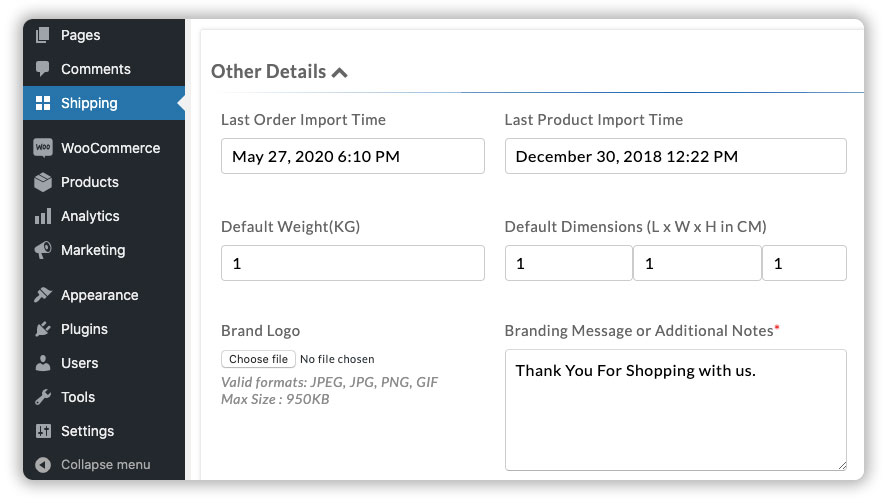
Visit Shipping > Settings > Stores, and click on your store name, as shown below.

Under the Other Details, configure the default weight and dimensions and click on Connect and Save button to save the changes.
Configure the shipping boxes and select the parcel packing method
The plugin allows you to choose from some of the most advanced packaging methods to efficiently pack your products into the boxes.
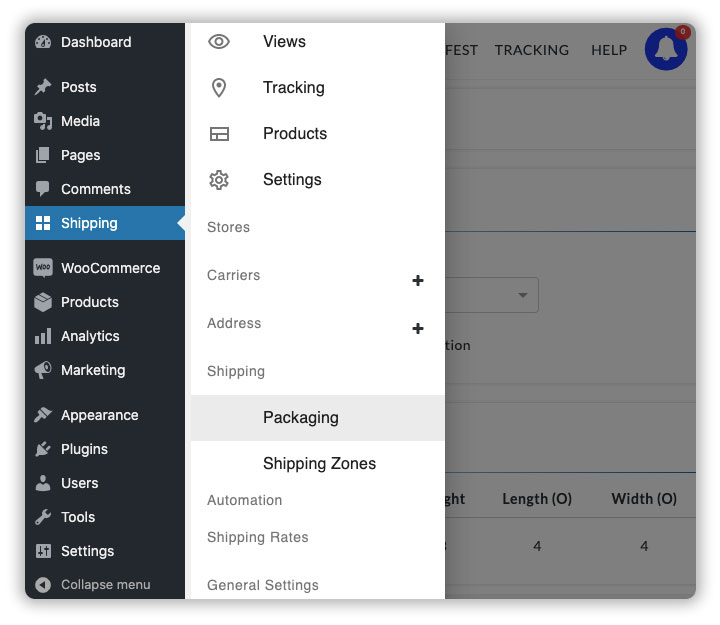
Visit Settings > Shipping > Packaging, as shown below.
Here you can choose from the parcel packing methods shown in the image below.
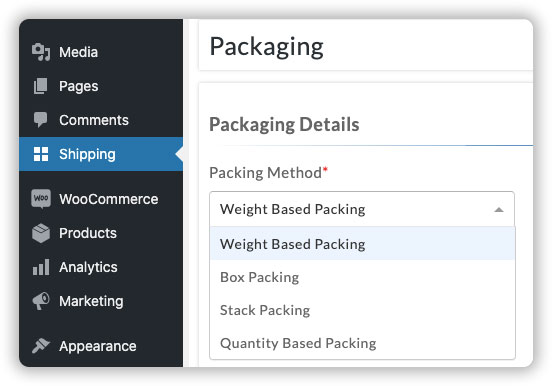
- Weight-Based Packing (recommended)
A packing method purely based on the weight of the product, where you can set a maximum weight (max. weight) as your box capacity, and the plugin will automatically determine the number of boxes to ship your products - Box Packing
A packing method based on both the Weight as well as Dimensions, where you can create your own boxes with custom weight and dimensions. The plugin will automatically calculate the correct box size that fits your products and save you a lot of hassle. - Stack Packing
An advanced packing method based on the total height of the products, where the plugin calculates the correct box suitable for your products by stacking up all the products to a certain height. - Quantity Based Packing
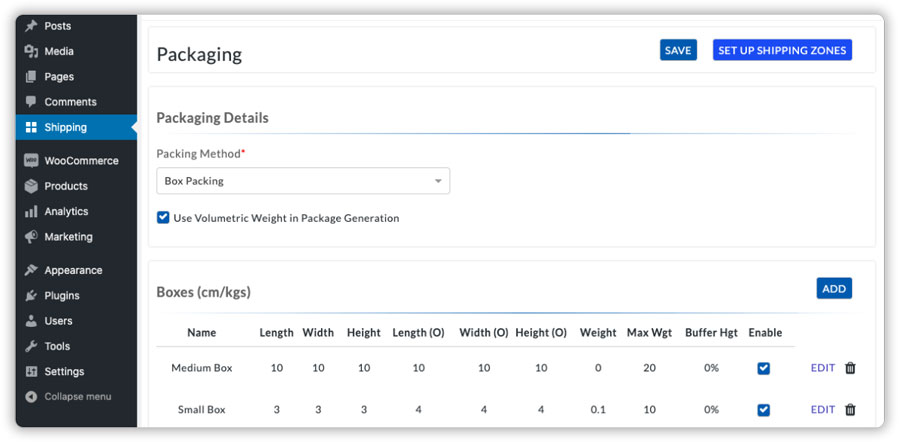
If you have your own boxes which you use for shipping, select the Box Packing method and proceed to add your boxes within the plugin for an accurate shipping rate.
After selecting the Box Packing method, click on Add under the Boxe(s) section. Here you can add the weight and dimensions of the boxes that you use to ship your products, as shown below.
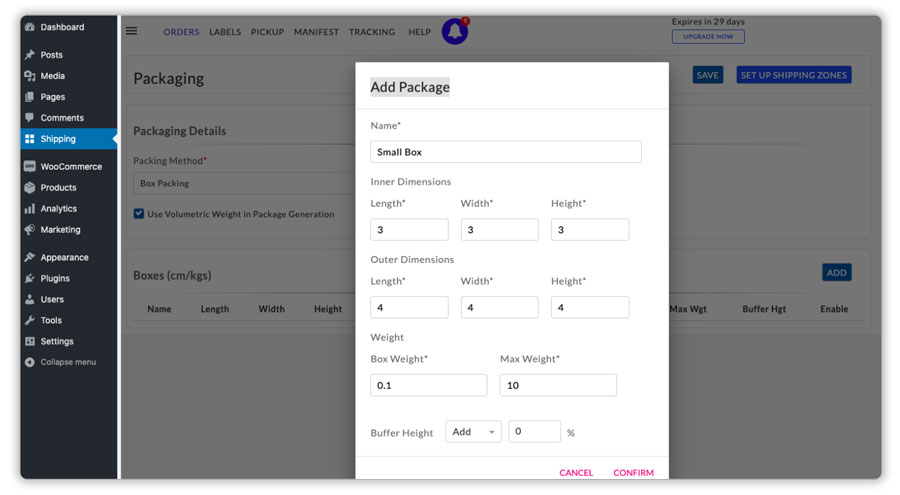
Click on Confirm to add the box and click on Save to save the changes. After adding all your boxes, you can view, edit, or delete them based on your requirements.
If you pack your products based on the total weight to get the most cost effective packing, select Weight Based Packing method.
After selecting the Weight Based Packing method, define a Max Weight, as shown below, to set a limit on the maximum weight that can be packed in one box.
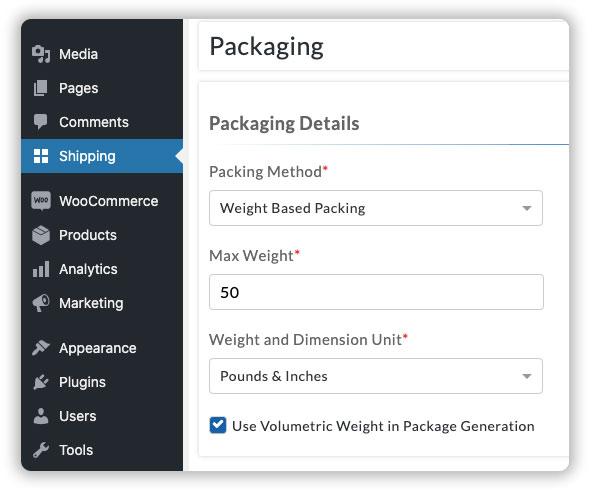
Once the setup is complete, click on Save to save the changes.
If you ship products that weigh less and have a greater area/volume, for example, cushions, pillows, etc. please enable Use Volumetric Weight in Package Generation to get an accurate shipping cost.
Display FedEx shipping rates on the WooCommerce cart & checkout page
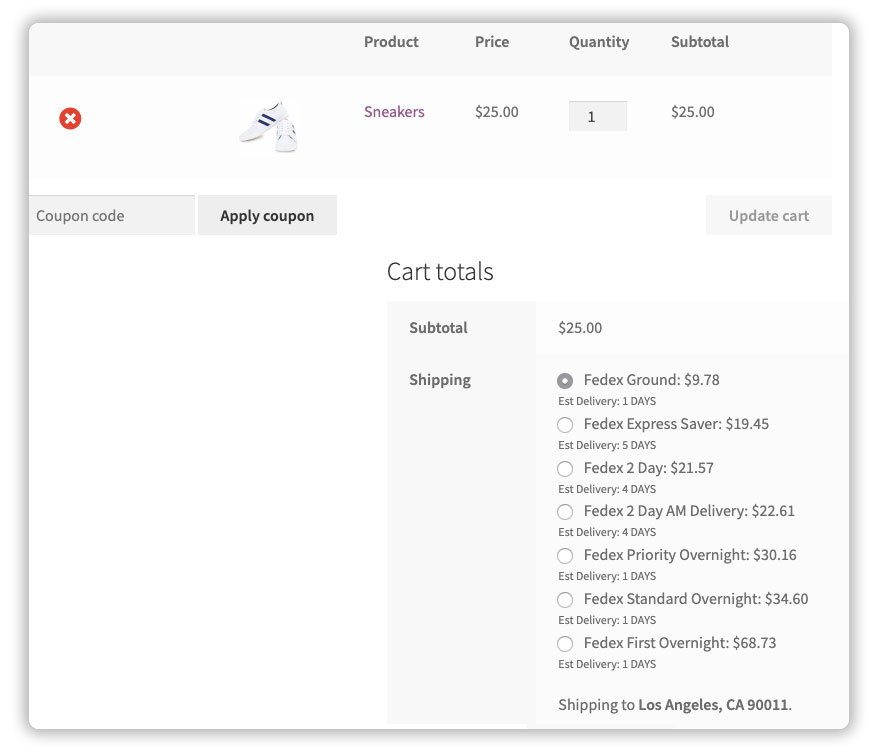
Visit the WooCommerce shop page and add a product to the cart. Enter the shipping address and calculate the shipping cost. The plugin will display the shipping cost for all the available FedEx shipping services or the FedEx services that you have selected based on your preference.
a. Verify the shipping cost displayed on the WooCommerce cart page
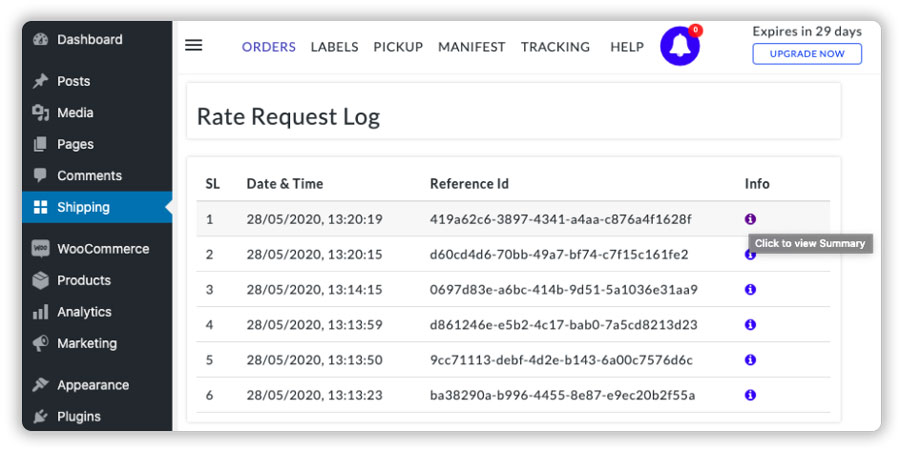
After displaying the shipping rates on the WooCommerce cart page, verify whether the shipping cost is accurate by visiting the Settings > Shipping Rates > Request Log
Click on the (i) icon in front of the most recent Shipping Rate Request, as shown below.
After viewing the request log, you can verify the following under this section,
Package Details – includes the product name, quantity, weight, cost, and type of packaging method as shown below.

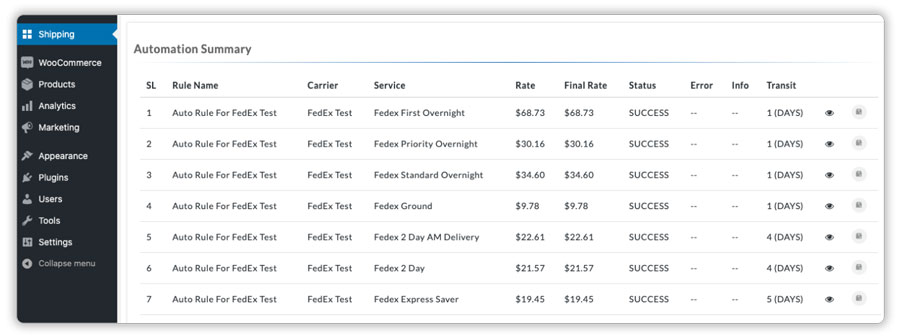
Shipping Methods – includes all the enabled FedEx shipping services, shipping costs for the available services, and estimated transit days for the shipment, as shown below.
Once you have verified the package details and shipping methods, you can place the order.
In case you do not see your preferred shipping service at the WooCommerce cart page, or get this message, “No shipping options were found”
* Verify the package details
* Verify the shipping methods
* Click on the error dislayed for the preferred shipping services
Place a couple of orders choosing different FedEx services
After complete verification of the packages, FedEx shipping services as well as shipping cost, place a few orders using different FedEx shipping services of your preference.
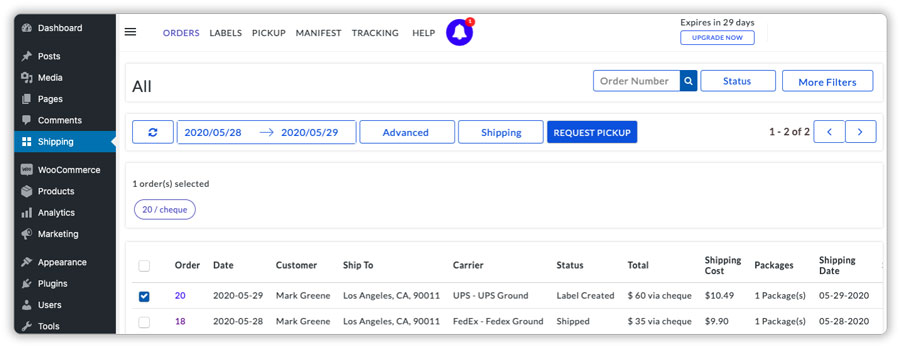
Now visit the Shipping tab from your WordPress Dashboard, as shown below.
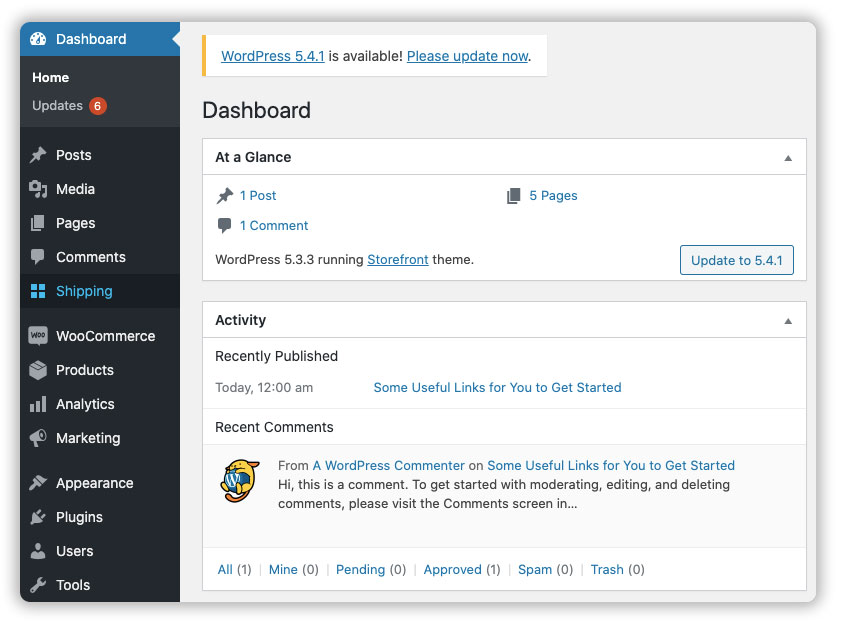
Under the orders section, the plugin will automatically import all the WooCommerce orders that are marked as Processing and display them as shown below.
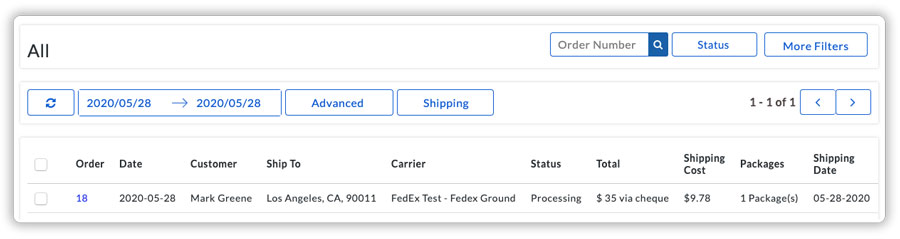
As you can see, the plugin’s order view allows you to get all the details of the orders such as,
- WooCommerce order ID
- Date of purchase
- Customer Name
- Customer’s shipping address
- Shipping carrier & shipping service
- Order Status
- Order subtotal and the mode of payment
- Shipping cost
- Number of packages or boxes required for the shipment
- Shipping date
- Order summary displaying all the details like product list, total weight, all available shipping services, etc.
The plugin will automatically import all the PROCESSING orders. In case the WooCommerce order status is not PROCESSING, you will be required to change the order status to PROCESSING manually from the WooCommerce Orders page.
Review the FedEx services selected automatically for the orders
By default, the orders display the FedEx shipping service selected by the customers while placing the orders. However, suppose the order has been placed using another shipping method like Free Shipping, Flat Rate Shipping, or any third-party shipping method. In that case, the plugin automatically assigns the cheapest available FedEx shipping service.
In the image below, you can see that FedEx Ground is the shipping service assigned to the order.
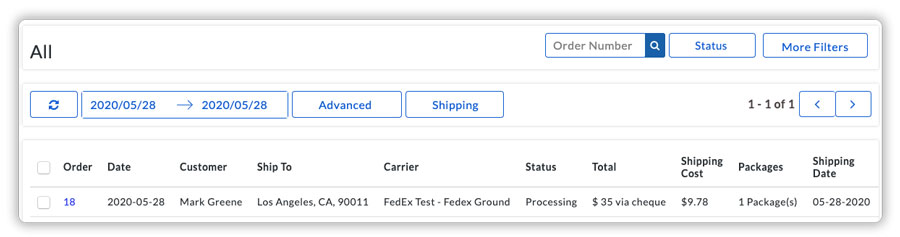
In order to verify the FedEx service assigned to the order, click on the (i) icon under the Order Summary for that order.
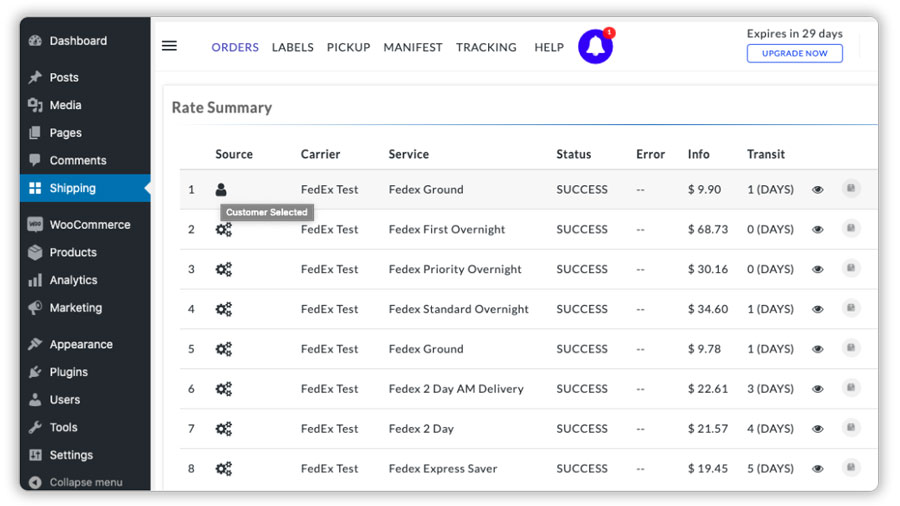
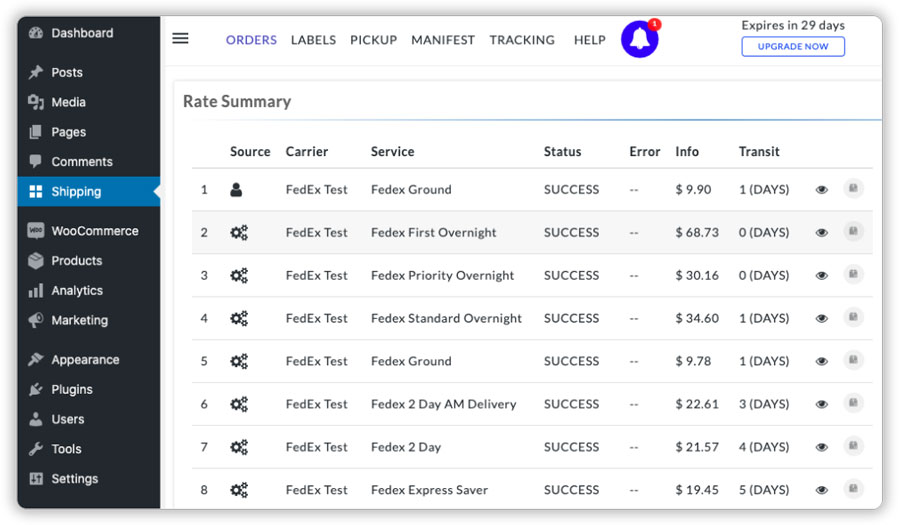
Under the Rate Summary section, you can see the same FedEx Ground being marked as Customer Selected, and hence assigned to the order for fulfillment, as shown in the image below.
Make the correction and reprocess the order if the order status is stuck as Initial with errors
It automatically marks the orders as Processing once they are imported. However, if due to some errors, your order status is still showing as Initial, you can review the order by following the steps below.
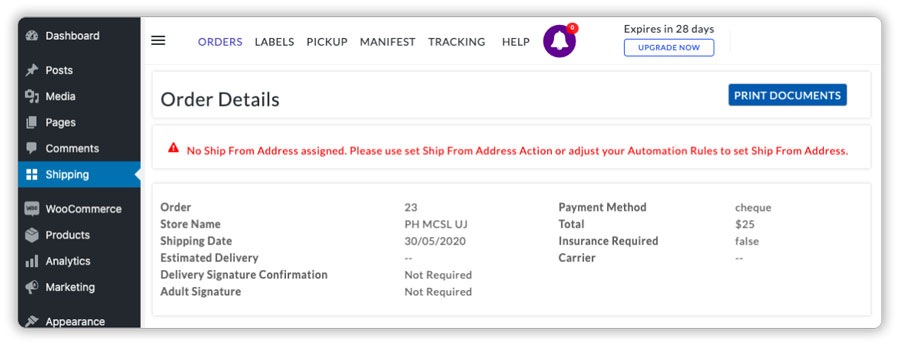
In the Orders tab, click on the exclamation sign (!) shown for the orders marked as Initial, as shown below.
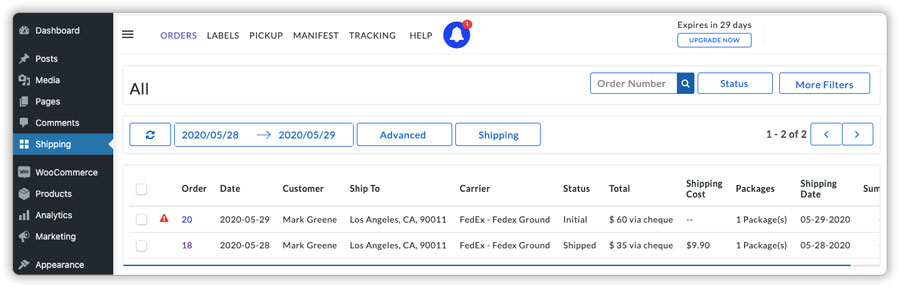
The plugin will display the exact issue with the order and why the order is not marked as Processing. For example, in the image below, the message is displayed as,
“No Ship From Address assigned. Please use set Ship From Address Action or adjust your Automation Rules to set Ship From Address.”
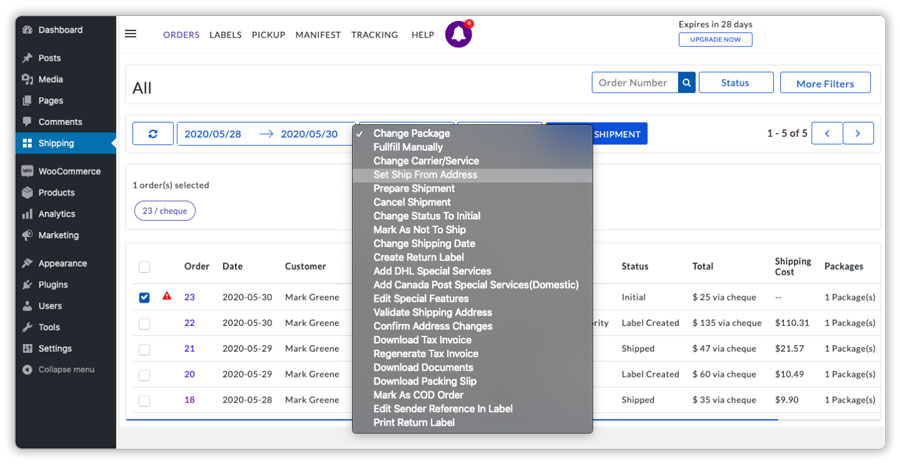
To fix the issue, visit the Orders tab, select the order and click on Set Ship From Address under the Advanced tab.
Once the issue is fixed, visit the Order tab, select the order again and click on Prepare Shipment under the Advanced tab, as shown below.
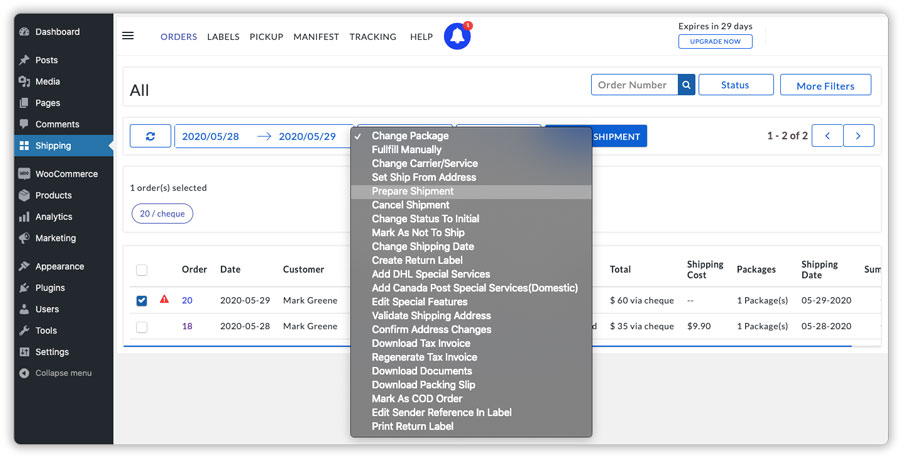
The orders will now be marked as Processing and are ready for printing shipping labels.
Verify the payment method & the shipping cost for the order
Once the orders are in Processing status and are ready for fulfillment, verify the payment method of the WooCommerce orders, as the shipping cost varies for different payment methods.
For example, FedEx shipping cost varies for the pre-paid payment methods in comparison to the Cash On Delivery payment option.
FedEx also requires the payment method to be mentioned on the shipping labels in the case of the Cash On Delivery.
You can check the payment method of the order by clicking the (i) icon in the Order Summary and visiting the Order Details section, as shown below.
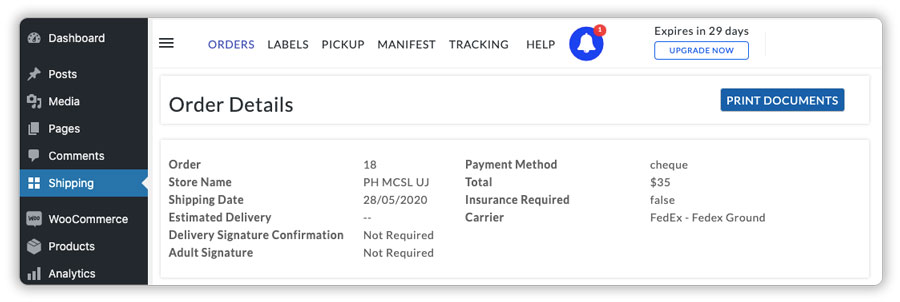
Once the payment method is verified, you can visit the Rate Summary to review the shipping cost for every shipping service that you will pay based on the payment method, as shown below.
Print FedEx shipping labels for your WooCommerce order(s)
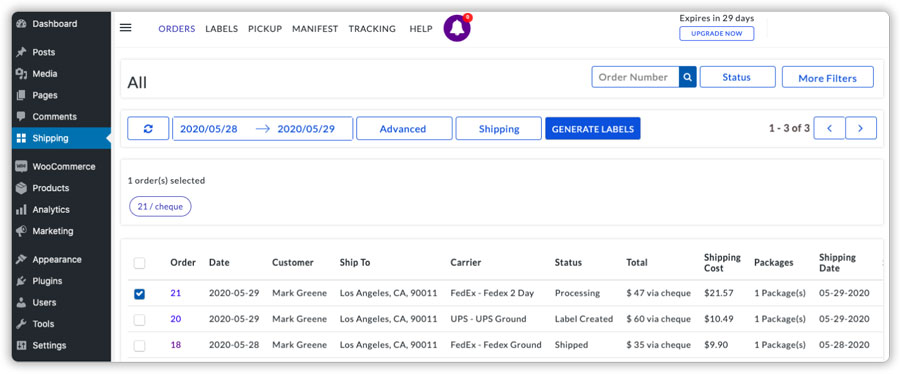
Visit the Orders tab and select the order(s) for which you want to generate and print a shipping label, and click on Generate Labels, as shown below.
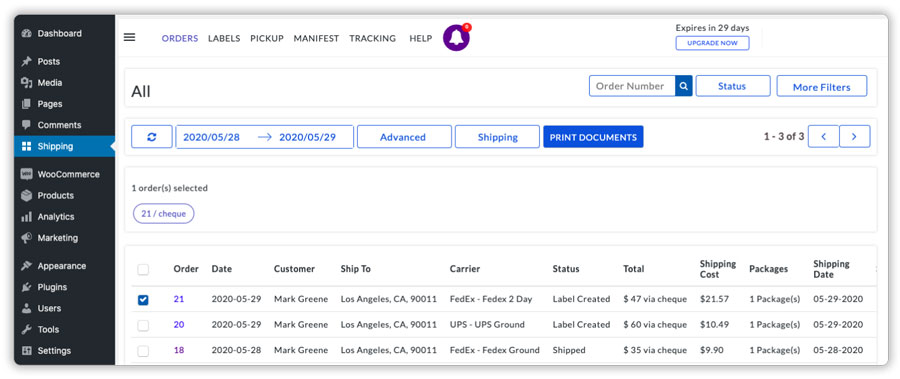
Select the order(s) again and click on Print Labels to get the FedEx shipping labels for your orders, as shown below.
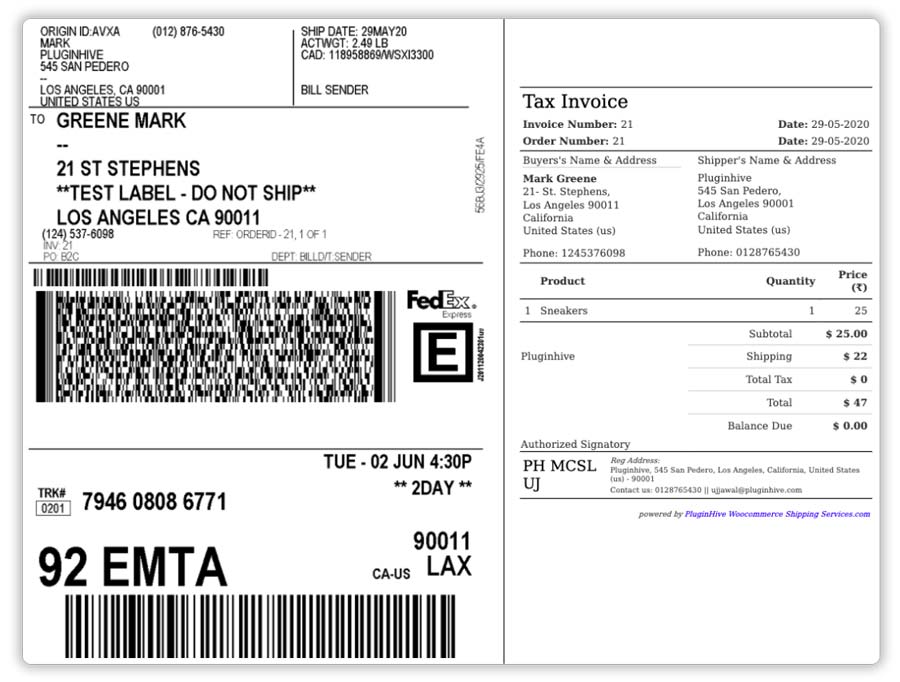
The plugin will automatically redirect you to print the shipping labels along with other documents like the tax invoice, as shown below.
Schedule FedEx pickups from within the WooCommerce store
Once your orders are ready for shipping, WooCommerce Shipping Services allow you to schedule FedEx pickups right from within your WooCommerce store.
Visit the Orders tab and select all the orders for which you want to request the carrier pickup. Now click on the Request Pickup option, as shown below.
Once the pickup is requested successfully, you can visit the Pickup tab to view the status of the pickup, as shown below.
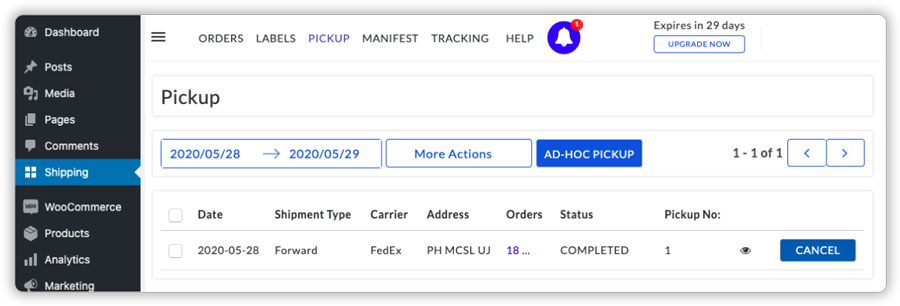
As you can see, you can view the pickup status as well as cancel the pickup based on your requirements.
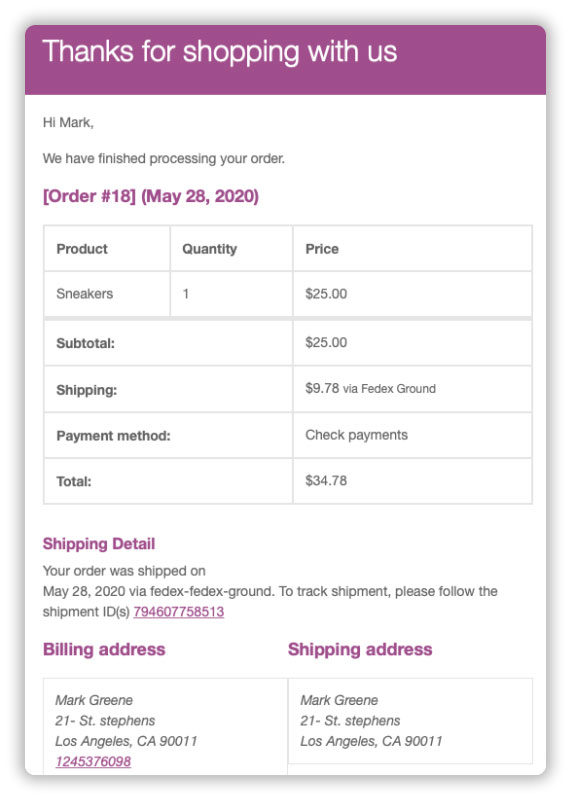
Fulfill orders and send WooCommerce Order Completion Email to customers along with the FedEx tracking details
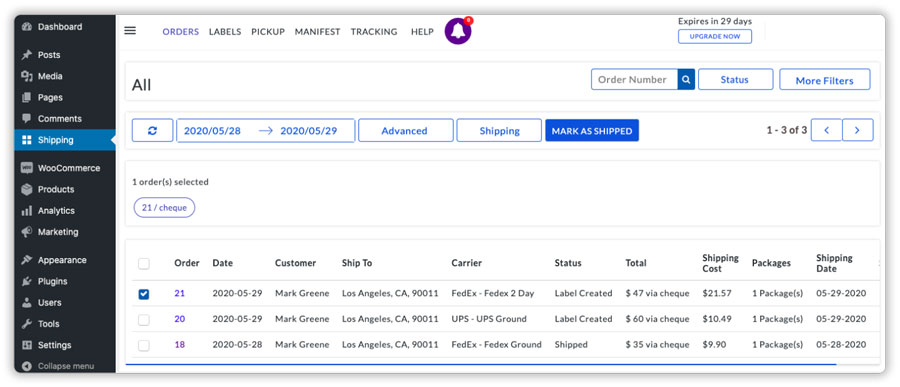
After requesting the pickup, you can visit the Orders tab and select all the orders which are ready to be shipped, and click on Mark As Shipped to fulfill these orders.
Once you mark the orders as shipped, your WooCommerce orders will be automatically marked as Completed. Visit the WooCommerce > Orders page to check the order status and click on the order.
In the image below, you can see the order is automatically marked as completed. Also, the FedEx tracking details are automatically updated to the WooCommerce orders.
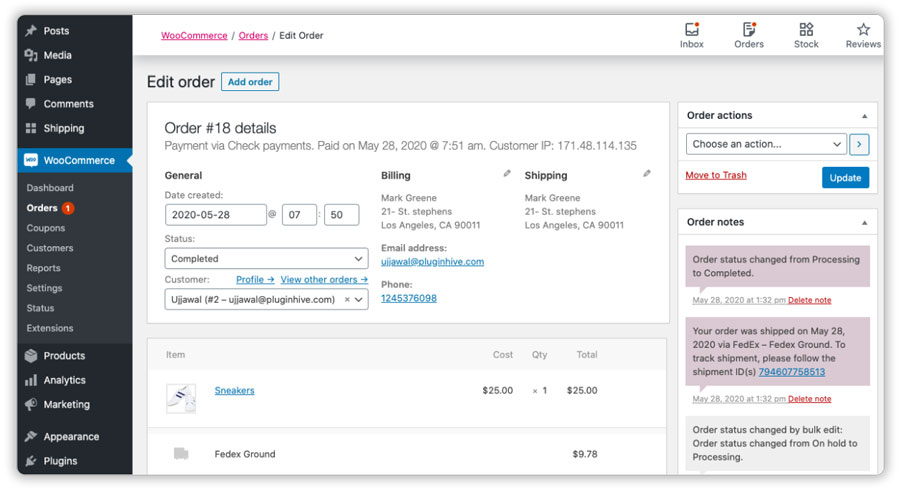
As for the customers, the plugin automatically sends the FedEx tracking details to the customer via the WooCommerce Order Completion Email, as shown in the image below.
Print order manifest for the carrier pick-up personnel
WooCommerce Shipping Services also allows you to print the shipping manifest for your shipping carrier pickup personnel, which you can print directly from your WooCommerce store.
Visit the Manifest tab and click on the Print icon to get the shipping manifest, as shown below.

As you can see in the image below, the manifest generated will have the following details.
- Airwaybill Number
- WooCommerce Order Number
- Payment Method
- Attention (customer) Name and Contact Number
- Customer’s City
- Product Name and Quantity
- Package Weight and Dimensions
- Barcode Airwaybill

Monitor Live FedEx Tracking Status
To track your orders, select the orders that are shipped and click on Track Your Shipments. Or, you can track all the orders by visiting the Tracking tab, where the plugin will display the live FedEx tracking status of all the shipments, as shown below.
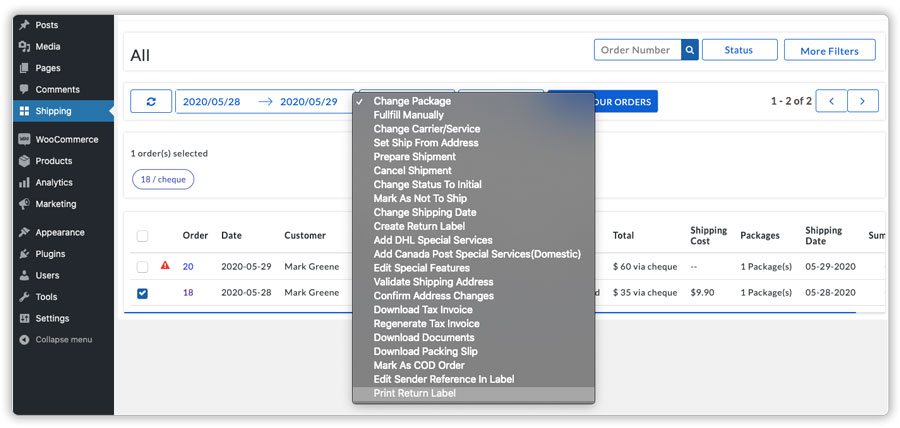
Print FedEx Return Shipping Labels for your orders
The plugin also allows you to handle the FedEx returns by allowing you to print FedEx return shipping labels directly from within the WooCommerce store. All you need to do is select the order for which the return shipping label is required and click on Create Return Labels under the Advanced tab, as shown below.