Setting up Stamps USPS Shipping Extension with Postage for Magento 2
With this tutorial, we’ll show you how to set up the Stamps USPS Shipping Extension with Postage for Magento 2 on your Magento-based online store.
Stamps USPS Shipping Extension with Postage for Magento 2
Stamps.com provides shipping services for small businesses, enterprises, and online retailers to print the official United States Postal Service(USPS) Stamps and shipping labels.
Stamps.com sends customers a digital scale to weigh letters and packages to ensure the correct amount of postage is applied to the piece of mail. The amount of postage applied is then deducted from the customer’s Stamps.com account, thereafter, letting customers print labels with postage.
With the help of Stamps.com USPS Shipping Extension for Magento 2, you get real-time USPS shipping rates. These rates depend on your package weight & dimensions, the address of the sender & receiver, and other necessary details.
Let’s go through the step-by-step instructions required to kick-start your Magento store with the Stamps USPS Shipping Extension.
Setting up the Stamps USPS Shipping Extension
After installing the plugin, a new shipping method ‘Stamps’ is available for shipping. Now you can configure this Stamps Shipping method as per your requirement. You can navigate to settings by going to Admin Dashboard→Stores→Configuration→Sales→Shipping Methods.
General Settings
Once you’re inside Shipping Methods, you’ll find the General settings as shown below.

- Enabled: Select Yes from the drop-down list to enable the Stamps USPS Shipping Method.
- Title: Method Title is visible on the Cart page. Specify the Title as required or defined by you.
API Settings
API settings are used to get rates and labels from Stamps.com and the setting fields are shown below.

- API User ID: For accessing Stamps.com APIs, you need to register with Stamps.com. After registration is complete, you get a User ID and Password.
How to create or register on Stamps.com?- Go to Stamps.com
- Click Get Started to sign up.
- Enter all the required details in the given registration form.
- Submit the registration form.
After registration, you will get the User ID and Password. You need to enter the User ID in the given text box.
- API Password: Enter the Password which you have got from Stamps.com.
- API Mode: In this field, you can set a required API mode for printing the labels. The available options are as given below:
- Test: Test mode is used to do some test purchasing and sample label printing by using Stamps.com API. You can use test mode before using Live Stamps.com Account. There is no real money transaction involved in test mode and is used only for development purposes.
- Live: Live mode is used for actual purchase and label printing.
Note: Please contact Stamps.com to obtain Test Credentials and Test API URL. You should also request to whitelist your website host IP. In addition, you need to request whitelisting your Personal Computer IP so that you can access/see the Label(generated in the Test Mode) URLs.
Handling Fee Settings
You can add the shipping price as required to the actual shipping cost. You can mention the fixed amount or the percentage of the total order. The handling fee settings are shown below.

Packages Request Type
Here, you can select the package type for packing the order. The shipping cost changes according to the option selected. The package request type settings are shown below.
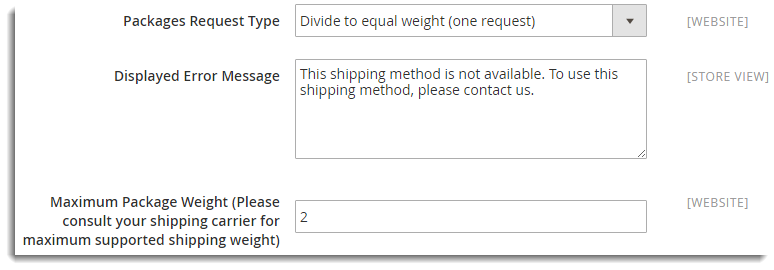
- Packages Request Type: The available options are as given below:
- Divide to equal weight(one request): The package is selected on the basis of the Maximum Package Weight (Please consult your shipping carrier for maximum supported shipping weight) field and the total of the cart.
- Use Origin Weight (few requests): The package is selected on the basis of each product’s weight.
- Displayed Error Message: In case, the customer does get any shipping method, this message is displayed.
- Maximum Package Weight (Please consult your shipping carrier for maximum supported shipping weight): Enter the required maximum limit for the single package after consulting the carrier.
Country Settings
The country settings are shown below.
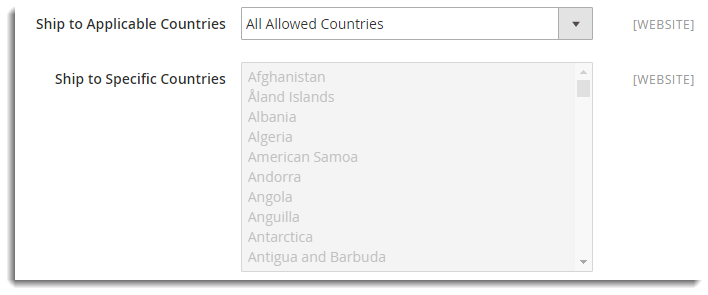
Ship to Applicable Countries: This field allows you to select countries for shipping. The available options are given below:
- All Allowed Countries: This option provides availability of the plugin to the customers in all countries which are set in General Settings. It is set as a default option.
- Specific Countries: This option allows you to add the list of countries. Stamps.com shipping Method gets available only in the listed countries.
Sort Order
If more than one shipping method is enabled, then this option allows you to position the shipping method among all the available ones that will be displayed on the checkout page. The Sort Order settings are shown below.

Specify the number to show this shipping method on the checkout page. For Example, Sort order for FedEx is 1, UPS is 2, and Stamps USPS is 3, then the shipping services for Stamps USPS will be displayed after FedEx and UPS.
Allowed Methods
Select the methods which you want to be available for the customers. The Allowed Methods settings are shown below.
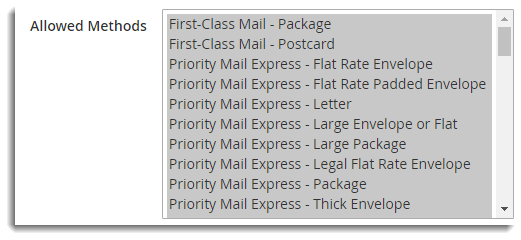
Insurance Setting
Insurance provides coverage in the event that they become lost or damaged while in transit. If Shipper requires protection for items, then insurance may be arranged at an additional cost by USPS. The Insurance settings are shown below.

Select the Yes option to ensure your package. For more information on insurance, check out the guide on Stamps USPS Insurance.
Hidden Postage
The Hidden Postage Setting is shown below. You can select the Yes option to hide the postage amount on the Print label.

Label Settings
The label printing setting fields are shown below.

- Print Layout: It deals with the arrangement of visual elements on a page. Print layouts that are supported by the plugin as given below:
- Default: Uses the default print layout.
- Normal: A label of 4 X 6 inches gets generated. For Critical Mails, this option generates labels for windowed envelopes.
- NormalLeft: Label of 4 X 6 inches gets generated on the left side of the paper.
- NormalRight: Label of 4 X 6 inches gets generated on the right side of the paper.
- Normal4X6: Label of 4 X 6 inches gets generated. This option only applies to Critical Mails and Library Mails.
- Normal6X4: Label of 6 X 4 inches gets generated. This option only applies to Critical Mails.
- Normal75X2: Label of 7.5 X 2 inches gets generated. This option only applies to domestic First Class or Priority packages.
- NormalReceipt: Label of 6 X 4 inches and receipt gets generated.
- NormalCN22: A 4 x 6 label on 8.5 x 11 sheet with Customs Form CN 22 gets generated.
Debug
If you are not getting proper rates( lesser or higher than expected), not getting all the available shipping options, or not getting rates at all, then you enable-Debug the option to find the error(s). By enabling debug mode, you can trace issues using log. The Debug setting is shown below.

Select the Yes option from the drop-down list to enable debug mode.
Stamps USPS Shipping Rates on the Magento Cart page
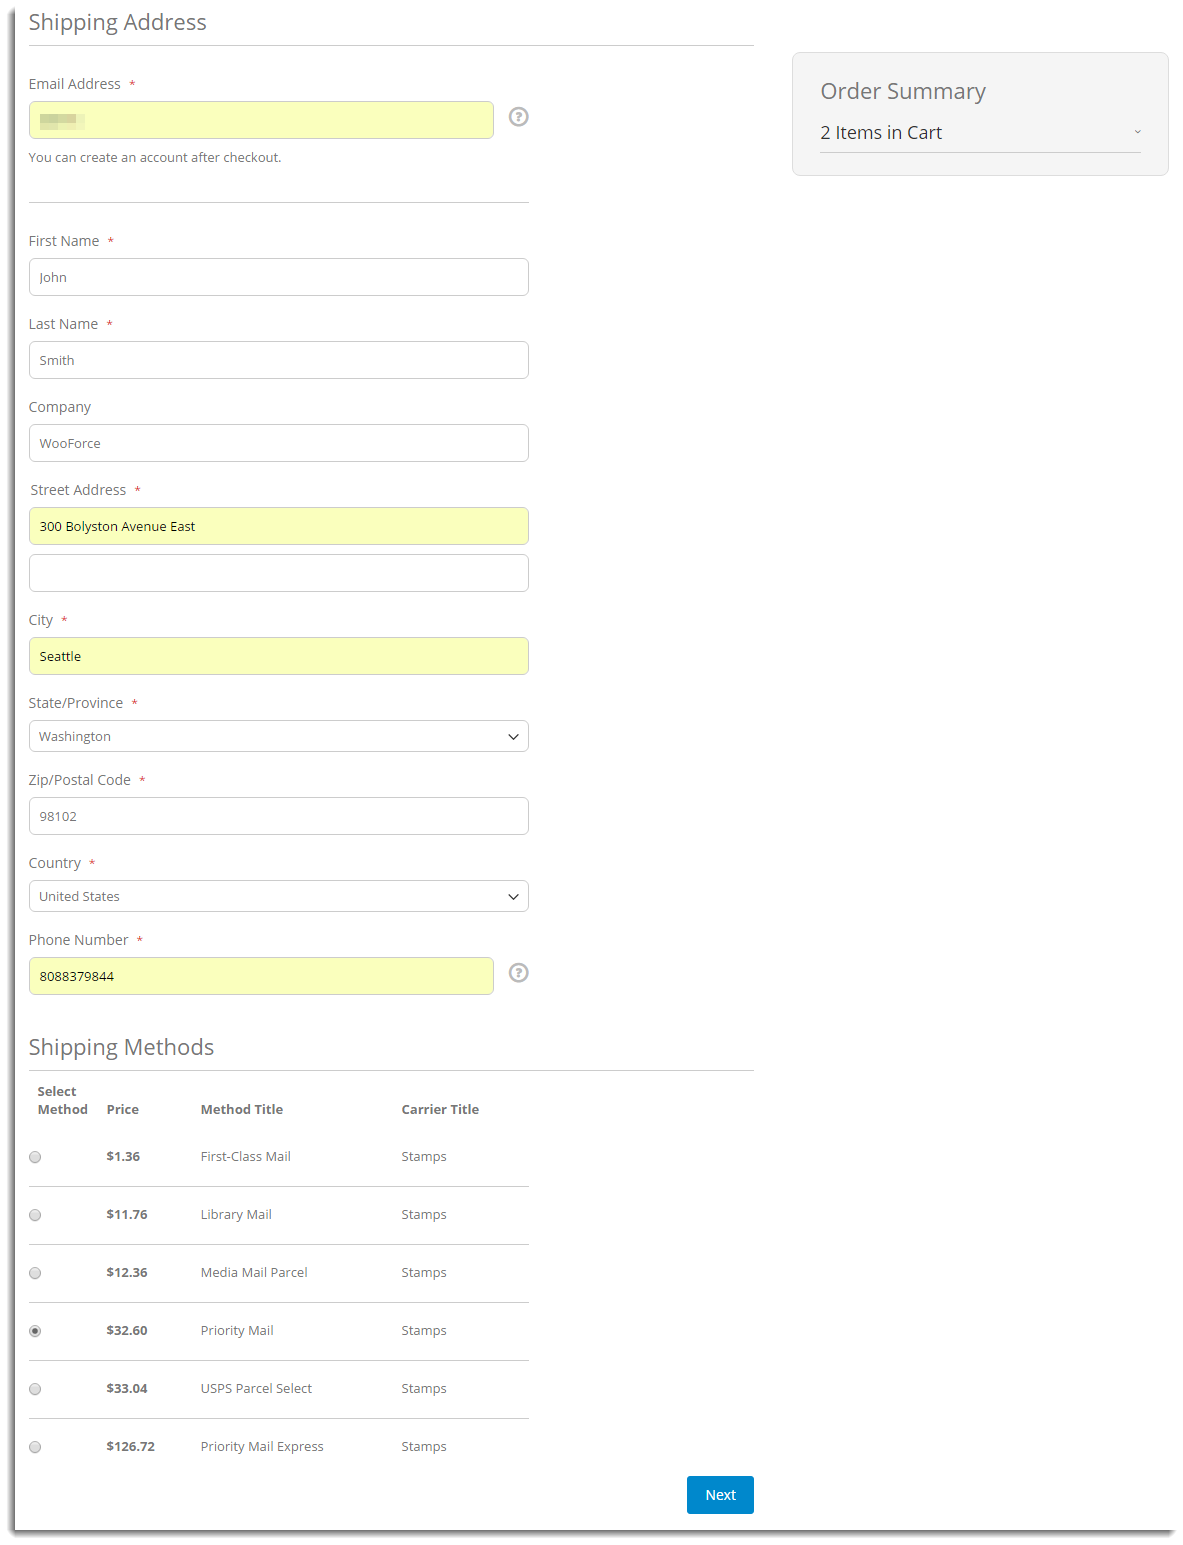
After setting up Stamps USPS Extension configuration settings, your customers can see the available services list on the cart page. Customers can select the desired shipping services and place the order from the Checkout page as shown below.
Creating and Print Stamps USPS Shipment Label
The Stamps USPS Shipping Extension is also capable of letting you create and print shipping labels for multiple shipments at a time. Navigate to Dashboard→Sales→Orders and you’ll find a list of orders, similar to this.
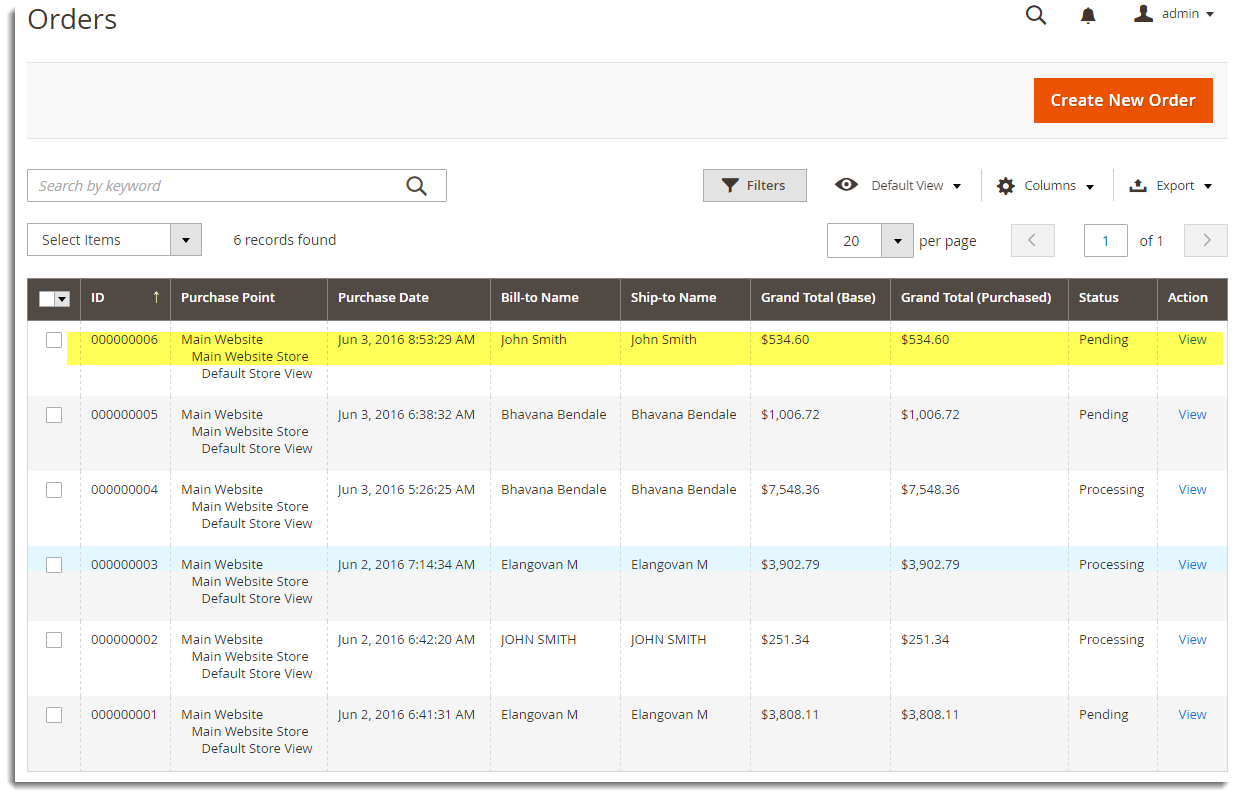
- Click View to see the order and click on Ship to ship the order as shown below.

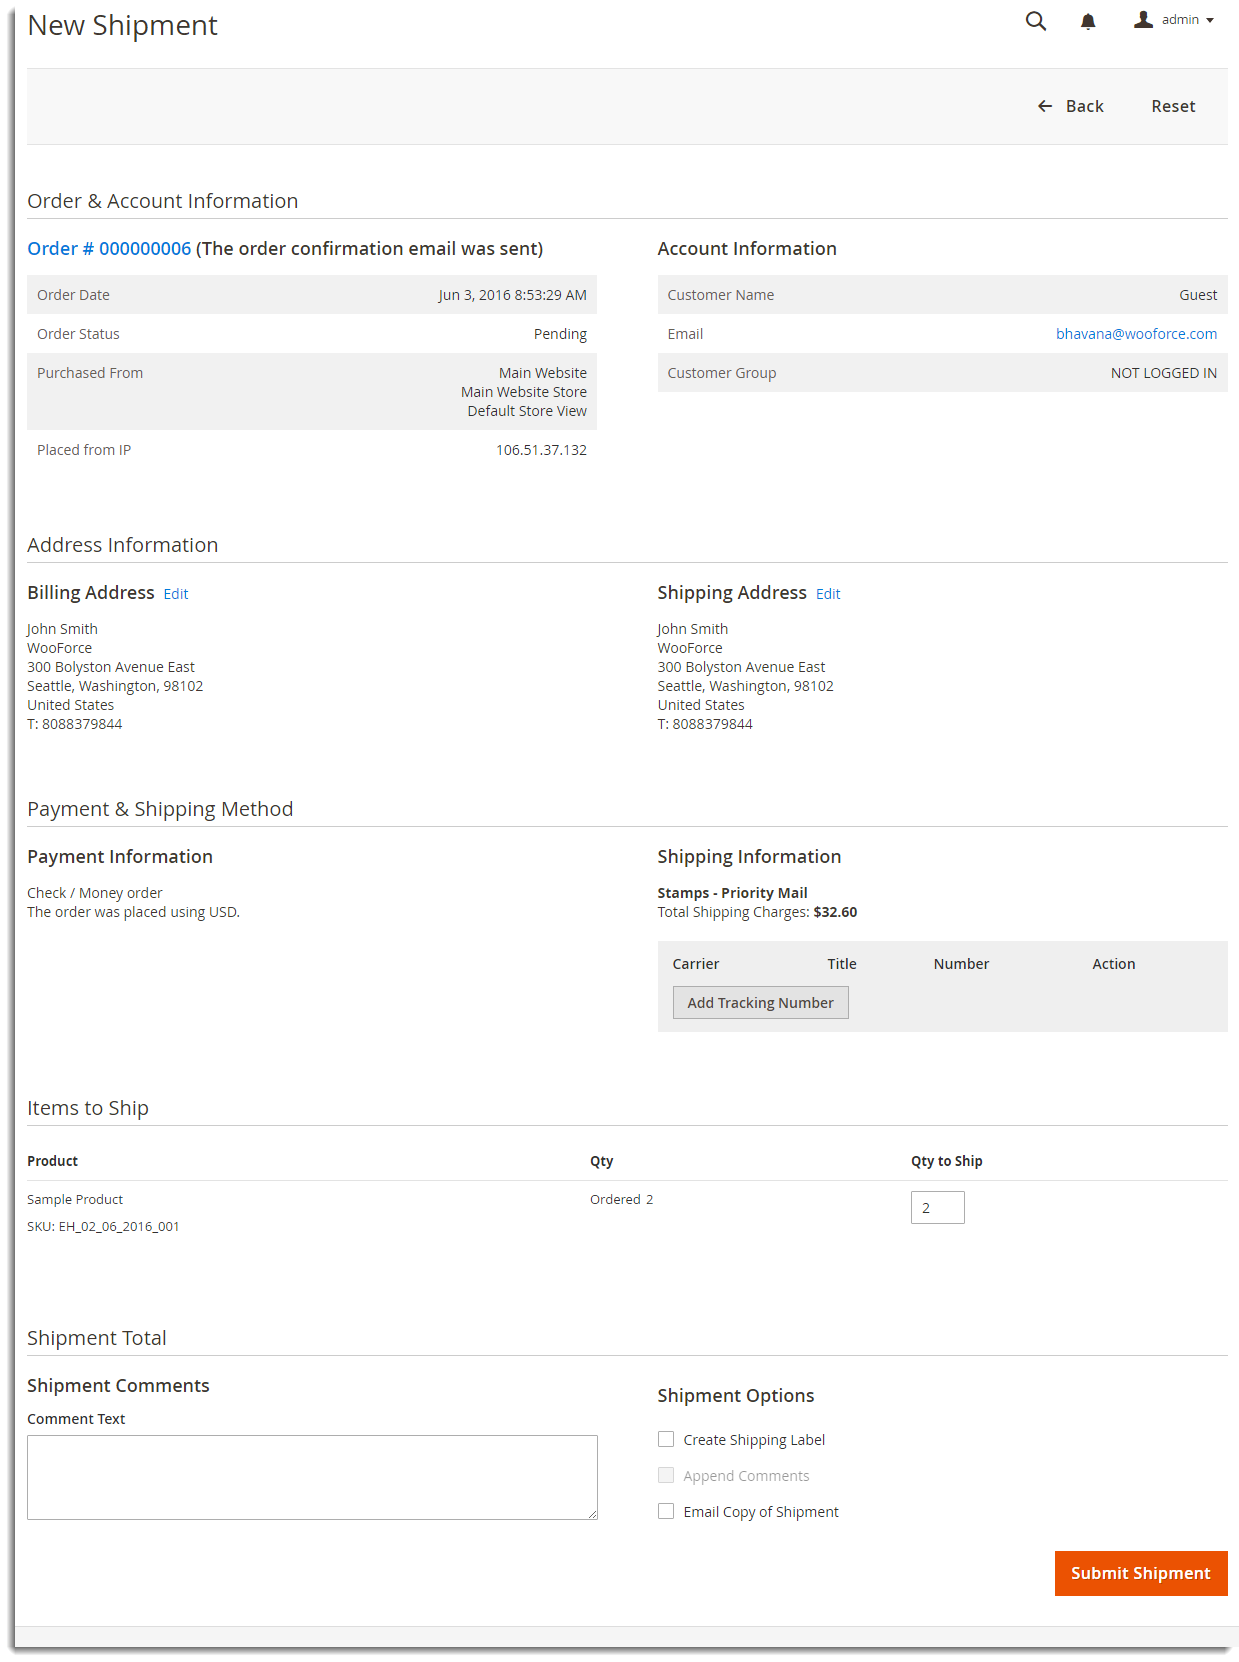
- To create the shipment, select the checkbox Create Shipping Label and then click on Submit Shipment as shown in the image below.
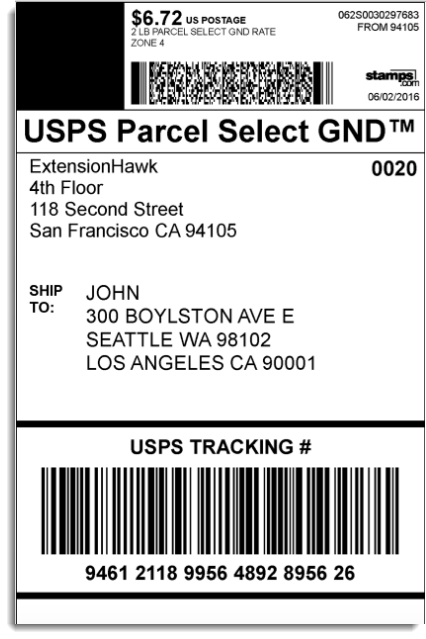
- You can print the Stamps USPS shipping label similar to this.
You can check out the Stamps USPS Shipping Plugin with Postage for Magento 2 to know more about the features.
If you need any help with the Extension or setting Stamps USPS on your Magento store, then feel free to Contact PluginHive Customer Support. Our team would be more than happy to help you out.
Good luck!
