


Set up the Shipment Tracking & Notify app on your Shopify store.
Shopify Shipment Tracking & Notify app provides Shopify store owners and their customers with a professional-grade tracking experience. The app notifies your customers about their package’s location via email notifications and also allows real-time shipment tracking with a built-in tracking lookup page on your Shopify store.
This article will guide you through the app’s setup and how you can get the most out of it on your Shopify store.
On This Page
- Getting Started with Shipment Tracking & Notify app for Shopify
- Shipment Tracking – Track Your First Order
- Tracking Lookup Page – Set Up and Preview
Getting Started with Shipment Tracking & Notify app for Shopify
To install the Shipment Tracking & Notify app, head to the Shopify App Store, search for Shipment Tracking & Notify, and click Install to add the app to your Shopify store.

After installing the Shipment Tracking & Notify app, choose the plan that best suits your store’s order volume and tracking requirements:
- Free – Up to 25 orders/month with email notifications.
- Starter ($9/month) – Up to 200 orders/month, including email notifications and a branded tracking page.
- Popular ($29/month) – Up to 1,000 orders/month, with email notifications and a branded tracking page.
- Premium ($49/month) – Up to 2,000 orders/month, with email notifications and a branded tracking page.
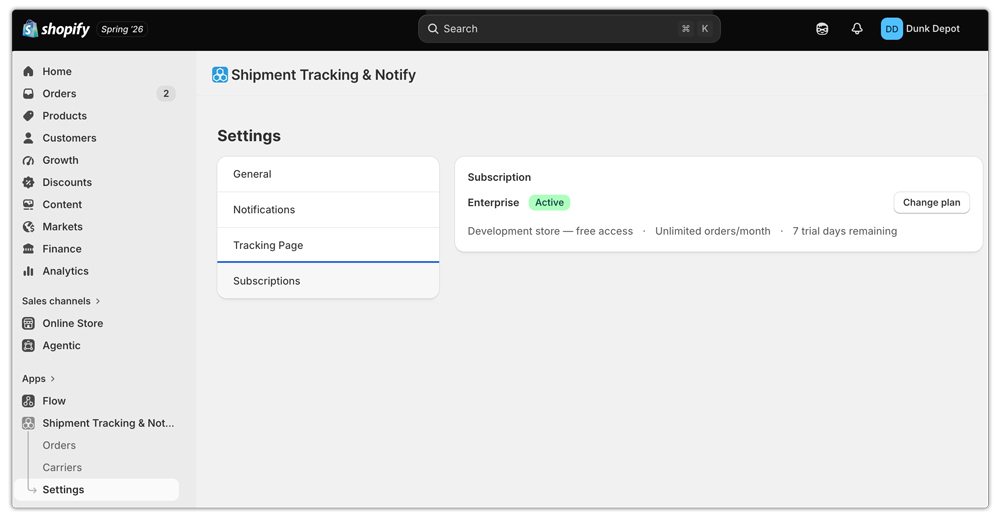
- Enterprise ($99/month) – Unlimited orders/month with email notifications, making it ideal for high-volume stores.

If you want to change this plan in the future, you can head on over to Settings > Subscription tab in the app and click on Change plan.
Before you can start tracking shipments, you need to configure a carrier. After selecting a plan, navigate to the Carriers section in the app. Here, you’ll have two options:
- Use a ready-to-use carrier (no credentials required): Choose from supported carriers that work out of the box without connecting your own carrier account. These include DHL Express, Australia Post, Canada Post, PostNord, Blue Dart, Aramex/Fastway, and several others.
- Connect your own carrier account: If you ship with carriers such as UPS, USPS, FedEx, Amazon Shipping, or other supported providers, you can connect your own carrier account by entering your API credentials. This lets the app retrieve tracking updates directly from your carrier account.

To connect your own carrier account, simply click on the carrier you want to use and enter your carrier account credentials.

Enabling Real-Time Email Notification:
Once your carrier is configured, navigate to Settings > Notifications and enable Email Notifications. This allows the app to automatically send live tracking updates to your customers via email.
The app allows you to send emails using your own SMTP Email server using your business/personal email ID. In order to do that, enter the following details under the SMTP section:
- SMTP Host
- SMTP Port
- SMTP UserName
- SMTP Password
Apart from SMTP Details, enter the email ID from which you need to send the tracking email under the From Address option.
Enter an email ID under Reply-To Address. If your customers reply back to the tracking email, that reply will be received on the email you provide in this step.

Next, configure your email branding by entering the following details:
- Your Store URL – The link customers will use to visit your store.
- Your Store Name – The name that will appear in your tracking emails.

You can also customize the tracking email sent to your customers using an HTML email template. Personalize the subject, branding, and content to match your store’s identity and customer experience.
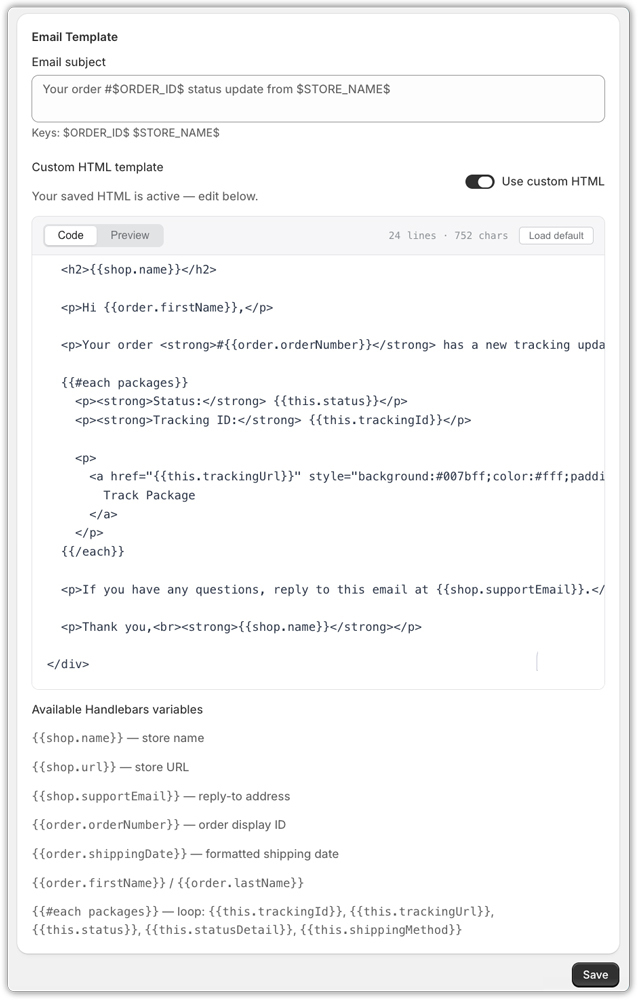
After everything is configured, just click on “save“.
Shipment Tracking – Track Your First Order
After everything is set up, follow the steps below to start tracking your orders using the Shipment Tracking & Notify app.
- Once you receive an order and you have successfully shipped it, click on Mark as Fulfilled.
- Enter the Tracking ID you received from the Shipping Carrier under Tracking Number and click on Fulfil Items.
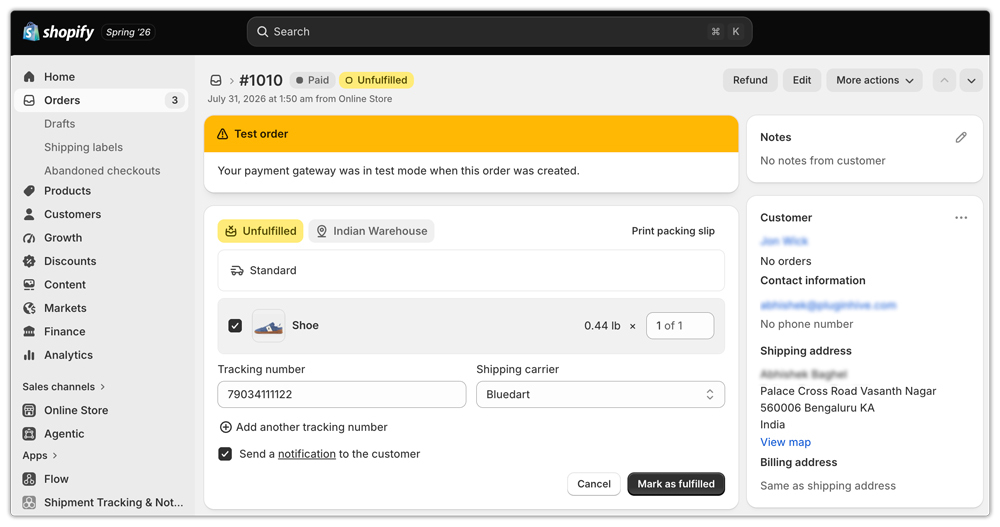
- Order Fulfilment Email will be automatically triggered, containing the Tracking Details of the order.
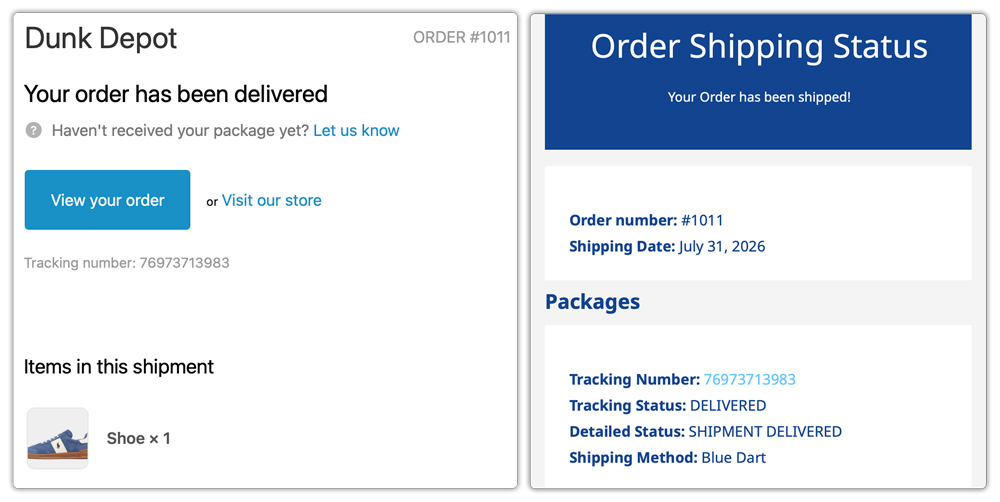
- After fulfillment, the app will automatically send email notifications to your customers on every tracking status change. Here are some of the Tracking Emails sent to the customers:
Once an order has been shipped, you can also track its progress directly from the merchant dashboard. Simply navigate to the Orders page within the app, where you’ll find all your tracked shipments.
The Orders page includes the following options:
- Import Orders – Manually import your Shopify orders into the app for tracking.
- Search Orders – Search for a specific order using the order number or other details.
- Carrier Filter – Filter orders by a specific shipping carrier.
- Date Range – View orders from a selected time period, such as the last 15 days.
The page also categorizes orders based on their tracking status, allowing you to quickly switch between All, Initial, In Transit, Out for Delivery, Delivered, Exceptions, and Cancelled shipments.
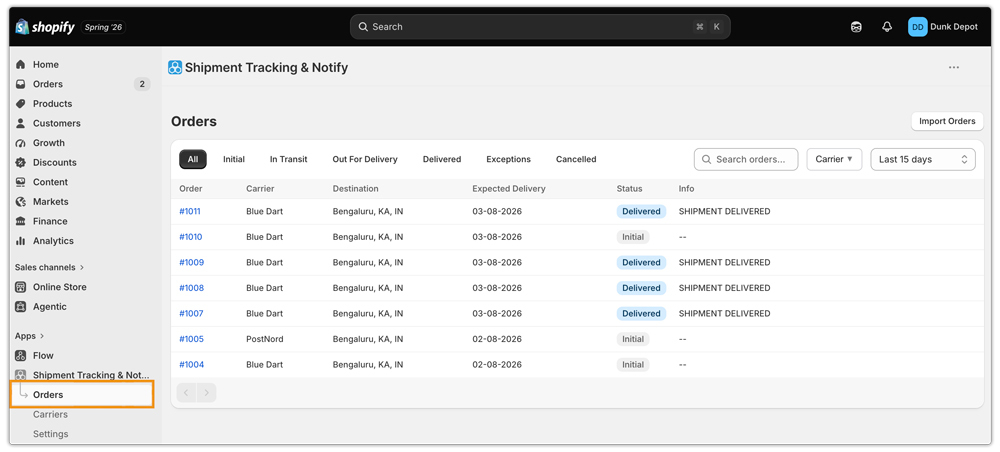
You can also click on an order and view its tracking lifecycle end to end.

Tracking Lookup Page – Set Up and Preview
Once you’ve enabled email notifications, the next step is to set up a tracking page on your storefront so customers can easily track their orders. Follow the steps below to configure it.
Follow the steps below to set up the Tracking Lookup Page on your Shopify store:
- Visit the Shopify admin dashboard and click on Content.
- Click on Menu and select under which menu you want to set the Tracking Lookup Page.

- Click on Add Menu Item and enter the following details:
- Label – Enter the name of your Tracking Page. Enter the name you want to display in your Shopify store’s header or footer.
- Link – Enter:
/apps/phtracking/

- Click on Save to save the tracking page under your menu.
- Visit your Shopify store, and you will be able to see the Tracking Page Name under your selected menu.
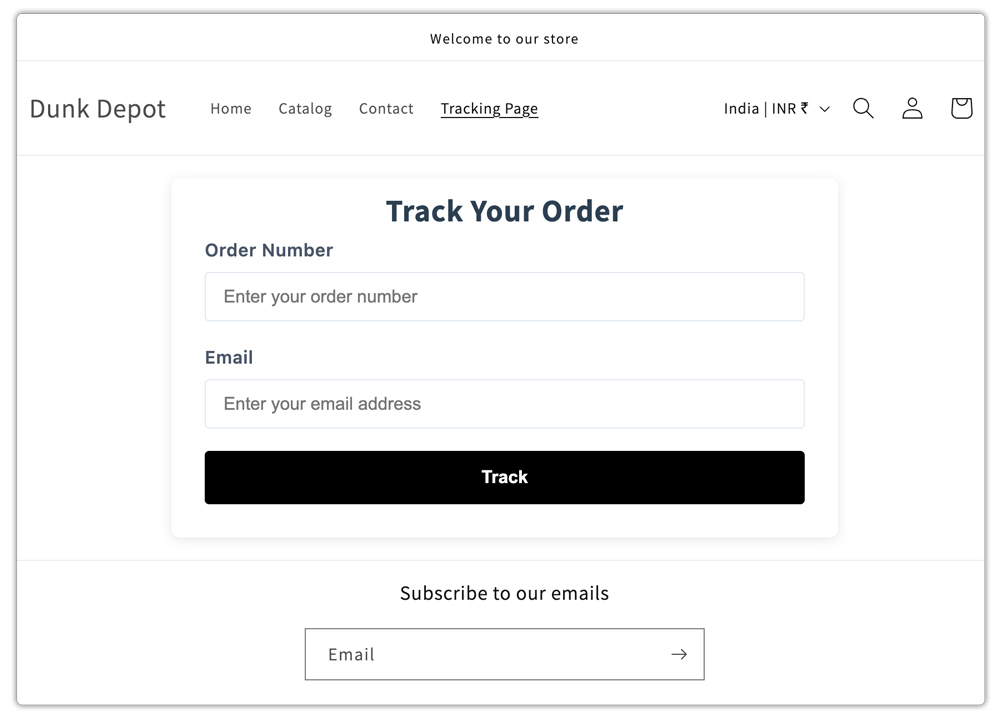
Customers will have to enter their Order Number along with their Email ID, and they will be able to see the live tracking status of their order, as shown below.
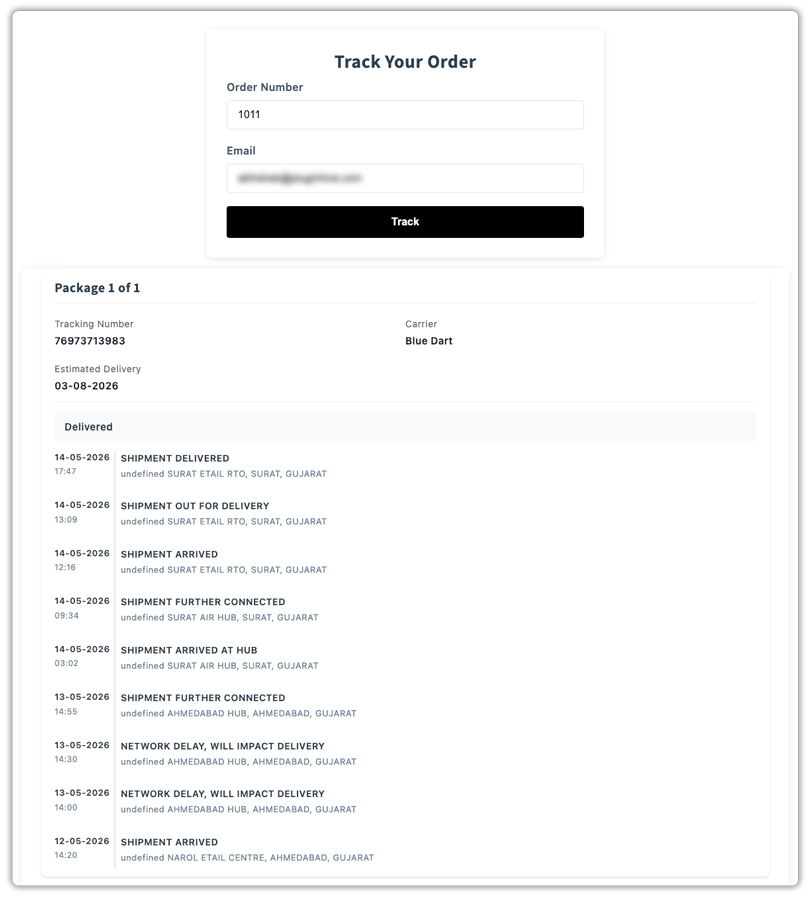
Additional Tracking Page Options:
The PluginHive Shipment Tracking & Notify app also lets you customize your customer tracking experience. It offers several options to help you customize a branded tracking page for your store.
- Enable Custom Tracking Lookup Page – When enabled, all tracking emails sent from your store will include a link to your branded tracking page. Customers can simply click the link in the email to land on your storefront tracking page.
- Display Order Details on the Tracking Page – You can choose what information customers see on the tracking page by enabling Show Order Details. This includes options to display the shipping address and order line items, allowing customers to view their order details alongside the live shipment status.

- Below is a screenshot of the email sent to the customer. Clicking the tracking number opens your store’s tracking page.

- Customize the Look and Feel of Your Tracking Page – The app also lets you personalize your tracking page by enabling Custom Page Styling, allowing you to apply your own CSS to match your store’s branding. You can also customize the Order Not Found message displayed when a customer enters an invalid order number.
These customization options help you create a fully branded tracking page that matches your storefront while providing a seamless tracking experience for your customers.

Setting up the PluginHive Shipment Tracking & Notify app gives your customers a seamless post-purchase experience with automated tracking emails and a branded tracking page, while helping you reduce WISMO queries.
If you need any help with the setup or configuration, feel free to contact us; we’ll be happy to assist you.