
Setting Up WooCommerce TForce Freight Shipping Plugin
This comprehensive guide will walk you through setting up the TForce Freight Shipping Plugin for your WooCommerce store. With this plugin, you’ll be able to get real-time rates for your freight shipments directly at checkout/cart, simplifying your fulfillment process. The guide will cover everything you need to know, including displaying rates at the checkout, creating shipping labels, and tracking your shipments.
Follow the step-by-step instructions to get the plugin configured in your WooCommerce Store. Jump straight to the specific section you need, or follow the entire guide for a complete setup. (If you’re new to the plugin, we recommend starting from the beginning).
In this Guide
- Download, Install, and Activate the Plugin
- Activate Your Plugin License
- Register Your TForce Freight Account
- Verify Your Products
- Add Shipper Details
- Configure the Packaging Setting
- Enable TForce Freight Shipping Services
- Configure Shipping Labels
- Add Special Services
- Configure Pick-Up settings
- Set-Up Advanced Settings
- Display TForce Freight Services at Cart/Checkout
- Printing TForce Freight Shipping Labels
- Request for TForce Freight Pick-Up
- Cancel TForce Freight Pick-Up
- Track TForce Freight Shipments
Download, Install, and Activate the Plugin
After making a purchase, log into your MY ACCOUNTS page.
You’ll find the plugin ZIP file to download in the API DOWNLOADS section.

Log into your WordPress Admin Account of your online store.

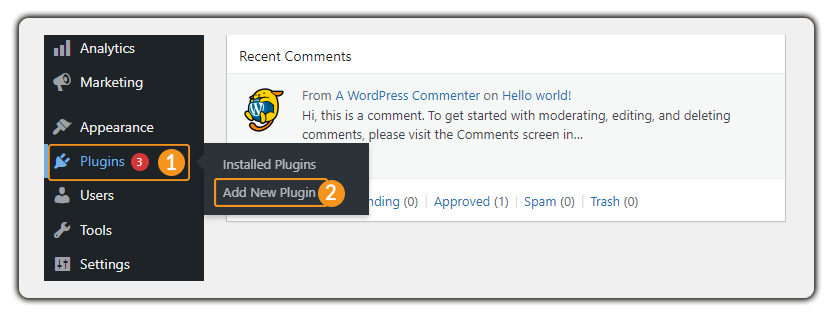
Navigate to Plugins > Add New Plugin as shown below:
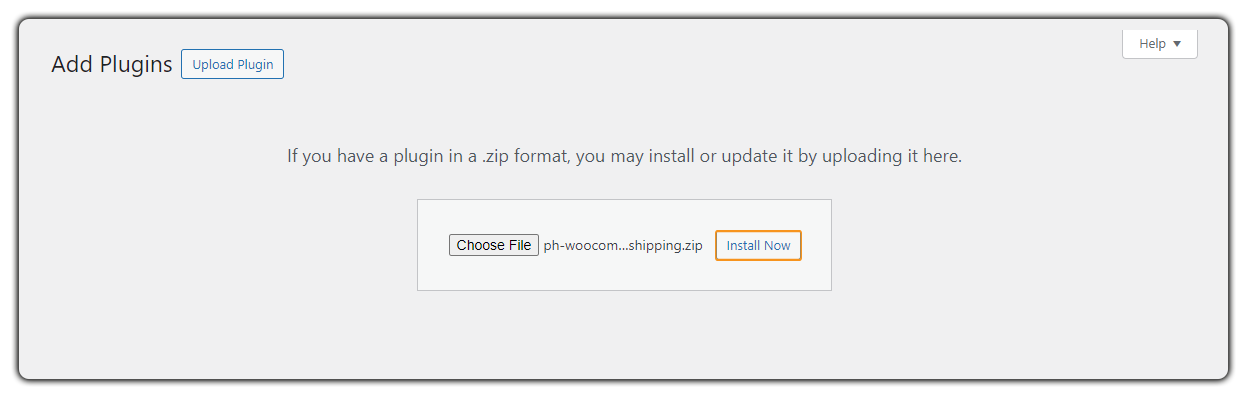
Now click on Upload Plugin > Choose File to upload the TForce Freight Shipping Plugin.

Once you uploaded the plugin, click on Install Now.
Click on Activate Plugin.

Now the plugin is activated and ready to use.
Activate Your Plugin License
After you activate your plugin, you need to activate the license.
To activate the plugin license, you need
- Product API Key
- Product ID
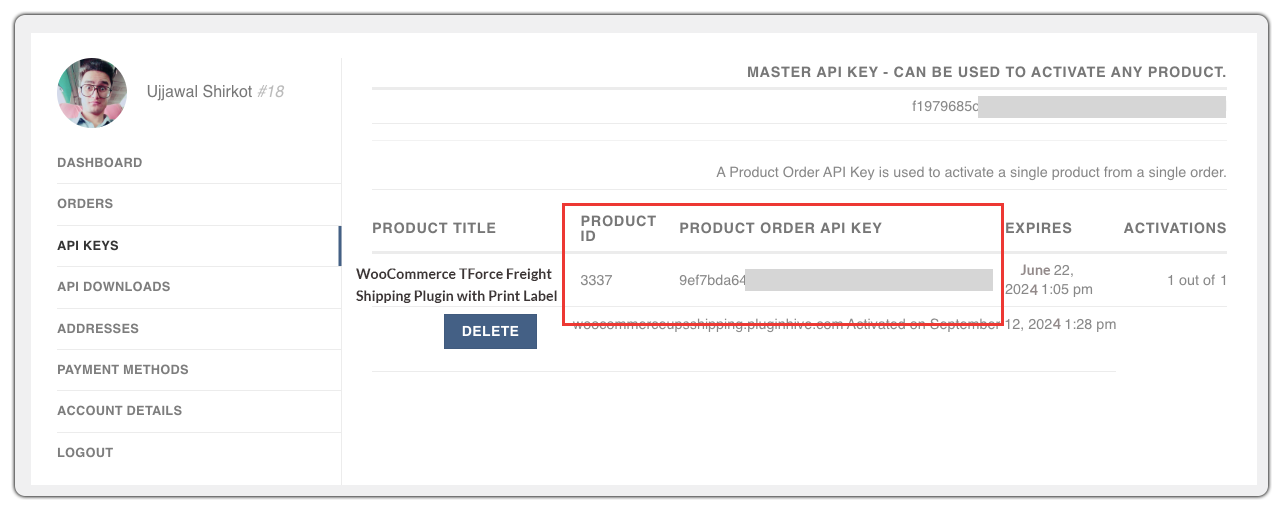
Visit the MY ACCOUNTS page. In the API KEYS section you can find the API Key and Product ID as shown below:
License Activation Is Mandatory
* Without an active plugin license, you won’t be able to use the plugin functionality, and the plugin will stop working.
* We strongly recommend activating the license promptly and renewing it when expired to avoid any disruptions in shipping capabilities.
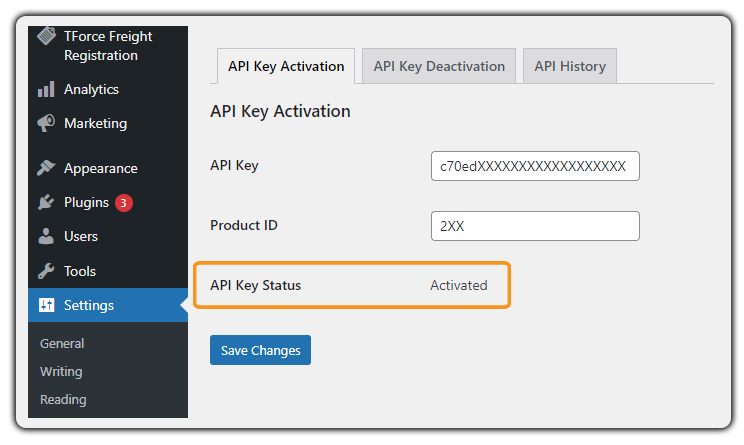
Go to TForce Freight Registration > License Activation as shown below:

Provide your API Key and Product ID and then click on Save Changes.
Your API Key Status will be changed to Activated when the license is activated.
Register Your TForce Freight Account
You should have a TForce Freight Account to register in the plugin. If you don’t have one, please visit the TForce Freight website to sign up.
To register you need
- TForce Freight Username
- Password
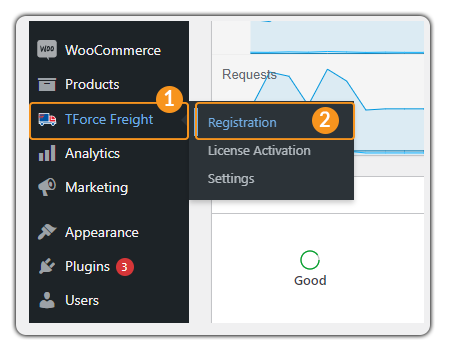
Go to TForce Freight Registration > Registration as shown below:
You will be taken to the TForce Freight Registration Page. Click on Login.

Provide your username and password. Then click on Log In as shown below:

TForce Freight App Portal will open. Click on Get Started.
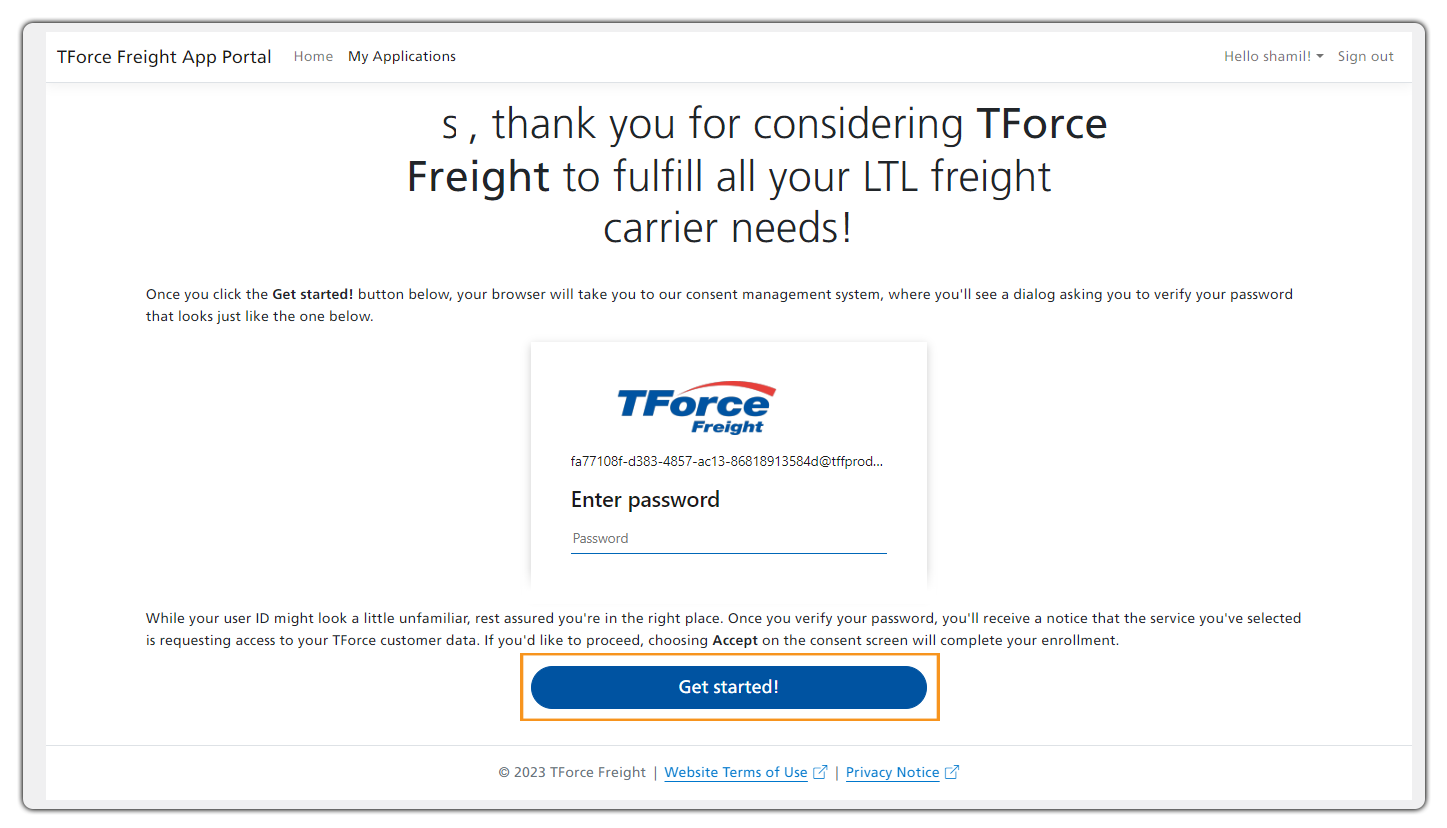
You will be taken to our Consent Management System, to verify your password.
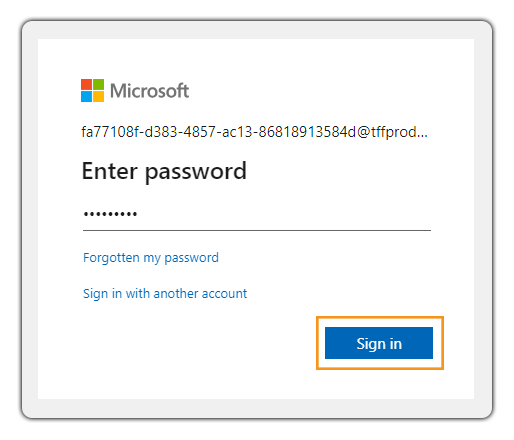
Enter the password and click on Sign in.
A window with permission requests will appear. Click on Next.
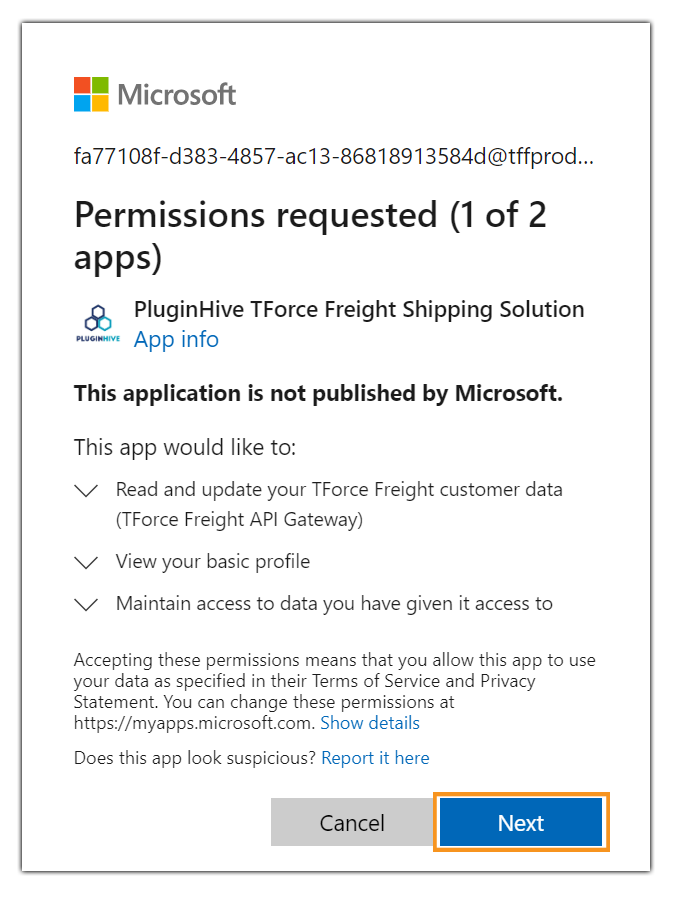
TForce Freight API Gateway permission request will appear. Read and click on Accept.

Now you have granted permission to the plugin to access your TForce Data.

The login is successful, and the Registration Successful page will open.
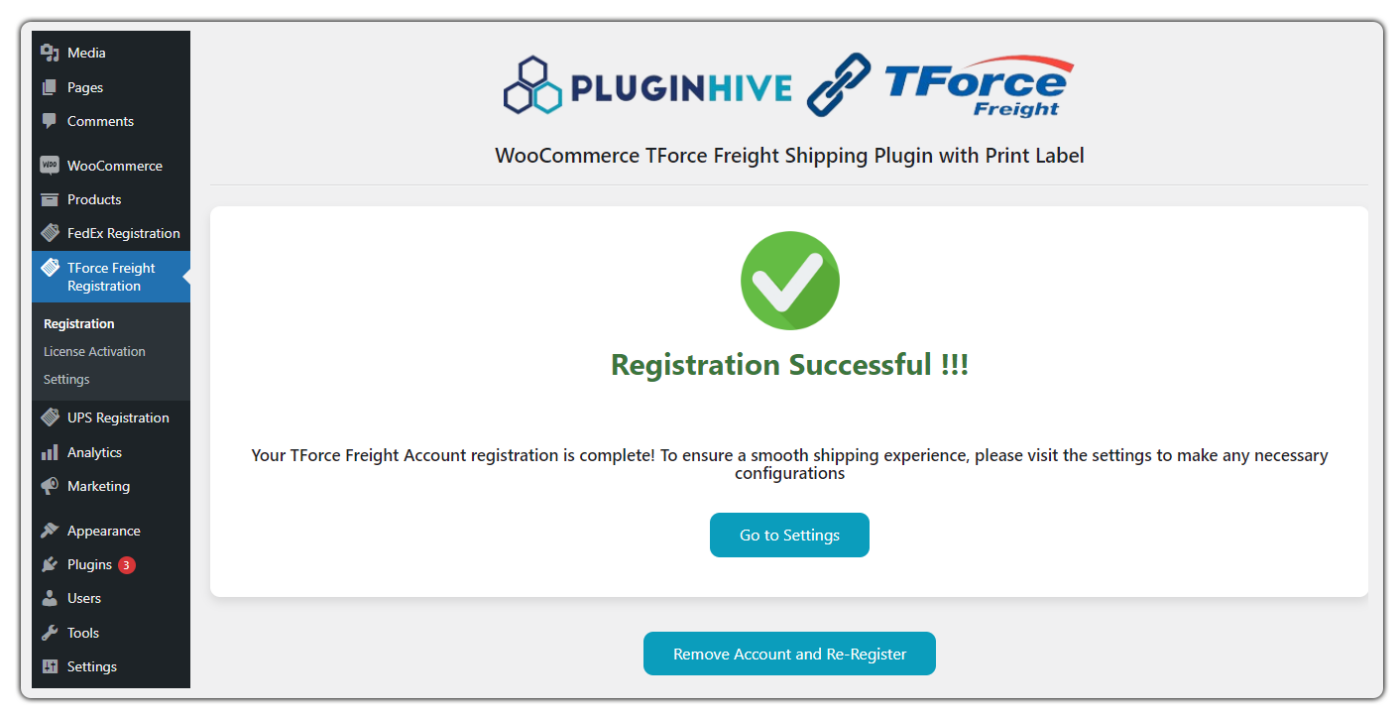
* To remove your TForce Freight Account or re-register, click on “Remove Account and Re-Register.”
If you face any issues or have any queries about the plugin setup, please contact our customer support.
Verify Your Products
Shipping rates vary based on the type of products, locations, special handling, etc. Refer to the below-given details for accurate rates:
- Add price to your WooCommerce products
- Add product weight and dimensions
- Check product stocks
- Add freight class to the products
1. Add Price to Your WooCommerce Products
Navigate to your WooCommerce Store > Products, and select the product you need to edit as shown below:
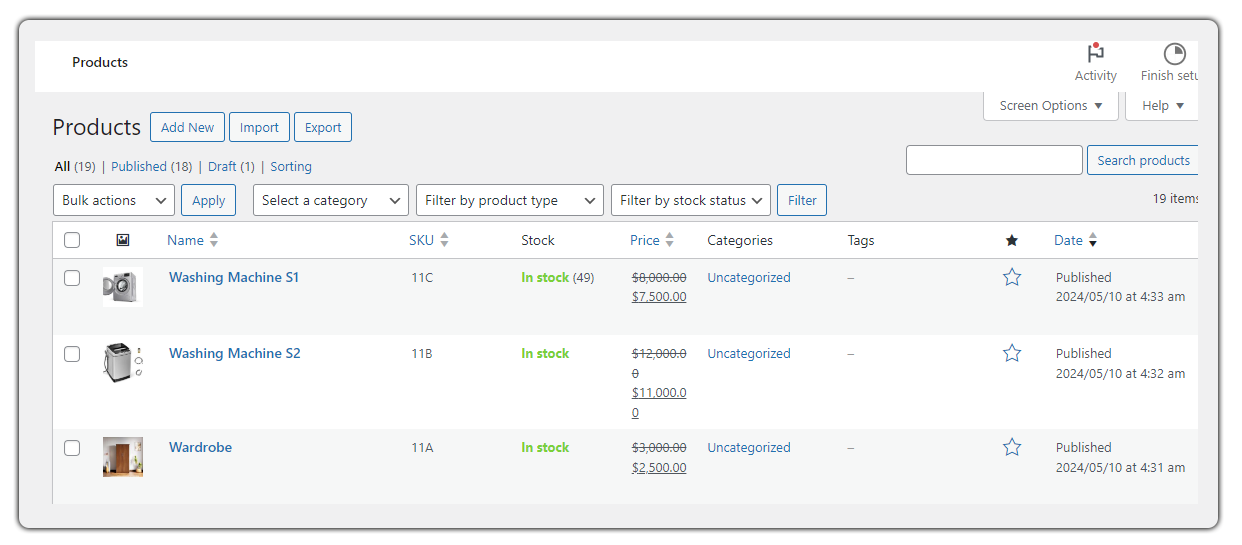
To add price to your products, navigate to General and enter the price, as shown below:

2. Add Product Weight and Dimensions
Your product should have the correct weight and dimension to display more accurate rates.
Navigate to the Shipping section and add the dimensions and weight.

3. Check Product Stocks
Navigate to the Inventory section and check the stock details.

4. Add Freight Class to the Product
Navigate to the Shipping > TForce-Freight Shipping Details section. Here, you can include Freight Class, Dangerous Goods, and Pre-packed Products based on your specific product information.

Add Shipper Details
Provide the shipping address details from where your order will be shipped. This could be your store address, shipping warehouse address, or any other relevant location.
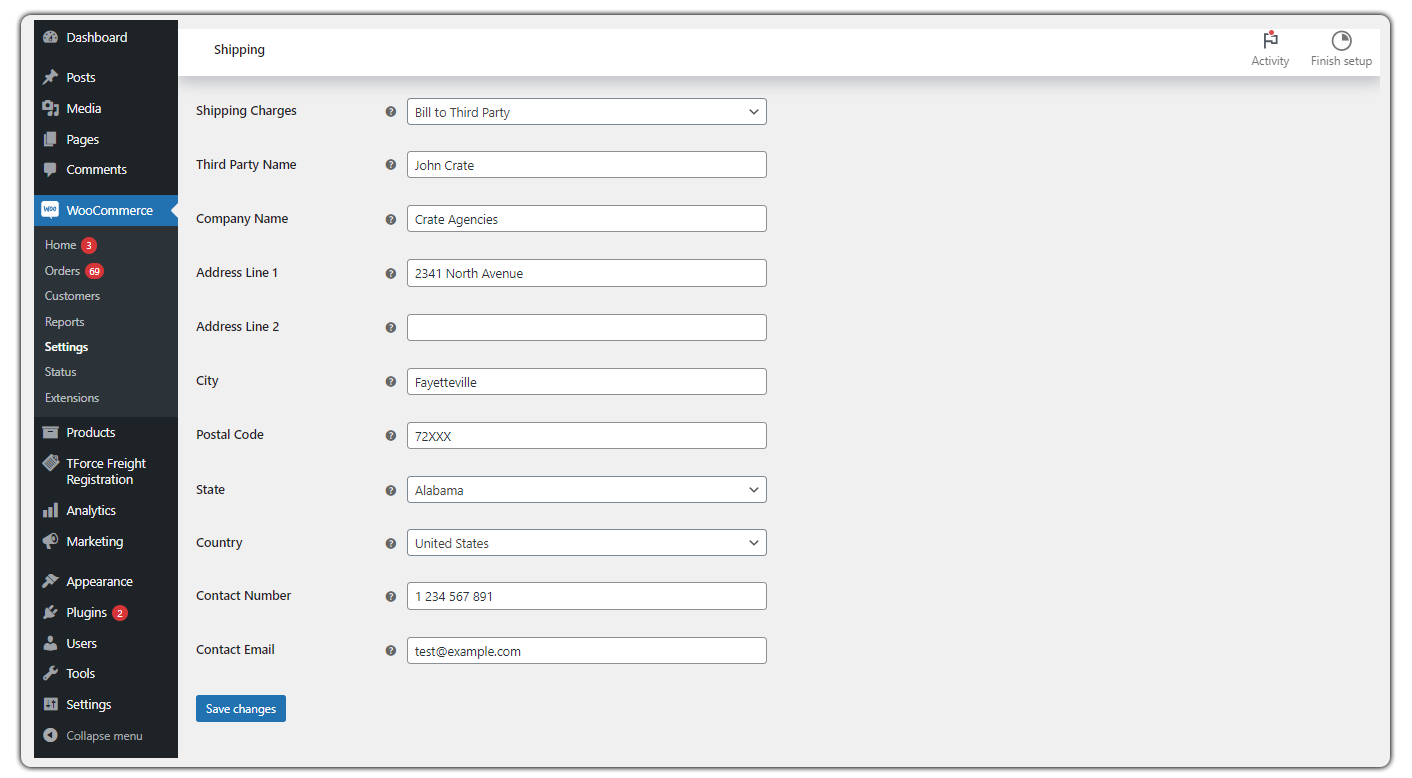
To add Shipper Details, go to WooCommerce > Settings > Shipping > TForce Freight > General as shown below:
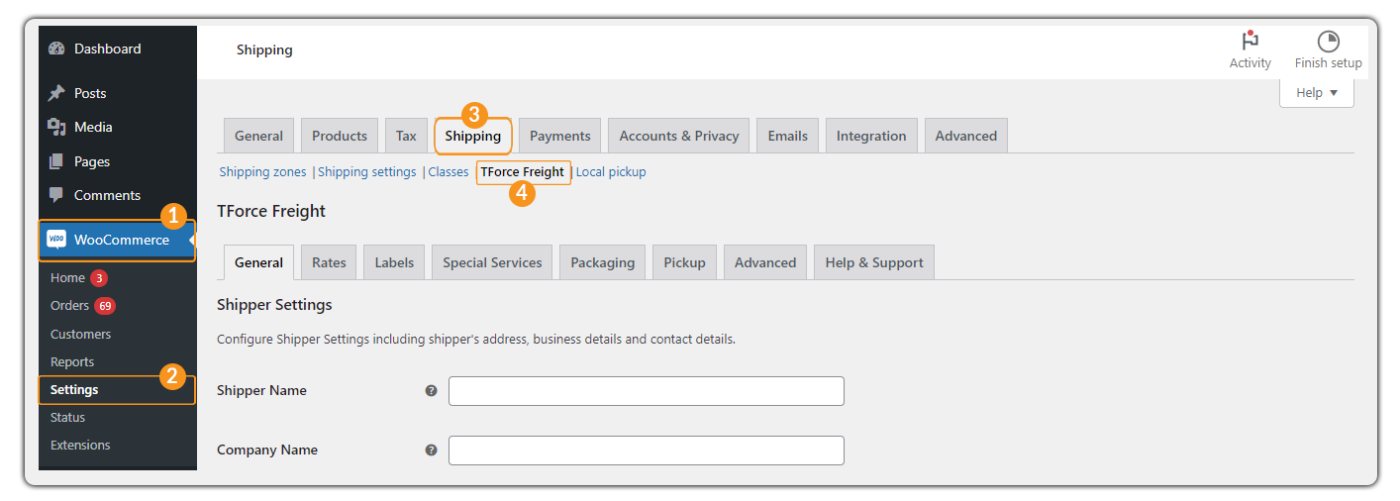
Add the Shipper Details under Shipper Settings accurately.

* You can ship your products only within the following states:
1. United States
2. Canada
3. Mexico.
Set Shipper Address as Residential
Enable the Shipper Address is Residential, if you’re shipping from home addresses like apartments and family houses.
NOTE: Remember that enabling this option may result in additional costs for your shipment delivery.

Set Shipping Charges
With this option, you can select and pay the shipping charges for the shipment.
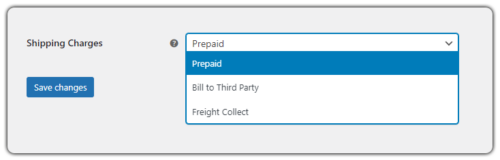
The options available are
- Prepaid: The shipping charges will be collected from you (the sender or shipper).
- Freight Collect: The shipping charges will be collected from the end customer who receives the shipment.
- Bill to Third Party: The shipping charges will be billed to a third-party contact other than the sender. Fill in the third-party contact accurately and save the changes.
If you face any issues or have any queries about the plugin setup, feel free to contact our customer support.
Configure the Packaging Setting
Configure your parcel packing settings by navigating to WooCommerce > Settings > Shipping > TForce Freight > Packaging as shown below:

The plugin offers you three methods to pack your products for shipping:
- Individual Packaging: Separate box for each item in the cart
- Flexible Packaging: Use boxes with customizable weight & dimension limits
- Max Weight Limit: Pack products in the same box until a limit is reached

1. Individual Packaging: Separate Box for Each Item in the Cart
If you want to pack each item separately or individually, select the Pack Items Individually option.

You can select the type of packaging for the freight.

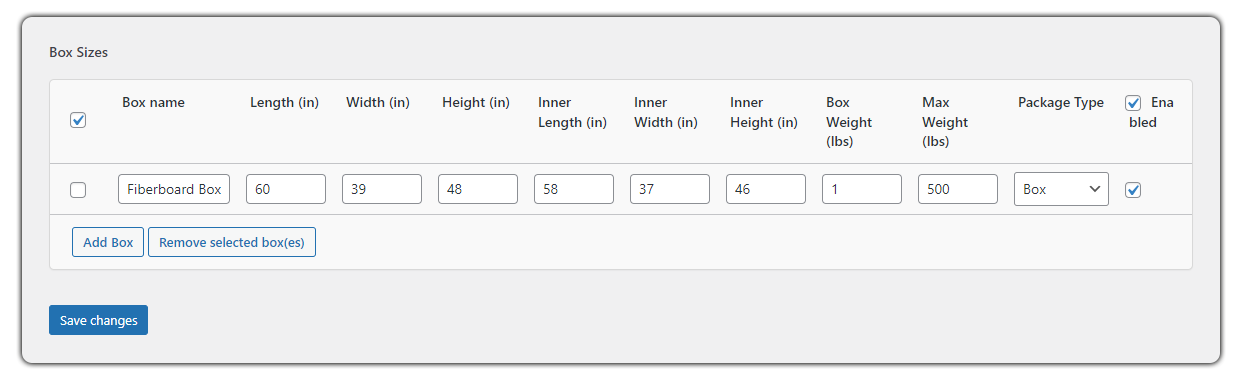
2. Flexible Packaging: Use Boxes With Customizable Weight & Dimension Limits
If you have custom boxes, add their weight and dimensions. The plugin can then match products that fit inside these boxes efficiently.
Add Your Box
To add the box you use for packing shipments click on “Add Box” as shown below.

Provide a name for the box, specify the outer and inner dimensions, add the weight of the box, and set the maximum weight capacity it can hold. You can also choose the appropriate package type (such as bag, cylinder, or pallet).
You can add multiple boxes following the same process. Enable the box you use and disable the others as needed.
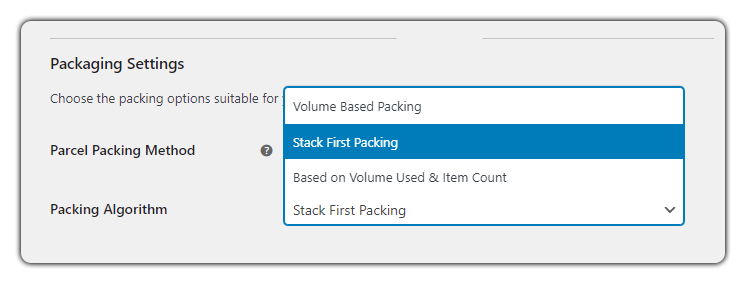
Packing Algorithm
- Volume-Based Packing:
When you use this algorithm, items are packed based on their volume. If the volume of the products is less than the volume of the box, those products will be packed inside that box. This way, we can minimize the unused space and optimize shipping efficiency. - Stack-First Packing:
When you use stack-first packing, you arrange items vertically within the shipping package. The first item is placed at the bottom, and subsequent items are stacked on top. This helps to ensure stable, balanced stacks that prevent shifting during transit. - Based on Volume Used & Item Count:
When you consider both the volume used (how much space is filled) and the total item count, it helps maximize the number of items shipped while efficiently utilizing available space.
3. Max Weight Limit: Pack Products in the Same Box Until a Limit Is Reached
If you want to pack items solely based on their weight, you can select Max Weight Limit.
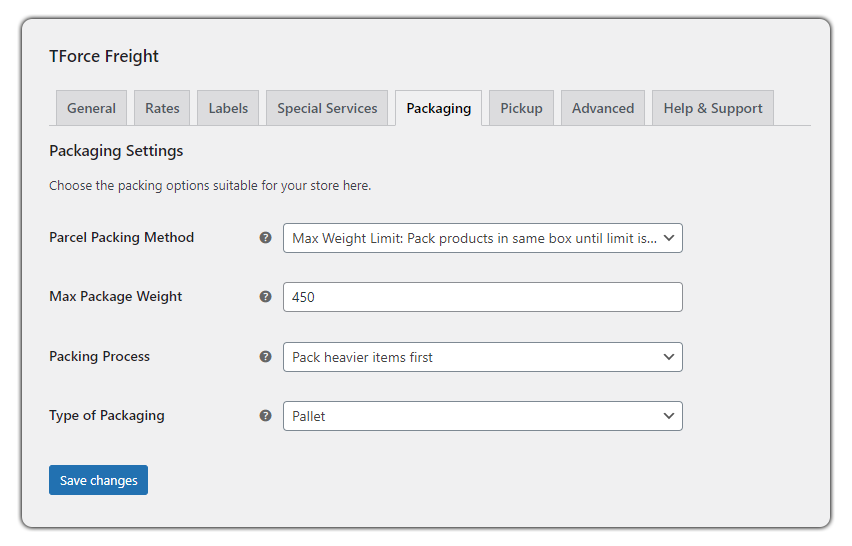
- Max Package Weight: Set the maximum weight your package can hold.
- Packing Process: Select how your products should be packed in the package. There are two ways to pack products: Pack Heavier Items First and Pack Lighter Items First
- Type of Packaging: Select the type of package like Bag, Pallet, Box, Plate, etc.
If you face any issues or have any queries, feel free to contact our customer support.
Enable TForce Freight Shipping Services
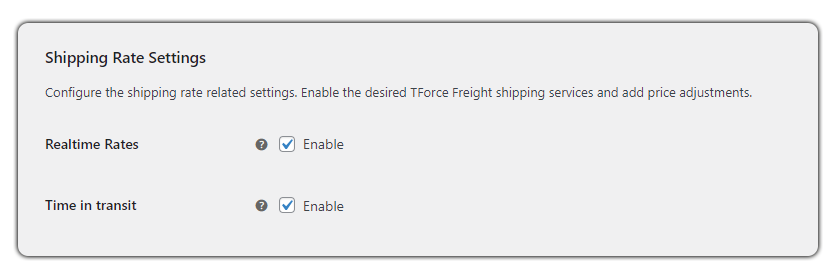
When your customers add products to their cart, they’ll see shipping rates based on the product weight, package type, and delivery location. To display shipping options and costs in checkout, you need real-time rates enabled.
Configure your Rates settings by navigating to WooCommerce > Settings > Shipping > TForce Freight > Rates as shown below:

You need to enable real-time rates to display rates and services in the checkout/car. If you want to show an estimated time to transit the package, enable Time in transit.
TForce Freight Services
The TForce Freight Services includes:
- TForce Freight LTL
- TForce Standard LTL
- TForce Freight LTL – Guaranteed

Price Adjustments
If required, you can add a Price Adjustment ($) or a Price Adjustment (%) for the shipping services. This allows you to add a charge over the shipping costs.
- Price Adjustment ($): Merchants can add fixed extra amounts to the actual shipping rate. These adjustments account for specific reasons or handling costs.
- Price Adjustment (%): Alternatively, merchants can apply a percentage increase to the actual shipping cost. This percentage addition allows flexibility based on order specifics.

Example
Scenario 1:
When you add $20 to the Price Adjustment($), the shipping rate will increase by $20. For example, if the TForce Freight LTL is $530, the shipping amount shown will be $550 ($530 + $20).

Scenario 2:
When you adjust the price by 10% in the Price Adjustment(%), the actual shipping rates increase accordingly. For example, if the TForce Freight LTL is $530, the adjusted shipping rate will be $583 ($530 + $53).

Scenario 3:
When you increase the Price Adjustment ($) by $20 and apply a 10% adjustment to the Price Adjustment (%), the shipping rate will increase accordingly. For example, TForce Freight LTL base rate of $530, the adjusted rate is $603 ($530 + $20 + $53).

FallBack Rates & Conversion Rate
Add Fallback Rates that will appear when TForce Freight doesn’t return any rates. This allows the customer to check out even if TForce Freight does not return any quotes.

If your store’s currency differs from the one set in your WooCommerce base location, enter the conversion rate here: WooCommerce Currency to USD Conversion Rate. This rate will be multiplied by the shipping costs.

If you use the same currency as your WooCommerce settings, leave this field empty or enter “1”. This signifies that no conversion is necessary.

If you face any issues or have any queries, feel free to contact our customer support.
Configure Shipping Labels
After setting up the rates, you need to choose the label format and set the default printing TForce Freight Shipping service.
Configure your Labels settings by navigating to WooCommerce > Settings > Shipping > TForce Freight > Labels.
Shipping Label Settings
- Label Printing – Enable this option to print labels.

- Label Format – You can select the Label Format to be used while printing the label.

- Display Shipment Tracking Details: When you enable this option, your customers will be able to view tracking details on their My Accounts page and receive order status updates.
- Custom Shipment Message: You can customize how your customers will receive the email.

Bulk & Auto Label Settings
- Default Service – When you have enabled rates, there is no need to assign default services. However, when 3rd-party rates are used, default services must be assigned. This service should be used during bulk and auto-label generation.
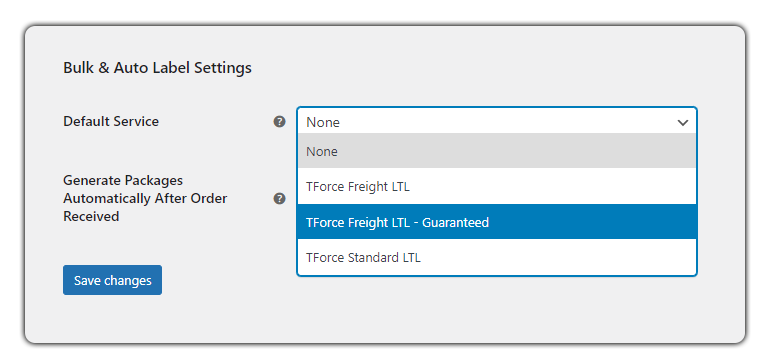
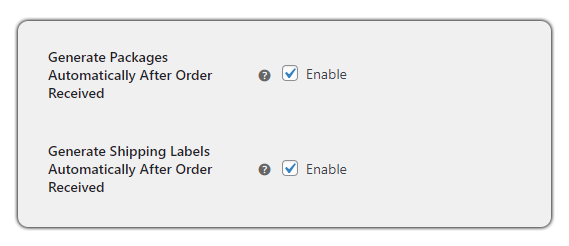
- Generate Packages Automatically After Order Received – When you enable this option, packages will be generated automatically whenever an order is received.
- Generate Shipping Labels Automatically After Order Received – When you enable this option, Labels will be generated automatically whenever an order is received.
- Trigger Automatic Label Generation – Using this option you can automatically generate labels either when an order is placed or when the payment is confirmed.

If you face any issues or have any queries, feel free to contact our customer support.
Add Special Services
You can specify whether your products are Dangerous Goods and provide pickup, delivery, and handling instructions.
Configure your Labels settings by navigating to WooCommerce > Settings > Shipping > TForce Freight > Special Services as shown below:
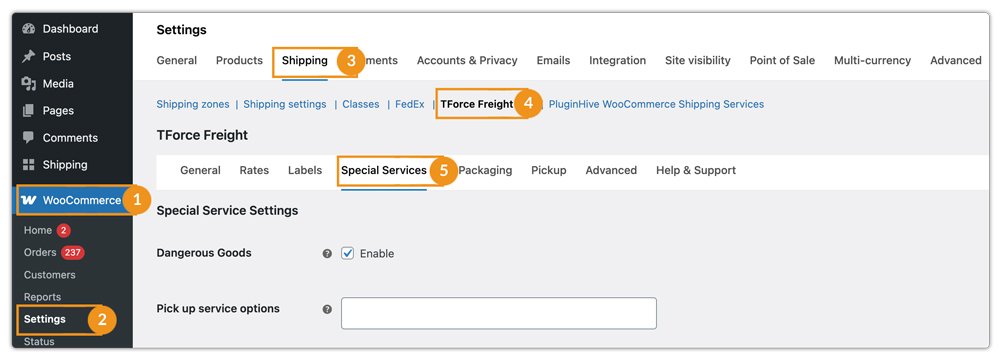
- Dangerous Goods – Enable this option if you ship Dangerous Goods
- Pickup service options – You can choose the pickup service that best suits your shipment from the dropdown options.
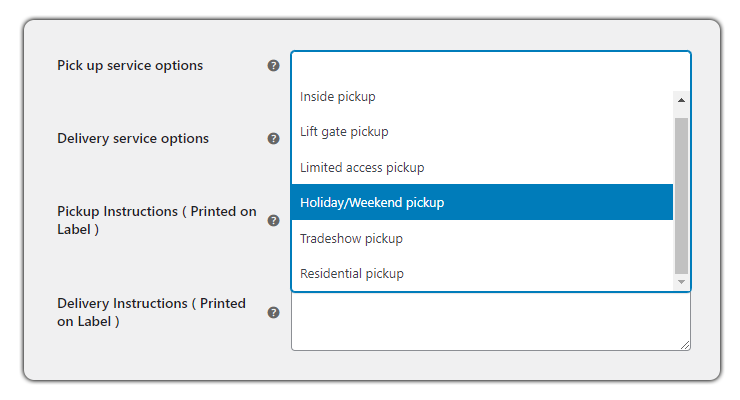
- Delivery Service Options: Enable this option if your shipments require special delivery services. Once enabled, you can select the required delivery service for each shipment from the table, as shown below.
- Apply Automatically: If enabled, the selected delivery service is automatically applied to the shipment without customer input.
- Let Customer Choose at Checkout: Enable this if you want customers to select the delivery service themselves during checkout.
- Display Text: This lets you set the text label shown for the delivery service at checkout.

Based on this, the corresponding option will appear at checkout. For example, Holiday or Weekend Delivery is displayed to customers at checkout.

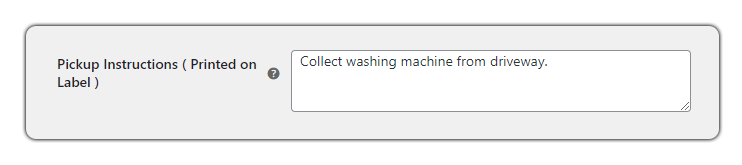
- Pickup Instructions ( Printed on Label ) – You can specify pick-up instructions according to your business needs. The character limit for these instructions is 60.
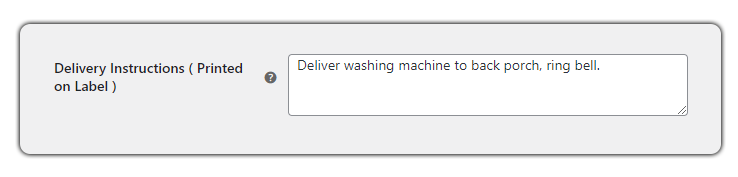
- Delivery Instructions ( Printed on Label ) – You can add delivery instructions according to your business needs. The character limit for these instructions is 300.
- Handling Instructions ( Printed on Label ) – You can provide instructions on how to handle your shipments. The character limit for these instructions is 300.

If you face any issues or have any queries about configuring the TForce Freight Shipping Plugin, feel free to contact our customer support.
Configure Pick-Up settings
Configure your PickUp settings by navigating to WooCommerce > Settings > Shipping > TForce Freight > PickUp.

- Enable Pickup – To request pickup services, you need to enable this option.
- Pickup Start Time – Provide the time from when the packages are ready to pick up from the store.
- Company Close Time – Provide the time when the company closes.
- Cut-Off Time – The order placed after this time will be taken for next-day pickup
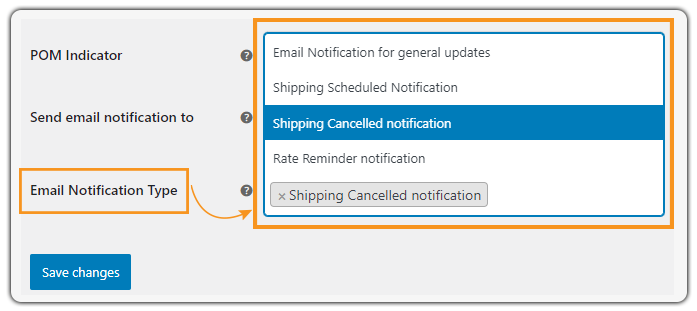
- POM Indicator – Enable this option to get notified about the pickup.
- Send email notification to – You can choose who should receive the pre-pickup notification.
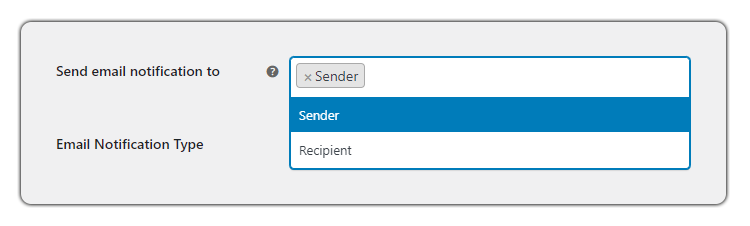
- Email Notification Type – You can choose the email notification type here.
Set-Up Advanced Settings
Set up your Advanced Settings by navigating to WooCommerce > Settings > Shipping > TForce Freight > Advanced Settings.
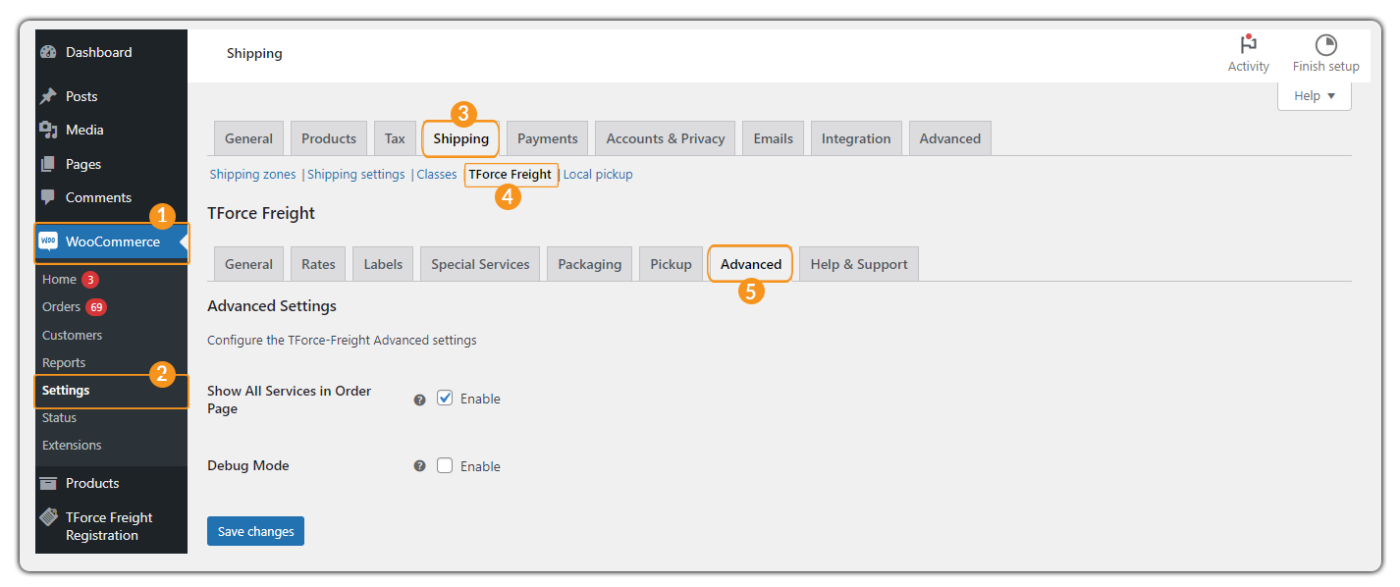
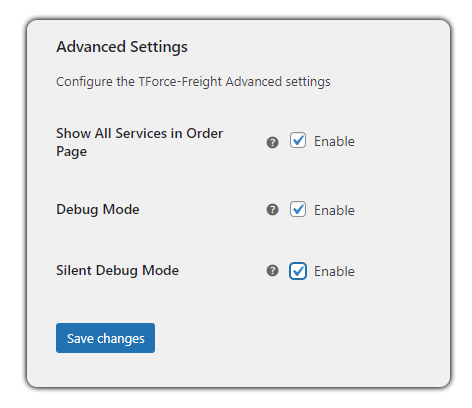
- Show All Services in Order Page – Enable this option for all the available services on the order page.
- Debug Mode – Enable this option to show debugging information on the checkout page.
- Silent Debug Mode – Enable this option to create debugging information without showing up on the checkout page.
Display TForce Freight Services at Cart/Checkout
Visit the Shop Page to choose a product you’d like to purchase and add it to your cart. Click on the checkout button to proceed and enter your shipping address details.
Once you’ve filled in the address, the plugin will display the available TForce Freight shipping rates right on the WooCommerce checkout page.

Printing TForce Freight Shipping Labels
After setting up the WooCommerce TForce Freight plugin configuration, you can print TForce Freight shipping labels directly from the WooCommerce orders page.
Print TForce Freight Shipping Labels for Single Order
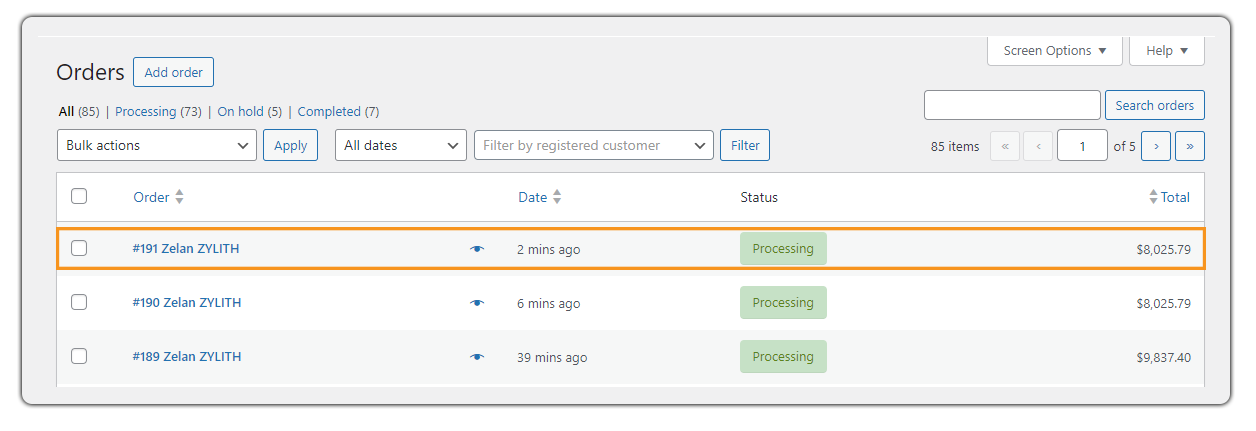
Go to your WooCommerce Orders page and click on the order you want to generate the shipping label.
Click on Generate Packages under the TForce Freight Shipment Label to generate packages.

The shipment packages will be generated.

Click on Calculate Shipping Cost and choose the preferred shipping service. Under the Special Services section, you’ll see the delivery service options based on your settings where you can remove any service you don’t want to offer or add new ones as needed.
Click on Create Shipment.

The shipping label is created. Click on Print Label to print the TForce Freight shipping label.
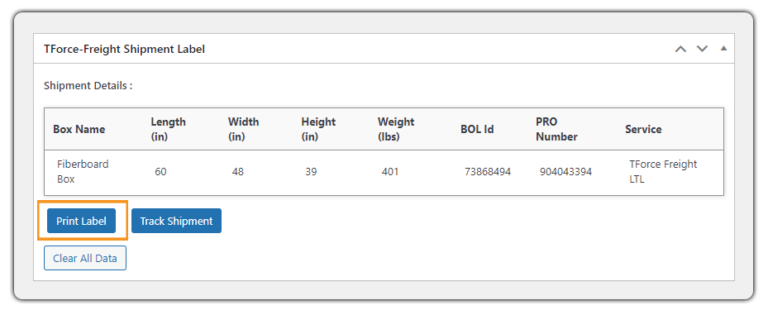
This is a sample of the TForce Freight shipping label:

TForce Freight Shipping Label Generation with Advanced Packaging Options
After package generation, enable Manual Packaging Mode to have complete control over the packaging process. This allows you to modify the dimensions, weight, and number of packages for the order.
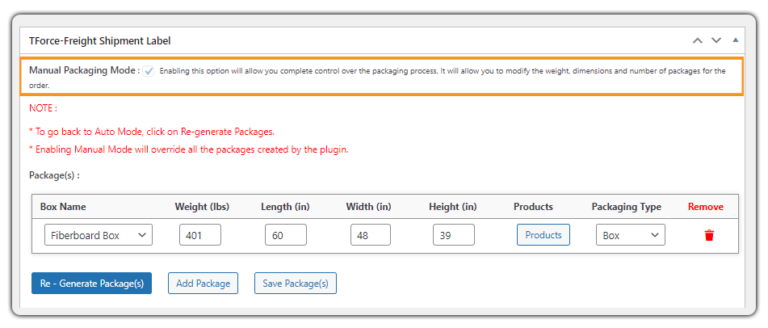
To separate a product and pack it individually, click on Products and adjust the quantity as needed.

After adjusting the number of products in a package, enter the Weight manually.
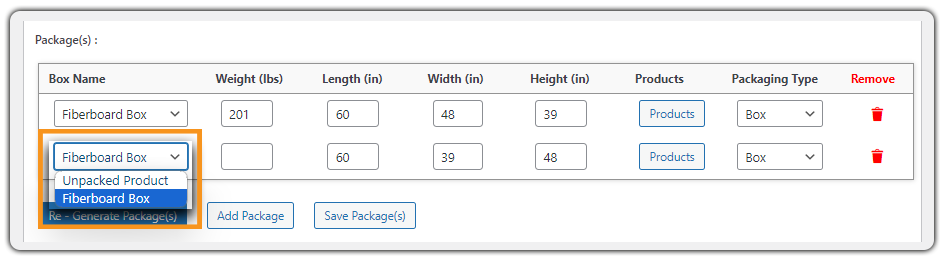
Then, click on Add Packages to pack the remaining products.

Select the box as per your need from the dropdown.
Click on Products to add the products to the packages. Always keep the Add to Package count equal to or smaller than the Available Quantity count.
Click on Save.
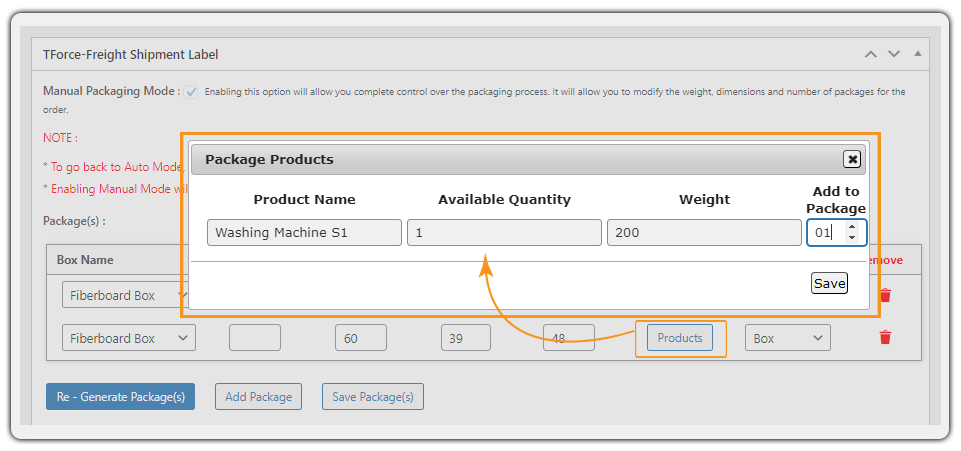
After saving the package, ensure that you manually enter the Weight.
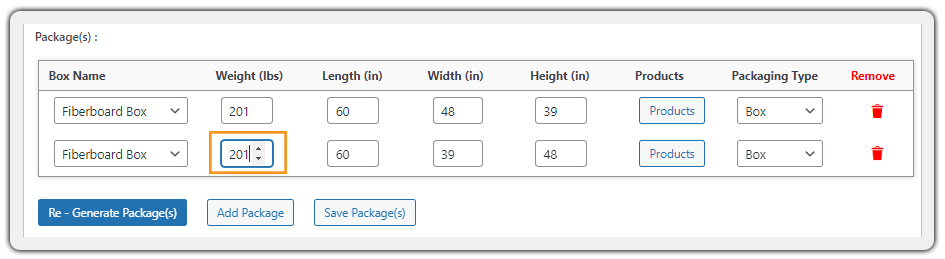
After adding the weight, click on Save Packages to save the customized packages. Packages saved successfully message will be displayed.

* You can delete a package by clicking on the Delete icon.
* If you want to re-generate the package again automatically which overrides the manually added packages click on the Re-Generate Package(s) button.
Now you can calculate the TForce Freight shipping cost by clicking on Calculate Shipping Cost. Select a TForce Freight shipping service and click Create Shipment.

You can download the TForce Freight shipping label by clicking on Print Label.

Print TForce Freight Shipping Labels for Multiple Orders
Go to your WooCommerce Orders page and select the order you want to generate the shipping label.
Click on Bulk Actions > Generate TForce Freight Label > Apply.

A notification will pop up, saying “Label successfully generated.“

Request for TForce Freight Pick-Up
Go to your WooCommerce Orders page and select the order you want to generate the shipping label.
Click on Bulk Actions > Request TForce Freight Pickup.

Successfully requested for pickup message will appear.

Cancel TForce Freight Pick-Up
To cancel the pickup request, select the orders and click on Bulk Actions > Cancel TForce Freight Pickup.

A pickup canceled message will appear.

Track TForce Freight Shipments
To track your shipments, go to the order and click Track Shipment under TForce-Freight Shipment Label.
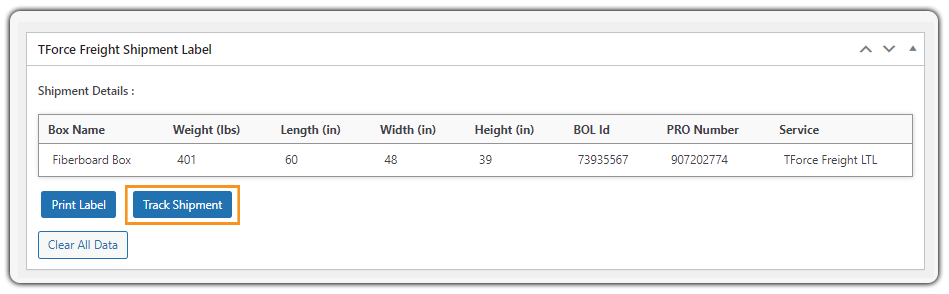
You will see the tracking details displayed.
If you face any issues or have any queries with setting up the plugin, please contact our team of experts.